Transcription
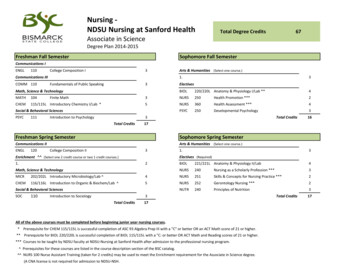
1NDSU Technology Learning & Media CenterQBB 150C 231-5130 www.ndsu.edu/its/tlmcCreating a Large Format Poster (Plot) Using PowerPoint 2013Posters should be designed and created in a manner that best communicates your message in a visual,graphical manner, so the viewer can quickly discern your message and determine whether she/he needsto read more or move on to the next poster.PowerPoint is one of the programs of choice for creating posters because Power Point is a user-friendlyprogram and is readily compatible with other Microsoft programs such as Word and Excel. Othersoftware packages that can be used for posters include (but are not limited to) Adobe Photoshop,Illustrator, InDesign, and FreeHand; Corel Presentations; and Microsoft Publisher.This handout provides guidelines for using PowerPoint to create a large format poster.Poster Size and SetupWorking with PicturesWorking with GraphsGrids, Guides, RulerSaving Slides as PicturesUsing Shapes as GuidesPrinting the PosterTitles, Font Sizes, Body TextBackgroundPoster Size and SetupFirst, create a single large slide in PowerPoint. When creating a poster in PowerPoint, it is a good idea touse a planning sheet to design your poster before creating it in PowerPoint.Also, you will want to set your page (slide) size before you begin creating the poster. If not, your postermay not be printable at the size you need.TIP: It is a good idea to verify poster size requirements for the event at which your poster will bedisplayed. Often there are guidelines about poster size.NOTE: The maximum custom slide size that PowerPoint allows is 56 x 56 inches; however, the ITSplotters are 36 and 42 inches wide, so either the width or height setting must accommodate thoselimitations. If you need a larger size (e.g., 36 X 60), set up your poster for half the size, so it can beenlarged proportionately later. (Remember, some graphics will lose quality when enlarged.)Margins: The plotters will not print to the edges of the paper because of a quarter to a half-inch defaultprinter edge; therefore, set one of the measurements at a half-inch (35.5 or 41.5) or an inch (35 or 41)less than the total width of the paper. An inch of white space around all the edges is visually appealing.1. In PowerPoint, click the Design tab, and in theCustomize group, click Slide Size Custom Slide Size 2. In the Slide Size dialogue box (shown on right), underSlides sized for:, select Custom.3. Specify Width and Height of poster.4. Under Orientation, specify Portrait or Landscape.04-2014
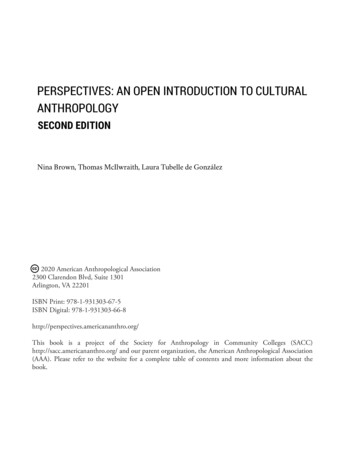
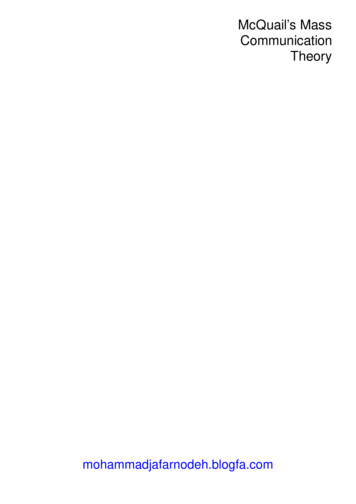
25. Choose OK. A dialogue box will appear, asking you whether you want to maximize the size of yourcontent. Click the Maximize button.6. Click on the Home tab, and in the Slides group, click on the drop-down arrow next to Layout. Selecta Blank layout.Once this is done, you are set to start working on your poster. This is where any planning documents willbe helpful.Grids, Guides, RulerUse the ruler, gridlines, and guides to position shapes and objects moreprecisely.1. On the View tab, in the Show group, toggle on and off Ruler, Gridlines,Guides.2. For more options, click the dialogue box launcher (circled in image onleft).3. In the Grid and Guides dialogue box, you can enable the Snap objects togrid option, set spacing measurements for the grid, under Grid settings,and display or hide drawing guides, under Guide settings.TIP: To temporarily override the “Snap to” feature while you are working, holddown the ALT key on your keyboard while you drag the shape or object.Using Shapes as GuidesConsider using shapes to define the areas of the title and to set the flow oftext and objects in your poster. You can delete the shapes later if you only want to use them asplaceholders.1. To draw shapes, click on the Insert tab,and in the Illustrations group, click on theShapes button.2. Select a shape and draw the object on theslide by holding your left mouse buttondown and dragging.3. To access Drawing Tools, click on theobject (Shape) you have inserted and theDrawing Tools tab should appear abovethe Format tab. (The Drawing Ribbon isshown below.)4. In the Shape Styles group, click Shape Filland select No Fill.5. Copy and paste your shape as many timesas necessary for your layout.04-2014
36. Align your Shapes: Select the shape(s) (hold the Shift key down while selecting multiple objects),and from the Drawing Tools ribbon, in the Drawing group, click Arrange and view options to alignand distribute objects evenly (e.g., Align Top and Distribute Horizontally). Using these Align toolswill help you create a more professional-looking poster.NOTE: PowerPoint 2013 has handy, built-in alignment guides that appear as you move and place shapesor objects.)7. When you are finished creating your poster, you can delete the shapes if you wish. Or if you keepthem, you can modify them by changing the border color and weight, changing the shape fill andeffects, etc., using the options on the Drawing Tools ribbon.TIP: Leave at least one inch of space between each column, more if the poster is very large. Also, leavean inch around all sides of the poster, if you can—a wider margin looks better than getting too close tothe edge.Titles, Font Sizes, Body TextThe title is the first thing your reader will look at. Your title should be interesting, easy to read andunderstand, and encourage the reader to check out your poster in more detail. In addition, theformatting of the title can set the mood for the entire poster. For the title, consider using a large, boldsan-serif font, such as Arial Black, Franklin Gothic Medium, Tahoma, Trebuchet. Make the font sizebetween 72-120 points. (72 points 1 inch) For the subtitles (authors' names, school name, etc.), use the same font as your title but make thefont size smaller than the title. A font size between 48-80 points usually works best. For the section headers (Abstract, Introduction, Results, etc.), use the same font as your title andsubtitle. Make the font size approximately 50% larger than the body text, between 36-72points. Make sure that all section headers are the same font size. DO NOT USE ALL CAPS in any part of your poster. Using all caps makes your text harder to read andit looks like you are shouting. For the body text, choose a serif type that is very readable, like Garamond, Book Antigua orBookman Old Style. Make the font size between 24-48 points. Make sure the body text is the samefont throughout the entire poster. For paragraphs or blocks of text, use left justify. While full justify (justifying the text on both the leftand the right) produces very neat-looking columns, a ragged edge is easier to read (really).Working with TextTo include text in your slide, you need to insert a Text Box and type text into the text box. This willbe a floating text box; you can move it anywhere you wish. (Remember, you can place text directlyin your Shapes—simply right-click on the border of the shape and select Edit Text. But if you deletethe Shapes, your text will also be deleted.) To insert a text box, click the Insert tab, and in the Text group, click on Text Box.04-2014
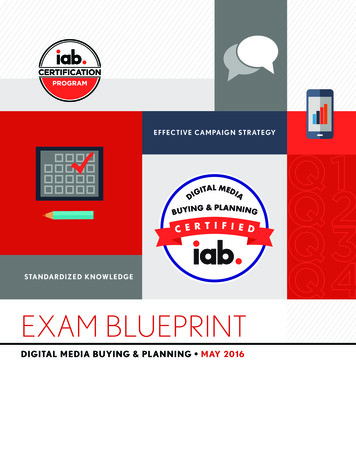
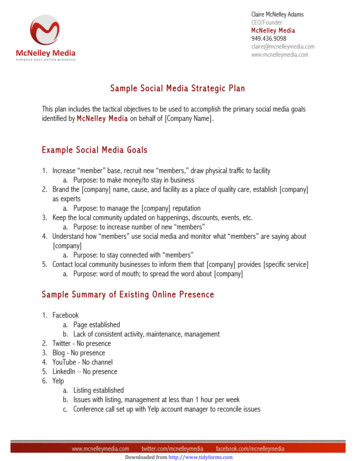
4 Move your cursor to the desired location on the slide, and click and drag to create a text box.Note that the text box automatically resizes itself as you enter more text. To change the font type, font size, font styles, font colors, etc., click the Home tab, and you willfind options to change these properties in the Font group. You will need to highlight the text toapply these changes. You can apply various effects and modifications to the text box and to the text by using theDrawing Tools. Click on a text box and the Drawing Tools tab will appear. Click on the Formattab (under the Drawing Tools contextual tab—shown below) and experiment with Shape Stylesand other features of the Drawing Tools ribbon.Right-click on the text box and select Format Shape (at the bottom of the list) to activate the FormatShape pane, where you can add a background and background effects to the text box.BackgroundPowerPoint gives you many background options. You may choose touse a color, a color gradient, a texture, or even a picture as thebackground for your poster.1. Click on the Design tab, then in the Customize group, clickFormat Background to activate the Format Background pane(shown on right).Fill – Effects - Picture2. Try out various options for Solid fill and Gradient fill (note color,transparency, and special gradient options).3. To apply a picture as a background, under the Fill category, clickPicture or texture fill.4. In the Format Background pane, under Insert picture from, clickthe File, Clipboard, or Online button and select an image.5. Change the transparency of the picture by using theTransparency slider.6. Click on the Picture buttonat the top of the FormatBackground dialogue box to access options for modifying thepicture (Picture Corrections, Picture Color).7. You can apply various color and artistic effects by opening theEffects options. Click the Effectsbutton in the FormatBackground dialog box.04-2014
5TIPS: Use high contrast colors between foreground and background. A light background with a darkforeground is the most readable combination. Allow enough “white space” to keep your poster from looking overloaded. Remember, combinations of red and green appear as grey to people who are color blind. Save thiscombination for Christmas only. Use the special effects in PowerPoint (for background and text) sparingly. Some PowerPoint effectsdo not print correctly (see next section).Working with Pictures To insert a picture, click the Insert tab, and in the Images group, click on the Pictures or OnlinePictures button, and select an image from your computer or a clip art image online. To resize the image, click on the image and use the corner handles to resize; using the cornerhandles will maintain the perspective of the picture.Clip Art—Vector Graphics Consider using clip art (Online Pictures option). Some of the clip art in PowerPoint (and otherMS Office programs) is line art (not pixels) or “vector graphic files,” so you can enlarge theimages to any size with no loss of quality. Vector format types include: WMF, EMF, and EPS You can Ungroup these clip art images into individualelements for editing.Digital Images / Photographs—Raster Graphics Raster graphics are composed of a grid of a finitenumber of dots known as pixels (not line art). GIF, PNG, and JPG (or JPEG) formats are common rasterfiles. A low resolution digital image file (a raster file) is onethat does not have many pixels. You cannot add morepixels to an image file; when you enlarge a lowresolution image file, the pixels are simply spread over alarger space, and the image loses quality. A high resolution raster graphic (image) can sometimesbe enlarged and still look good. If you are planning to use a picture in a large formatposter, always take the picture on a high quality settingon your camera and scan any pictures at a highresolution setting (at least 300 ppi). You cannot Ungroup digital images into individualelements for editing, like you can with vector images.04-2014
6TIPS: In your online search (Insert tab Images group Online Pictures), you can request results thatinclude only images that are in .jpg format (raster) or only images that are .wmf (vector). Type thename of the item you are searching for and type the format after it. Examples: flower .jpg orflower .wmf Check the size of the images you use. Usually, the dimensions specified are in pixels.72 pixels 1 inch Pictures you find on the Web are almost always low resolution, unless specifically identified as highresolution. These images are for onscreen or Web page use only.Using NDSU Branding ResourcesNDSU logos are available for download on the NDSU University Relations Web site:http://www.ndsu.edu/vpur/resources/ Read the Usage Guidelines and use the logosappropriately. Do not use an NDSU logo or picture from the NDSU Web site.GroupingGrouping shapes, pictures, or other objects lets you flip, rotate, move, resize, or change theattributes of multiple shapes or objects at the same time as though they were a single shape orobject.1. To group two or more objects, select the shapes or other objects. (Hold the Shift key downwhile selecting multiple objects.)2. Under Picture Tools or Drawing Tools (depending on what type of objects you have selected),on the Format tab, in the Arrange group, click Group, and then click Group. OR you can rightclick on one of the selected objects and click Group Group.3. To Ungroup, follow one of the procedures above, and click Ungroup.Change OrderPowerPoint allows you to work with layers—to bring objects, placeholders, or shapes to the front orsend them to the back. Right-click the shape and select a menu option to move it to the front or back (Bring to front orSend to Back).Working with GraphsFor best results, create your graphs in Excel and then copy and paste them onto your poster slide.1. In Excel, create your graph. Right-click on the graph (the outside border to select all of it) and chooseCopy.2. Return to PowerPoint and choose Edit Paste. (The shortcut keys CTRL-C and CTRL-V work, too.)3. If you need to resize your graph in PowerPoint, select the graph and drag one of the corner handles(not the ones on the sides, top or bottom). Hold the Shift key down while resizing, to retainproportion.4. You will probably need to enlarge text elements of your graph. To do so, right click on each textelement and enlarge the font size (24 is a readable size) in the dialogue box that appears.04-2014
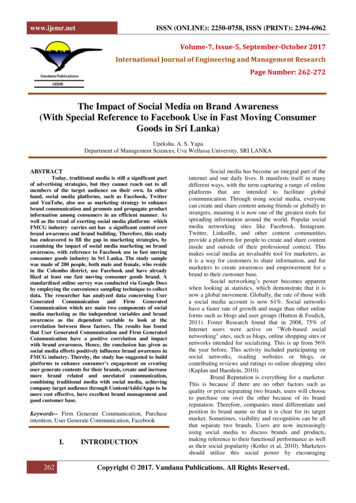
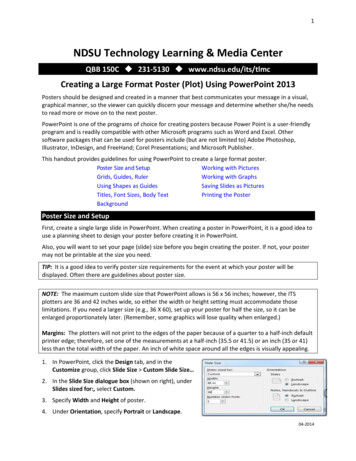
7TIP: If you change the relative height and width of your graph while resizing in PowerPoint, all text inthe graph will be distorted. However, this will not happen in Excel. If you want to change theproportions of your graph, do it in Excel before inserting it in PowerPoint.Save Slide(s) as Picture(s)You can export one or more slides and usethem as pictures in your poster.The figure on the right is an example of a postercreated from an existing slide show. Each slide will be a separate graphic. Put only one or two elements on each slide. Use consistent background colors and textsizes when creating your PowerPoint slideshow.Save Slides as TIFF ImagesFirst, export all the slides in your slide showas TIFFs (an image format that retainsquality). You can also create just one slideand save it as an image file in this way.1. Open the existing PowerPoint file.2. From the File tab, select Save as. Click on Computer and select the Browse icon and browse towhere you want to save your image(s).3. Click on the drop down menu next to Save as type: and select TIFF Tag Image File Format (*.tif).4. Click the Save button.5. Click All Slides or Just This One at prompt.6. TIFF images will be numerically saved in a folder named after the PowerPoint.7. Close file.Create a Poster from Exported Slides1. Create a new PowerPoint file: Click on the File tab, select New, and double-click on the BlankPresentation icon.2. Specify the size of your poster. (See section on Poster Size in this document.)3. Insert TIFFs: Click on the Insert tab, and in the Images group, click Picture.4. Navigate to the folder containing the TIFF files, and select all the slides (CTRL-A).5. Click the Insert button. Click and drag pictures to resize, place, and position them.6. Add title, change background, etc. Save as a PowerPoint file when finished.04-2014
8Printing the PosterSetting Print OptionsSome special features in PowerPoint, like transparency and shadows, may not print correctly. Settingsome print options may help.1. Click on the File tab and then click on Options.2. In the PowerPoint Options dialogue box, click on Advanced.3. Under Print (you will need to scroll down the page), enable the High quality option.4. To ensure best quality for your images, under Image Size and Quality, check the box next to Do notcompress images in file and be sure the target output for printing is set to 220 ppi, the highestpossible setting.TIP: Always use high quality images, especially when you need to enlarge them. See the section onWorking with Pictures (page 5) for information about resolution and image formats.Sending the Poster to the PlotterTake your file to the Technology Learning & Media Center (TLMC) in QBB (formerly IACC) 150C and havea TLMC staff person help you set up the poster for printing and send the poster to the plotter. If a TLMCemployee helps you and your poster does not print correctly, you will not be charged for printing itagain.You will take the plotting slip filled out by the TLMC employee to the Help Desk window in IACC 150 andpay for the plot. You must use Bison Bucks to pay for the plot. Later, you will pick up your plot at thesame window.You can find more information about plotting (e.g., cost, paper types) and about the TLMC (e.g., labhours) at the TLMC Web site: www.ndsu.edu/its/tlmcTIP: You can print the poster on letter-size paper to preview it. In the Print dialogue box, find the Scaleto fit paper option, and then click OK.See Learning Links on the TLMC Web site for links to many tutorials on using PowerPoint.For more information, contact: ndsu.tlmc.support@ndsu.edu04-2014
Guides, Ruler Use the ruler, gridlines, and guides to position shapes and objects more precisely. 1. On the . View. tab, in the . Show. group, toggle on and off . Ruler, Gridlines, Guides. 2. For more options, click the dialogue box launcher (circled in image on left). 3. In the . Grid and Guides