Transcription
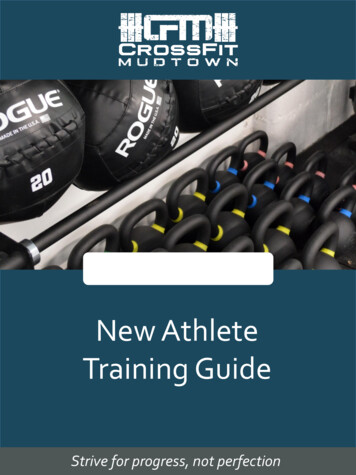
New AthleteTraining GuideStrive for progress, not perfection
MethodologyOnRamp Training GuideProgram OverviewThe CrossFit Mudtown New Athlete Training Guide is acollection of CrossFit material and images of the foundationalmovements and methodology of CrossFit.The OnRamp Course provides those completely new toCrossFit the knowledge and skills to begin their health andfitness journey in CrossFit. This Guide is designed to be usedin conjunction with the OnRamp Course to develop theparticipant’s knowledge and athlete skills.This is an essential but not an exhaustive resource. Asparticipants transition into regular group classes, they willcontinue to learn and progress.2
MethodologyOnRamp Training GuideWhat is CrossFit? Greg Glassman set out to define fitness Started CrossFit in 2001 Measurable & Repeatable Increased work capacity across broad times andmodal domains Constantly Varied Functional Fitness Relatively High Intensity* Universal Scalability – Our needs vary by degree,not kind. CF Games, 12,000 gyms worldwide Virtuosity – “Do the common uncommonly well.” Community Nutrition – “You can’t out train a bad diet.”3
MethodologyOnRamp Training GuideHealth Continuum4
MethodologyOnRamp Training GuideCrossFit in 100 WordsEat meat and vegetables, nuts and seeds, some fruit,little starch and no sugar. Keep intake to levels thatwill support exercise but not body fat. Practice andtrain major lifts: Deadlift, clean, squat, presses, C&J,and snatch. Similarly, master the basics ofgymnastics: pull-ups, dips, rope climb, push-ups, situps, presses to handstand, pirouettes, flips, splits,and holds. Bike, run, swim, row, etc, hard and fast.Five or six days per week mix these elements in asmany combinations and patterns as creativity willallow. Routine is the enemy. Keep workouts shortand intense. Regularly learn and play new sports.5
MethodologyOnRamp Training GuideFour Stages of Learning6
MethodologyOnRamp Training GuideAcronyms & AbbreviationsAMRAPAs many rounds/reps as possiblePJPush JerkBPBench PressPPPush PressBSBack SquatPRPersonal RecordBWBody WeightPUPush UpC2BChest to bar pullupsPLUPull UpC&JClean & JerkRNDRoundCFTCrossFit TotalRepRepetition, one performance of an exerciseDLDeadliftRFTRound for TimeDNFDid not finishRXAs prescribed – no modificationDUDouble UnderRMEMOTM Every minute on the minutesS2ORepetition maximum – 1RM max lift for 1 rep. Your10RM is the most you can lift 10 timesShoulder to OverheadG2OGround to overheadSDHPSumo deadlift high pullGHDGlute-Hamstring DeveloperSetGPPGeneral Physical PreparednessA number of repetitions. Ex: 3 sets of 5 reps (3x5),means do 5 reps, rest, 5 reps, rest, 5 reps.Subbed Substituted. Ex: regular push-ups in place of HSPUHSPUHandstand push-upT2BToes to barKBSKettlebell SwingTGUTurkish GetupKTEKnees to elbowsTabataMetconMetabolic ConditioningWOD8 intervals of 20 seconds all-out intensity exercisefollowed by 10 seconds of restWorkout of the dayMUMuscle Up5x55 sets of 5 reps at the same weightOHSOverhead Squat5-5-5-5-5 5 sets of increasing the weight each setPoodRussian unit of weight, usually forkettlebells (1 pood 16kg or 35#)7
The Movements Class 1OnRamp Training GuideSquatThe squat is essential to human movement, a proven performance enhancer and a gatewaymovement to the best exercise in strength and conditioning.Setup1. Stance – feet under hips or slightlyoutside of hips, toes turned out2. Neutral spine3. Chest up4. Belly and back tight5. Apply torque on your hips (rotate themout while keeping feet firming planted tothe floor)Performing the Squat1. Keeping a neutral spine position, drivehips back and down(don’t over extend the lumbar)2. Lower hips keeping shins as vertical aspossible3. Knees track out over your toes, not in4. Bottom position is just below parallel –hip crease drops below knee depthCommon Faults5. To help maintain tension and maximizetorque think about pulling yourself intothe bottom instead of dropping into thebottom position.Knees in, head notneutralRounded shoulders andbutt winkKnees forward, weighton toes.8
The Movements Class 1OnRamp Training GuidePush-upPush-ups are one of the most basic exercises that are beneficial to build a strong core and upperbody using only your body and a flat surface.Setup1. Kneel down and situate hands aboutshoulder width, fingers pointingstraight ahead or slightly out.2. Sprawl legs back into a plank position,keeping feet together.3. Hands are out in front of your bodyslightly, spine is neutral (don’t drophead or look up)Performing the Push-up1. Squeezing glutes and belly, leverforward, positioning shoulders overyour hands.2. Keep weight centered over yourhands and forearms vertical (elbows inline with wrists)3. Lower into the bottom position,keeping glutes squeezed, belly tightand forearms vertical.Common Faults4. Press out of the bottom positionwithout any change in spine orshoulder position.Elbows flaring outLoss of midline stability9
The Movements Class 1OnRamp Training GuideAb Mat Sit-upStrong core, simple as that. The AbMat, when placed under the lumbar spine with the higher portiontowards your bum creates this beautiful environment for the abdominals to move through their full andavailable range of motion.Setup:1. Sit on the floor with the ab mat placed beneath your lower back, higher part under your lumbar.2. Legs are bent with feet on the floor.3. Sit tall.Performing the sit-up:1. Lay back over the ab mat reaching hands over head2. Reach to touch the floor overhead, extending your core over the ab mat3. Drive up leading with your arms, engaging your core.4. Touch your heels or the floor by your feet.10
The Movements Class 2OnRamp Training GuideRowing MachineAlso called an Indoor Rower or Ergometer, it simulates the act of water-sport rowing. Rowing is anexceptional cardiovascular exercise and engages multiple muscle groups to provide a full-bodystrength and endurance movement.Key components of the rowing okFlywheelDamper11
The Movements Class 2OnRamp Training GuideRowing Machine, cont.Set-up:1. Sit centered on the seat. Place feet under the foot straps on the foot rest. The top of your shoe shouldcome about ½ inch over the foot ramp. The foot rests are adjustable and numbered to make setting upyour feet simple each time you row. Pull the foot straps tight.2. Turn on the display and set it to the desired data measurement (meters, calories or watts) and view.3. Set the damper to desired number – typically 3-5 for beginners. Higher damper settings allow more airinto the flywheel housing. The more air, the more work it takes to spin the flywheel against the air.More air also slows the flywheel down faster on the recovery, requiring more work to accelerate it onthe next stroke. Lower damper settings allow less air into the flywheel housing, making it easier to spinthe flywheel.4. Pull the handle out of the handle hook and set your grip. Hands should be even on each side. Extendyour arms straight toward the flywheel, and keep your wrists flat.5. Spine should be neutral and tilted forward slightly at the hips. Shins vertical and feet firmly planted inthe foot rests.Performing the Row:Catch Extend your armsstraight toward theflywheel and keep yourwrists flat. Slide forward on theseat until your shins arevertical. Lean forward slightly atthe hips. You are ready to takethe first/next stroke.Drive Begin the drive byextending your legsand pushing off againstthe foot pads. Keep your core tight,arms straight and backfirm as you transferpower to the handles. As your kneesstraighten, graduallybend your arms andlean your upper bodyback.Finish Bend your elbows andpull the handle intoyour sternum. Extend your legs. Lean back slightly atthe hips.Recovery Extend your arms bystraightening your elbowsand returning the handletoward the flywheel. Lean your upper bodyforward at the hips tofollow the arms. Gradually bend yourknees and slide forwardon the seat to the start (orcatch) position.Focus on consistent steady movement – You are the master of the numbers on the display, not the victim ofthem. Steady consistent movement will be more efficient. Remember you are on the “water” – smooth movement isrewarded. Smooth movement is fast and efficient. Jerky movements make waves and flip boats.12
The Movements Class 2OnRamp Training GuideRowing Machine, cont.Faults:Shooting the hipsIf your legs are pushing quickly and causingyour rear to shoot out ahead of the rest ofyou, your upper body will have toawkwardly catch up. Doing extra work tojerk your top half around will make yourstroke less efficient, and can cause injury.Finish handle position too high or lowPulling the handle too high or low doesn’t allowfor optimum muscle engagement thereforelosing efficiency and power in the pull.Wrong arm/leg sequence in RecoveryLegs, hips, arms, arms, hips, legs. This is thesequence to remember when rowing.Getting out of sequence makes you losemomentum and power.Hunching over during the driveYou want to sit tall with a stacked posture.Focus on “turning on” your abdominalmuscles, or engaging your core, and relaxingyour shoulders so they are pulled back anddown. Your spine should always be in neutral.13
The Movements Class 2OnRamp Training GuidePull-upA fundamental compound upper-body exercise. Pull-ups force you to manipulate the entirety ofyour body weight.Setup:1. Stand beneath a pull-up bar you can reach either byextending your arms or jumping up. You can also stand ona box to reach a pull-up bar.2. Grip the pull-up bar. Hands should be just outside shoulderwidth.Performing the pull-up:1. Activate shoulders and hollow your core.2. Keeping spine and chin neutral, pull your body towards thebar until chin is above the 3. Return to starting position with arms fully extended.Variations:KippingBand assistedJumpingRing (Body) Row14
The Movements Class 3OnRamp Training GuideToes to BarA dynamic core movement where the primary mover is the hip flexion, but also requires you tohang from a bar to include an element of grip strength and greater flexibility.Setup:1. Stand beneath a pull-up bar you can reach either byextending your arms or jumping up. You can also standon a box to reach a pull-up bar.2. Grip the pull-up bar. Hands should be just outsideshoulder width.Performing toes to bar:1. Activate shoulders and hollow your core.2. Keeping spine and chin neutral, start the kip, bendyour legs and pull them toward the bar.3. When your knees reach your elbows, kick quicklytouching your toes to the bar between your hands.4. Return to starting position with legs down and armsfully extended.Variations:Knees to elbowsKnee raises15
The Movements Class 3OnRamp Training GuideBack Squat“There is simply no other exercise, and certainly no machine, that produces the level of central nervoussystem activity, improved balance and coordination, skeletal loading and bone density enhancement,muscular stimulation and growth, connective tissue stress and strength, psychological demand andtoughness, and overall systemic conditioning than the correctly performed full squat.” –Starting StrengthSetup:1. Set your grip with thumbs over the bar and wristsstraight.2. Dip under the bar. Position the bar to sit on your reardeltoids (just above the shoulder blades). Drive elbowsup to “lock” the bar in place on your back.3. Step up and out from the rack with torso tilted forwardslightly making sure the bar is over the middle of yourfeet.4. Set your stance, feet under hips or just outside, toespointed out slightly.Performing the Back Squat:1. Take a deep breath in and push it into your belly.2. Begin the back squat by driving your hips back anddown. Think about elongating the hamstrings.3. Knees track out over toes not in. Keep chest out andelbows up locking bar in place. Spine is neutral.4. Continue pulling (not dropping) your hips back anddown, keeping shins as vertical as possible until hipsdrop just below parallel.5. Push out of the bottom position, driving hips up. Chestcomes up at the same time.Common Faults6. Finish with hips fully extended at the top.Chin upKnees inTorso too verticalShooting the hips16
The Movements Class 4OnRamp Training GuideJump RopeAn excellent conditioning exercise that challenges coordination and stamina.Setup:1. Make sure your rope is the properlength. To do this, grip the handles andstand on the middle of the rope. Pullthe handles up. They should reachbetween your sternum and armpits.2. Grip the handles and position yourhands. Your arms should becomfortably bent, hands placed about afoot from your sides and about waistlevel.3. Rope is behind you.Performing the Jump Rope:1. Start the rope’s rotation by turning yourarms. Once the rope is moving don’tswing your arms or shoulders too much.Jumping rope is all in the wrists.2. Try to softly jump up and down on theballs of your feet. Your heels shouldnever touch the ground. And don’t jumptoo high.3. Keep your gaze straight ahead.Faults4. Get in a rhythm. Think jump, wrist,jump, wrist, jump Jumping toohigh/donkey kickUsing arms/shouldersinstead of wrists17
The Movements Class 4OnRamp Training GuidePressA compound movement that is great for developing upper body strength and midline stability.Setup:1. Set your grip on the barbell which is placed in the rack. Dip under the bar and bring to a front rack position with thebar resting on your shoulders. Elbows are down, almost vertical.2. Set your feet under your hips. Legs are straight and stay that way through the duration of the lift. Create torque onyour hips and squeeze your glutes.Performing the Press:1. Set your breath, keeping chest tall and expanded. Press the bar over head.2. Slightly move head back out of the way to allow bar to move straight up, staying over the middle of the foot.3. Keep elbows in, do not flair them out.Common Faults4. Finish with arms fully extended at the top.Muted hipPushing the bar outinstead of upOver extending18
The Movements Class 4OnRamp Training GuidePush PressAdding a dip to the press enables you to handle larger loads and teaches how to transmit forcefrom your hips to your shoulders.Setup:1. Same as the PressPerforming the Push Press:1. Set your breath, keeping chest tall and expanded.2. Dip: Initiate the dip by bending the hips and knees while keeping the torso upright.3. Drive: With no pause at the bottom of the dip, the hips and legs are forcefully extended.4. Press: As the hips and legs complete extension the shoulders and arms forcefully press the bar overhead until thearms are fully extended.19
The Movements Class 4OnRamp Training GuidePush JerkFrom press to push press to push jerk the movements become increasingly more athletic, functional, andsuited to heavier loads. The progression also increasingly relies on the power zone (hips & core). In theshoulder press the power zone is used for stabilization only. In the push press the power zone provides notonly stability, but also the primary stimulus in both the dip and drive. In the push jerk the hips are called onfor the dip, drive, second dip, and squat. The role of the hip is increased in each exercise.Setup:1. Same as the Press & Push PressPerforming the Push Press:1. Set your breath, keeping chest tall and expanded.2. Dip: Initiate the dip by bending the hips and kneeswhile keeping the torso upright.3. Drive: With no pause at the bottom of the dip, the hipsand legs are forcefully extended.4. Press and Dip: This time instead of just pressing, youpress and dip a second time simultaneously, catchingthe bar in a partial squat with the arms fully extendedoverhead.5. Finish by standing straight up knees locked with thebar straight overhead20
The Movements Class 4OnRamp Training GuideSplit JerkAllows you to move more weight with a more stable hip position.Setup:1. Same as the Push JerkPerforming the Push Press:1. Set your breath, keeping chest tall and expanded.2. Dip: Initiate the dip by bending the hips and knees while keeping the torso upright.3. Drive: With no pause at the bottom of the dip, the hips and legs are forcefully extended.4. Press and Split: press and dip a second time simultaneously, jumping your feet apart front to back with your front legin flexion and back leg in extension. Arms fully extended overhead. Toes should be pointed in slightly.Common Faults5. Finish by bringing front foot back a step then back foot forward to meet the front foot before bringing the bar backdown to the starting position.Front view ofsplit showingproper footangles andwidthBack leg straightBack leg foot turned out21
The Movements Class 5OnRamp Training GuideFront SquatA variant of the weighted squat that requires the barbell to be stabilized in a front rack position.The mechanics of a front squat place a greater demand on the quadriceps, abdominals and knees,and alleviate stress off of the glutes and hips.Set-up:1. Start with the barbell on a squat rack. Make sure that the bar is racked about an inch or two below the clavicles whilein a full standing position. This ensures both an aggressive primer for the kinetic chain when un-racking the barbell aswell as an easy and safe re-racking of the barbell once the set is finished.2. Choose a hand position on the barbell close to or mirroring the grip you use for a press. Do not fully grip the bar, butrather just hook the fingers around the bar.3. Meet the bar and place it above the clavicles while rotating your elbows upward to create as much of a horizontalangle with your arms. This creates the “shelf” across the clavicles and anterior deltoids.4. After un-racking, stay tight and position your feet about shoulder-width apart, point your toes 30-45 degrees outward(aligned with knee direction), and pull the hips back slightly to place majority of the resistance onto the heels.Performing the Front Squat:1. Take a deep breath and focus a majority of the pressure to the abdominal area to stabilize the entire torso and spine.Hold your breath through the descent and stand of the front squat to maintain midline stability.2. Begin lowering yourself into the bottom position, which requires the crease of the hip to fall below the knees, whileremembering these cues: chest up, sit back, knees out; and elbows straight forward/high.3. Drive out of the bottom position by forcing the hips open. Keeping the torso upright finish the movement with hipsfully open at the top.Common FaultsKnees forward,weight on toesTorso not upright,elbows down22
The Movements Class 5OnRamp Training GuideThrusterA strength and conditioning movement that combines the front squat and push press.Set-up:1. See Front Squat set-upPerforming the Thruster:1. Perform a Front Squat (see Performing the Front Squat)2. Drive out of the bottom position by forcing the hips to open keeping torso upright. As the hips fully open,simultaneously press the bar overhead into a fully locked position. Remember to be aggressive when opening thehips. The more “pop” you have, the more power that gets transferred to the press.3. Finish by bringing the bar back to the front rack position.23
The Movements Class 5OnRamp Training GuideWall Ball ShotsThe wall-ball drill comprises two highly functional classical weightlifting movements (front squatand push-press) brought together at light loads and extended duration to create a super potentmetabolic conditioning tool with an enormous potential for increasing athletic performance.– CrossFit Journal, 2003Set-up:1. With a medicine ball, find a spot in front of a wall with a target overhead. Typical targets range from 8-10’. Face thewall and stretch the ball straight out. Move forward until the ball touches the wall. This is your starting distance fromthe wall (the distance can be adjusted in/out to comfort/ability).2. Set your squat stance. Feet just outside the hips, toes slightly turned out.3. Place the ball in a front rack position with forearms parallel to the wall. The ball should be just underneath your chin.Performing the Wall Ball:1. The movement begins as a front squat and follows through to a push press/throw that sends the ball up and forwardto the target from which it rebounds back to the throwers outstretched arms where it is “absorbed” back into thesquat.Faults2. Remember to be aggressive when opening the hips coming up from the squat. The more “pop” you have whenopening the hips, the more power that is transferred to the throw. Torso stay tall and core is tight.Not using hands evenlyNot squatting belowparallel, torso not upright.Ball too low24
The Movements Class 6OnRamp Training Guide5 Step Set-upEvery time the barbell is lifted from the floor for any movement, we always start with our 5 step set-up. Aproper barbell set-up that is dialed-in and consistent allows the lifter to execute the movement moreefficiently and with more power.1. Bar over themiddle of the footSet your feet underthe bar so whenlooking down, the baris over the middle ofyour foot. Stance iship width.2. GripSet your grip for theappropriate lift (morenarrow for Cleans andwider for Snatch). Hookgrip (seen above) isused most often whenlifting the bar from thefloor. Place fingersaround the bar and overthe thumb.3. Shins to the barAfter feet and grip areset, bring your shins tothe bar. Don’t worryabout setting your torsoyet.4. Squeeze chest upPuff your chest out,tighten the core,create a nice lumbarcurve, but don’t overextend. Spine isneutral. Shoulders arepinned back anddown.5. Set your breathTake a deep breathand put it in your gut –hold your breaththrough the durationof the lift.25
The Movements Class 6OnRamp Training GuideDeadliftThe deadlift keeps company with standing, running, jumping, and throwing for functionality butimparts quick and prominent athletic advantage like no other exercise. – CrossFit Journal, 2003Set-up:1. See - 5 Step Set-UpPerforming the Deadlift:1. Begin the movement by opening the hips and driving knees back. The hips and chest come up at the same time.2. Be sure to keep torso tight and shoulders pinned back as you stand. Spine is always neutral. Think about pushing yourfeet into the ground not pulling the bar up with your arms. The deadlift is mostly a leg exercise and the only purposeyour arms/hands serve is to hold on to the bar.3. Finish the movement with hips fully open at the top. Release your breath at the top.26
The Movements Class 6OnRamp Training GuideBurpeeAn intense, full body exercise that has tremendous impact on endurance and conditioning.Set-up:1. Begin in a standing position with feetunder the hips.Performing the Burpee:1. Squat down and place hands on thefloor in front of you.2. Kick your feet back into a push-upposition and immediately drop yourchest to the floor.3. Raise your chest back up and jumpyour feet back underneath your hipswith a wide stance.4. Stand and jump with a clap overheadto finish.27
The Movements Class 6OnRamp Training GuideBox JumpPlyometrics (jumping exercises) work on hip explosiveness and leg drive, and can immenselyimprove flexibility in the hamstrings and lower back.Set-up:1. Place a box in front of you at thedesired height. Typical heightsrange from 20-30”.2. Face the box in a jumping stance(feet under the hips).3. You should be standing close tothe box (within 12”). This allowsyou to exert more energy jumpingup instead of up AND out.Performing the Box Jump:1. Begin the jump by performing apartial squat to load the legs anddrive the arms back.2. Swing the arms forward and upjumping simultaneously. The armshelp provide momentum to thejump.3. Land as softly as possible on theballs of your feet in a partial squatposition on top of the box.4. Stand and open the hips fully tofinish the jump.5. Return to the starting position bystepping down or for moreadvanced athletes, jumping down.28
The Movements Class 7OnRamp Training GuideCleanOlympic lifts like the Clean build muscle and power by training your body to explode upward.When the Clean is performed correctly, it will improve your vertical jump and speed.Set-up:1. See 5 Step Set-UpPerforming the Clean:1. Begin the movement similar to adeadlift. Hips raise, knees go back.There should be no change inspinal position meaning the chestraises at the same rate as yourhips.2. Once the bar reaches mid-thigh(aka power or jumping position),jump. Hips and knees areunlocked, elbows are straight, andthe jump will take the bar straightup.3. As you reach full hip extensionafter the jump, slide your feet intoyour landing position and quicklyturn your elbows under the barwith the bar landing in the rackposition. Your legs and hips will bein a partial or full squat position.This step is fast and aggressive.Faults4. Finish the clean by standing upstraight, fully opening your hipswith the bar still in the rackposition.Not opening the hips onthe jump, curling the barupReceiving the bar with amuted hipReceiving the bar with too wide of astanceElbows too low in therack position.29
The Movements Class 7OnRamp Training GuideRing DipThe ring dip exercise is the standard dip, performed on gymnastics rings, and has long been astaple compound exercise in many gymnasts’ routines. Ring dips are quite a bit more challengingthan bar dips because rings are extremely unstable, thus demanding the utilization of numerousstabilizer muscles in your core and shoulders.Set-up:1. Set the rings to the appropriateheight. Stand facing the rings, thetop of the ring should be at thebottom of your shoulder.2. Set your grip placing hands on theinside, bottom portion of the ring.Performing the Ring Dip:1. Jump up to a support positionwith elbows locked out, handsturned out, long neck and hollowbody position.2. Initiate the dip by sending thechest forward and down.3. Always keeping the elbow directlyover the wrist and forearmsvertical. Reach the bottom of thedip with your shoulder belowelbow.4. Press back up and finish in thesame strong support position youstarted.Variations:MatadorBand assistedBox/bench30
The Movements Class 8OnRamp Training GuideSnatchThe Snatch is the most technical movement you’ll see in our gym, but similar to the other Olympic lift theClean, it supports your overall efforts in power, speed and neural pathway development.Set-up:1. See 5 Step Set-Up2. Grip is wide. To determine your grip,stand in a high hang position with awide grip. The bar should be at thecrease of your hips (or if you bendforward the bar doesn’t move.Performing the Snatch:1. Begin by lifting the bar off the groundhips raise, knees go back. There shouldbe no change in spinal positionmeaning the chest raises at the samerate as your hips.2. Once the bar reaches mid-thigh (akapower or jumping position), jump. Hipsand knees are unlocked, elbows arestraight, and the jump will take the barstraight up.3. As you reach full hip extension after thejump, slide your feet into your landingposition and pull yourself underneaththe bar with the bar landing in anoverhead partial or full squat position.This step is fast and aggressive.Faults4. Finish the snatch by standing upstraight, fully opening your hips withthe bar still overhead.Elbows not locked out overhead.Shoulders inactive.Knees too far forward.Arms over-extended.31
The Movements Class 8OnRamp Training GuideOverhead SquatAnother variation of the weighted squat. This one focuses on the finish position of the snatch.Set-up:1. Stand with a barbell in the hang position. Your grip width should be the same width as your snatch grip.2. Hang snatch the barbell overhead into the finish snatch position.3. Elbows are locked, shoulders active holding the bar straight overhead. The bar should be over the middle of your feet.Performing the Overhead Squat:1. Tighten your core and set your breath into your stomach.2. Begin the squat by pushing hips back and bending the knees. This squat is more up-right and requires more focus tostabilize the bar overhead. Don’t drop your chest or the bar will come crashing down in front.3. Continue lowering into a full squat position with the crease of the hips below the knee. Focus on a tight core andactively pushing the bar up with your shoulders.Faults4. Drive out of the bottom and finish the squat by standing and fully extending the hips at the top.Elbows not locked out overhead.Shoulders inactive.Knees too far forward.Arms over-extended.32
The Movements Class 8OnRamp Training GuideLungeAn effective lower-body exercise that effectively works your glutes and quadriceps and alsoengages your hamstrings. They also help improve flexibility and core strength.Set-up:1. Stand with feet under the hips.2. Hands can hang at your sides or placed onyour hips.3. Keep your upper body straight, with yourshoulders back and relaxed and chin up(pick a point to stare at in front of you soyou don't look down). Always engageyour core.Performing the Lunge:1. Step forward with one leg, lowering yourhips until both knees are bent at about a90-degree angle. Make sure your frontknee is directly above your ankle, notpushed out too far, and make sure yourother knee doesn't touch the floor.2. Keep the weight in your heels as you pushback up to the starting position.FaultsVariations:MatadorWeightedlungeBand assistedChest dropping forwardBox/benchStance too narrow33
The Movements Class 9OnRamp Training GuideKettlebell SwingA full body exercise that helps train explosive hip power and builds aerobic capacity. The kettlebell swingtargets your shoulders, back, abdominals, hips, glutes, legs and also increases grip strength.Set-up:1. Stand with feet under the hips. Kettlebell is on the ground between your feet.2. Lower yourself to the bell, positioning the hips down and back, set your grip on the kettlebell and pull your shouldersback. This is very similar to the deadlift set-up.Performing the Kettlebell Swing:1. Now simply hike the bell back hard. Make sure to keep the alignment o
Methodology OnRamp Training Guide The CrossFit Mudtown New Athlete Training Guide is a collection of CrossFit material and images of the foundational movements and methodology of CrossFit. The OnRamp Course provides those completely new to CrossFit the knowledge and skil