Transcription
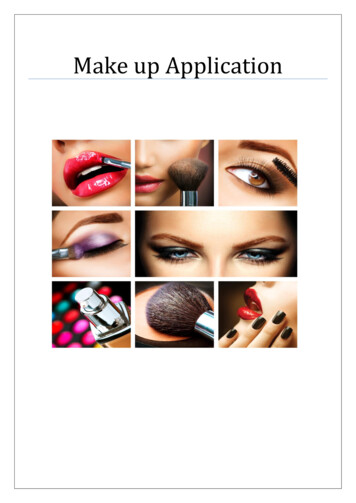
Make up Application
Table of ContentsFace Makeup . 51.1 Preparing the skin . 51.1.1 Cleansing . 51.2 Sunless Tanning. 71.2.1 Sunless Tanning - What are the options? . 71.2.2 Application Best Practices . 91.3 Face Makeup . 111.3.1 Foundation Finishes . 111.3.2 Foundation Coverage . 121.3.3 Concealer . 131.3.4 Powder . 141.4 Face Makeup Application. 161.4.1 Choosing Your Materials . 161.4.2 Choosing Your Shape . 161.5 Conclusion . 18Eye Makeup . 192.1 Determining the Eye Shape . 202.2 Eye Shape Makeup Application . 212.3 Eye shadow . 232.3.1 Eyeshadow Finishes . 232.3.2 Warm vs. Cool Toned Eyeshadows . 242.4 Eyeliner . 262.5 Mascara . 272.6 False Eyelashes. 292.6.1 False Eyelashes Shapes . 292.6.2 How to Apply False Lashes . 312.7 Factors to Consider When Choosing Bridal or Event Eye Makeup . 32Lips, Cheeks & Brows . 343.1 Lips . 34ii P a g e
3.1.1 Lip Products. 343.1.2 Lipstick Finishes. 373.1.3 Perfect Lip Application . 383.2 Cheeks . 393.2.1 Blush. 403.2.2 Bronzer . 413.2.3 Highlighter. 423.3 Eyebrows . 433.3.1 Eyebrow Products . 433.3.2 Eyebrow Application . 44Special Considerations for Weddings & Events . 474.1 Photography. 474.1.1 Face Makeup for Photography. 474.1.2 Eye Makeup for Photography . 494.2 Lighting . 504.2.1 Makeup in Natural Light . 504.2.2 Makeup for artificial lighting . 514.3 Durability. 514.3.1 Skin Prep . 514.3.2 Primers . 524.3.3 Finishing Sprays . 54Bridal & Special Occasion Makeup as a business. 555.1 Finding Clientele. 555.1.1 Wedding Fairs, Websites & Other Resources . 565.1.2 The Importance of Referrals . 585.1.3 Creating a Portfolio . 585.2 Preparing for the Event . 595.2.1 Gather Information . 605.2.2 Trial Run . 615.3 Creating Your Makeup Kit . 62iii P a g e
5.3.1 Kit Essentials. 635.3.2 Tool Essentials . 665.4 Managing Event Day . 67iv P a g e
Face Makeup1.1 Preparing the skinCreating an excellent base for your makeup is just as important as the makeup itself! As themakeup artist, you are responsible for making your client’s skin the perfect palette for yourwork. By taking appropriate steps to prepare the skin, the makeup will go on smoother andlast longer. Depending on the bride, event or situation you may have the opportunity toreally work with your client in skin preparation. Additionally, you can always providedetailed instructions to a client prior to your makeup application.1.1.1 CleansingThe first step in preparing the skin is cleansing. Cleansing is critical to ensure that anyprevious makeup is removed, along with any dirt, oil or residue. There are a few optionswhen it comes to cleansing your client’s skin that you could choose:Makeup Removing Wipes One of the easiest ways to cleanse the skin is by utilizing amakeup removing wipe. This option is great for times where you need a quick option toremove makeup, or you are limited on space. To start, take a makeup removing wipe andgently wipe it across the face in slow, smooth movements applying a small amount ofpressure. Continue this motion with clean areas of the wipe until all makeup and dirt isremoved.Cleansing Cloth Another option for cleansing the skin is by utilizing a cleansing cloth.Typically, a microfiber towel, these cloths combine with water to effectively cleanse the skinand remove makeup. Taking a clean cloth, wet with water and smooth all over the face tocleanse.Cleansing Facial Soap, The most effective way to cleanse the skin is by using a traditionalcleansing facial soap on the skin to remove makeup, dirt and oil. If you are doing this on aclient, gently wet the skin with a damp washcloth. Follow up by applying the facial soap witheither your fingers or a cloth until any residue has lifted. Finish by using a damp washclothto remove the soap and pat dry. If you are doing this on yourself, simply wet the face anduse the facial soap to wash your face in the traditional fashion to cleanse.1.1.2 Exfoliating & ToningAfter cleansing, it is important to either exfoliate or tone the skin. This allows the skin to return to itsoptimal state, and can help prep the skin’s texture for makeup application. When it comes to exfoliating,this would typically be done by using a chemical or physical exfoliant on the skin. A chemical exfoliantremoves dead skin cells with its chemical enzymes, and a physical exfoliant typically has small beads orgrains. Exfoliating helps your skin remove dead skin cells, and can even out your skin’s texture prior toapplying makeup.
Similarly, toning your skin helps ensure there are no traces of makeup, dirt or oil on the skin. Wipe atoner across your client’s skin using a cotton pad, or spritz onto skin prior to moisturizing.6 Page
1.1.3 HydratingHydrating the skin after a thorough cleansing routine is critical to keeping the skin from drying out duringthe makeup application process. Take a moisturizer, and pat gently into the skin to allow the moisturizerto fully sink into the skin. The gentle pressing will also promote circulation in the skin, which will give theskin a healthy glow prior to makeup application.After applying a moisturizer, if the skin still needs a bit of hydration there are some more options.Spraying the face with a hydrating mist such as an Evian spray or rose water will help seal in themoisturizer and make the skin plump and dewy.1.2 Sunless TanningIf your bride or client is looking to have a bronze glow on their big day, there are a few options to givethem a natural tan without the sun. Avoiding the sun prior to a big event is extremely important, as thesun can dry out the skin and promote unwanted wrinkles and sun spots. Instead of laying out in the sunor hitting a tanning bed, use a sunless tanning option to achieve the bronze glow.1.2.1 Sunless Tanning - What are the options?There are a few different options when it comes to sunless tanning. Here, we will break down thedifferent sunless tanning options to help you choose which is best for yourself or your client.7 Page
Personalized Spray Tan: This is the highest end option, and requires hiring a spray tantechnician to do a one-on-one spray tan for your bride. These technicians may be located ina salon, or may even come directly to the event site. For these sessions, the technician willhand spray you to achieve the perfect colour and application for an individual client. Spray Tan Booth: Many salons offer spray tanning booths that make getting a professionalspray tan extremely easy and quick. In these booths, you can customize the colour toachieve your desired level of bronze. There are many different types of spray tan booths, sobe sure to do some research to ensure you will choose the right one for you or your clients.Additionally, you can utilize the salon staff to gain knowledge prior to using a spray tanbooth. Self-Tanning Mousse: For a natural a buildable option with even application, opt for a selftanning mousse to add a bronze glow to your skin. These self-tanning mousses typically looklike a foam or whipped texture, and are typically applied with a mit for even texture. Selftanning mousses often are a bit more foolproof, but can be a bit difficult to apply in hard toreach areas (like the shoulders and back). For perfect application, take your time or evenrecruit a friend to help with application for your big day. Self-Tanning Spray: When it comes to easy application, a self-tanning spray allows you toeasily tan your entire body. It is important to do plenty of product research before usingaself-tanning spray, in order to find one with a steady stream and even application. Makesure to apply carefully, so as not to go over the same area multiple times creating an uneventan.8 Page
Self-Tanning Lotion: The most common product on the market is self-tanning lotions, so youhave plenty of options if you choose to go this route. The lotions often have differentqualities, such as colour, application and development time. Some may have a bit ofshimmer, while others are matte. As with all of these products, do your research prior topurchasing in order to determine which self-tanning lotion will best meet your needs.1.2.2 Application Best PracticesIn order to make your sunless tan last as long as possible and achieve a flawless application, there are afew critical steps prior to application.1. Shave or wax: When it comes to removing unwanted hair, it’s important to do this prior toapplying sunless tanner. These actions can actually remove sunless tanner, so shave or waxwell before your sunless tan application.2. Exfoliate: Before applying self-tanner, it is absolutely essential to remove dead skin andflakes. To avoid dark patches of tanner clinging to these areas, use an exfoliating body scrub9 Page
in the shower to slough away dead skin cells. Be sure to focus on common rough patches,like the elbows, knees, ankles and heels.3. Moisturize: After exfoliating, it’s important to add some moisture back into your skin priorto applying sunless tanner. Using a lightweight moisturizer, apply evenly all over your bodyin a thin layer. Dab a bit of extra lotion in areas where the self-tanner may cling, like aroundthe cuticles and behind the knees.3.4. Start from the bottom up: In order to achieve the most flawless self-tan application, startyour application at the bottom of your body and work your way up. Begin applying at thefeet and ankles, and then move up in circular motions along the legs and thighs. This willhelp ensure there are no strange marks or creases as you bend to apply the sunless tanner.5. Be patient: Allow yourself time to apply the tanner slowly and carefully, and don’t rush yourapplication process. Once you have applied your sunless tanner, be patient and allow thetanner to dry completely before putting on clothing. You will want to avoid showering for 68 hours, to allow the tanner plenty of time to develop.6. Clean it up: If you have any dark patches or poor application, clean up those areas byrubbing half a lemon on the area and follow up with a damp towel. The acidity of the lemon10 P a g e
will help remove any self-tanner that you’re hoping to remove to even out the look of yourglow.7. Preserve your glow: You can help your sunless tanner last as long as possible by using gentleproducts (like gentle cleansers and soaps), and by keeping your skin constantly moisturized.1.3 Face MakeupNow that the skin is prepped and ready to go, it’s time to find the perfect makeup to achieve a flawlesscomplexion. Between foundations, concealers and powders there are countless options - how do youknow which is the right one? We will break down the different types of products and perfect application,so that your bride will have perfect skin on her big day.1.3.1 Foundation FinishesA foundation finish is best described as the look of your skin after the foundation is set. It will beimportant to consult with your client to determine the desired look they want for their skin on the day ofthe wedding or event. A close comparison would be the paint on your walls - the finish of the paint variesso it’s important to know the difference in order to make the best choice for you and your client. Dewy Finish: A foundation with a dewy finish will often be described as luminous, fresh andyouthful. Many times, dewy finish foundations will create the look of hydrated skin, and aregreat for people with dry or aging skin. Skin looks radiant, and can often have a bit ofopalescence to the foundation. This finish is not the best for oily skin, as it can oftenaccentuate the shiny nature of oily skin. Satin Finish: A satin finish foundation falls in the middle of the three finishes, and is notquite dewy but not quite matte. This is a natural looking finish, and has a soft sheen on theskin. This is the most universal finish, and looks good on almost every skin type! Matte Finish: If your client is looking for a flat and “perfect” finish, a matte finish foundationis the choice for them. For those with oily skin, this finish will give them optimal wear timeand finish. Similarly, for skin that has different textures a matte finish foundation will createa flat finish to help even the skin’s tone and texture.11 P a g e
1.3.2 Foundation CoverageThe coverage level of a foundation is essentially the amount of pigment in a foundation, and how muchthe foundation will cover in one layer. To determine the appropriate coverage level for you or your client,it is important to understand how much skin they would like to show through the makeup. The coverageof a foundation can often vary based on how it is applied, but in general you can learn how a foundationmay look on the skin by understanding its coverage level. Sheer Coverage: A sheer coverage foundation will provide very light coverage to the skin, soyou will be able to see much of the skin through the foundation. This coverage level willnaturally enhance the look of your skin, and will slightly blur any imperfections. Medium Coverage: For natural coverage of any blemishes, dark spots or imperfections,medium coverage foundation is the perfect choice. This option covers most skin issues on itsown, while still giving the skin a natural look. Any larger blemishes or discolouration mayrequire additional product to conceal, but overall this is an excellent option for those withminimal skin issues. Medium to Full Coverage: This foundation will act similarly to a medium coveragefoundation, with the option to build coverage up to a full coverage look. Depending on howit is applied, medium to full coverage foundations can still provide a natural look while stilloffering customizable coverage. This is an excellent option for those who may havecombination skin needing a bit more coverage in some areas than others.12 P a g e
Full Coverage: This foundation contains the most pigment, and will cover skin completely. For those trulyfocused on having flawless skin for an event or photography, this coverage will achieve full coverage forheavy discolouration or other skin issues. This coverage will look the least natural against the skin, soapplication is critical to achieve a blended look.1.3.3 ConcealerWhen it comes to concealing dark spots and imperfections, the best way to understand what shade tochoose comes back to the basics of the colour wheel. Shades directly across from each other on thecolour wheel will cancel each other out, which is the goal when colour correcting with concealer. Here,we will dive into further detail on the different colour correcting concealer options and when to use eachone. Yellow Concealers: With yellow being right across from purple on the colour wheel, yellowconcealers are excellent at correcting purple tones in the skin. For bruises or purple veins,yellow concealers will counteract the purple tones to allow for even colouring across theskin. A high coverage yellow concealer can also be a great option for covering up any tattoosfor an event or photos. Peach/Salmon Concealer: Since this tone is a combination of red and orange tones, it isextremely helpful in concealing blue and purple tones in the skin. More specifically, theseshades are ideal for colour correcting dark circles under the eyes. Salmon and peach tonedconcealers offer immense brightening under the eye, which is perfect for making the facelook awake and luminous.13 P a g e
Green Concealer: Since green is directly across from red on the colour wheel, this is anexcellent option for covering any unwanted redness on the skin. Specifically, this is an idealconcealer colour to use for acne, blemishes or red toned hyperpigmentation. If your clientstruggles with redness all over the face from rosacea or sunburn, a green tinted primer willhelp counteract these issues for a flawless foundation colouring. Purple Concealer: For those who suffer from yellow or sallow skin tone, a purple concealeris the perfect option to colour correct those issues. For yellow spots on the skin, a purplespot concealer will counteract the yellow tones on the face or body. Tan/Neutral Concealer: For those with minimal skin issues, a neutral skin-toned concealerwill suffice for covering any minor imperfections. When it comes to the occasional blemishor minor dark circles under the eyes, a neutral concealer will be a perfect option to cover amultitude of issues. This is a great option to have on hand for any small skin issue that maypop up on an irregular basis.1.3.4 PowderAfter choosing the perfect foundation and concealer, it is important to set those products with a settingpowder to ensure your makeup application lasts all day long without any shine. There are a few differentoptions when it comes to setting powder, so it is important to understand the differences in order tochoose the best one for yourself or your client. Here are the main choices you will need to make whenchoosing a setting powder. Pressed vs. Loose: There are two main choices when it comes to the texture of the settingpowder you choose. A common option for daily use is the mess-free pressed powder, whichoften comes in a compact. These powders will commonly be used for quick fixes, as well as14 P a g e
daily use. When it comes to lose powder, this is often a makeup artist’s first choice forweddings and events. Loose powders are often finer milled, which translates beautifully inphotography and videography. They can also create a more natural, less “powdery” look onthe face when setting foundation and concealer. Pigmented vs. Translucent: In addition to the actual powder itself, you also will have thechoice of whether to utilize a pigmented powder or a translucent powder. A powder withpigment will add additional coverage to any foundation or concealer you have alreadyapplied. This is a great option for those looking for extra coverage on top of a sheer ormedium coverage foundation. Alternatively, translucent powders offer no additionalcoverage and will simply assist with setting the foundation and concealer. Translucentpowders work well for setting high coverage foundations, as well as those looking to settheir completed foundation application.15 P a g e
1.4 Face Makeup ApplicationNow that you’ve learned how to choose the best makeup products for yourself or your client, it isessential to know the best application techniques to achieve optimal results. There are a few key toolsthat are common for makeup artist foundation applications, so here we will breakdown the differencesbetween the many different facial brushes and sponges for ideal application.1.4.1 Choosing Your MaterialsThere are so many different brands and types of brushes, but one of the easiest places to start is bychoosing which material your brush is made from. There are both natural and synthetic fibers, which canmake a difference in how the brushes apply makeup. Different types of brushes work best with differentproducts, so it’s important to know the differences between the types of brushes and materials. Natural Brushes: Natural brushes are made out of natural fibers, which typically mean theyare made from real hair. Most often they are from various types of animal hair, so it may bebest to look for cruelty-free brushes if that appeals to you or your client base. There aresome benefits about natural brushes, and since they are made from natural fibers they oftenbehave like hair. They typically have more texture compared to synthetic brushes, and canbehave more durably in your makeup collection. Natural brushes are best used for powderproducts, as they often blend easier than their synthetic counterparts. Synthetic Brushes: As you might guess from the name, synthetic brushes are made fromsynthetic, manmade materials. Because they are not made up of natural hair, they do nothave the ability to absorb any product through the porous texture or cuticle. This makesthem great options for liquid or cream products, like concealer, foundation and evenskincare products. Synthetic brushes can vary in quality, so be sure to feel the bristles ifpossible to determine if they will work for your purpose.1.4.2 Choosing Your ShapeWhen it comes to applying foundation, concealer and powder, application can make all the difference.There are a variety of shapes and styles of brushes, and it is important to use the right one for yourproduct. Here are a few of the most common brushes for applying foundation, concealer and powder. Foundation Brush: This is most often a densely packed brush, with tapered bristles to applyfoundation in a precise manner. When it comes to building up coverage, a foundation brushwill allow you to achieve your ideal coverage and an airbrushed finish. This brush is bestused for cream or liquid foundation. Stippling Brush: Not as dense, this brush is often made of duo fiber bristles and allows astrong coverage. When the product is stippled on, it achieves a poreless finish with ablended look. This is an extremely versatile brush, and can be used to apply cream, liquid orpowder products.16 P a g e
Concealer Brush: Almost a smaller version of the foundation brush, the concealer brush is atapered brush for precise application. This can assist with using product in specific places,like the corners of the eyes or on blemishes. The concealer brush is best used with liquid andcream concealers. Powder Brush: Powder brushes can come in varying shape, but most often have a fluffy,rounded shape. With its loosely packed bristles and soft texture, powder brushes are bestused for applying product all over a large area. Most often, powder brushes are best usedfor applying loose or pressed powder products. Kabuki Brush: With a short handle and densely packed bristles, kabuki brushes often have arounded shape. When used to apply product, they will provide medium coverage and moreprecision than a powder brush. Kabuki brushes are best used for applying both loose andpressed powder products to achieve more precision or coverage. 17 P a g e
1.5 ConclusionIn this module, we have covered the basics of how to achieve the perfect face look for your client. Youlearned the importance of prepping the skin for makeup, and basic skincare techniques to create theperfect canvas for makeup. For the brides and clients who may want a bronze glow on their big day, wediscussed the basics of sunless tanning, how to choose the best product and the essential steps toachieve the perfect application.When it comes to makeup, we went into detail on the different foundation finishes and coverages tochoose the best product for your client. We also demonstrated the different colour correcting concealeroptions in order to conceal the different skin issues a client may face.This module covered the different product choices you have when it comes to powder products to setyour foundation and concealer. Lastly, you learned the best materials and brushes to apply face makeupto get a flawless look. Walking away from module one, you are now armed with the knowledge to createa perfect face look for your client’s wedding or special event.1
Face Makeup 1.1 Preparing the skin Creating an excellent base for your makeup is just as important as the makeup itself! As the makeup artist, you are responsible for making your client’s skin the perfect palette for your work. By taking appropriate steps to prepare the skin,
