Transcription
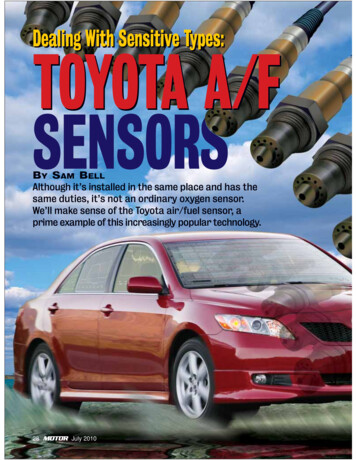
Dealing With Sensitive Types:TOYOTA A/FSENSORSBY SAM BELLAlthough it’s installed in the same place and has thesame duties, it’s not an ordinary oxygen sensor.We’ll make sense of the Toyota air/fuel sensor, aprime example of this increasingly popular technology.28July 2010
Photo montage & illustration: Harold A Perry; images: Toyota and ThinkstockMost of us have become pretty comfortable with the conventional oxygen sensor,and feel like we havea pretty good handleon telling the good ones from the badones. So it’s time to move out of ourcomfort zone and on to the oxygen sensor’s more sophisticated younger cousin,the air/fuel (A/F) sensor. These come ina few different varieties, but I’ll concentrate on the Toyota sensor exclusively because the company was an early adapterof this technology and it’s found on manyof its vehicles. These sensors are usedonly upstream of the catalytic converter;downstream sensors are always of theconventional O2 sensor type.How do you tell whether the vehiclehas an O2 sensor or an A/F sensor? Notall Toyotas use an air/fuel sensor, butthey’re in increasingly widespread usethroughout the product line. The firstplace to look is on the underhood VehicleEmission Control Information (VECI)label. Of course, as we all know, sometimes the hood isn’t original, or the labelis missing. In such a case, check theVIN with your local dealer. Sometimes,however, even a VIN check is inconclusive. At that point, careful examinationof the wire colors at the harness connector plug should prove conclusive.Let’s first look at a few of the morecommon DTCs associated with a badair/fuel sensor, then take a deeper lookat advanced diagnostic techniques anddatastream analysis.Far and away the most commonair/fuel sensor fault codes in the northernpart of the country are P1135 and P1155,indicating heater circuit failures in thesensors for bank 1 or bank 2, respectively. These are two-trip codes. While conventional oxygen sensors function at 650 to 850 F, the Toyota A/F sensor requires1200 F for reliable accuracy.Diagnosis here holds few surprises, asit largely mirrors the procedures for diagnosing heater circuit faults in oxygen sensors. Some applications feature separatededicated A/F sensor heater fuses, commonly on V6 models, although there area few dual-bank 4-cylinders as well. Most4-cylinder single-bank applications donot utilize a dedicated heater fuse, so ifthe car runs, you can be sure the fuse isgood, since it also powers the injectors.Toyota A/F sensor heaters are nominally in the 75-watt range (approximately 5 to 7 amps), though actual currentconsumption may vary with the appliedduty cycle. A low-amp probe can quickly verify heater performance. Typicalheater control programming applies fullpower for about 20 seconds after startup, then maintains heat with an appliedduty cycle that varies as needed. Whenexhaust flow is low, as at idle, more heatis commanded. There are also someone-trip heater codes that occur in therelatively rarer event of a completelyopen or shorted heater circuit.Accompanying the P1135/P1155codes may appear code P1130 orP1150—air/fuel sensor range or performance fault codes, also two-trip codes.If there are heater codes as well, theymust be dealt with first. In fact, even if arange or performance code appearsalone, check the associated heater circuit and actual heater performance first,since these are critical to correct A/Fsensor functioning. The Toyota air/fuelsensor typically operates at about1200 F, so relying on exhaust gasesalone to bring the sensor up to tempsimply doesn’t work reliably.Whatever DTCs you retrieve, besure to check for relevant TSBs at theoutset. For example, a code P0031and/or P2238 on some applications,such as a 2.4L Camry, may require botha new sensor and a recalibration of thePCM—Toyota-speak for a reflash.Rounding out the DTC list specific toToyota A/F sensors are codes P1133 andP1153, indicating an unacceptable slowdown in the sensor’s response rate. Themonitor for these DTCs executes an active test and looks for the sensor to respond within a maximum of 1.1 seconds.Once again, these are two-trip codes.In addition, there’s a very commonone-trip code that you may encounter.It’s P0125, rather misleadingly titled “insufficient coolant temperature forclosed-loop operation.” Don’t be fooled!Here’s what really happens: The A/Fsensor is monitored for voltage changeactivity under specified conditions. Ifthere’s insufficient change in the sensor’soutput voltage during a 90-second interval of off-idle operation at or above 1500rpm with a road-speed of 25 to 62 mph,July 201029
DEALING WITH TOYOTA A/F SENSORSThis underhood VECI label calls out theair/fuel sensor (“A/FS”) to alert thetechnician that the upstream exhaustsensor is not an oxygen sensor.at the outset. If someone has recentlycleared DTCs or interrupted the keepalive memory (KAM) circuit, some monitors may still show incomplete, depriving you of potentially useful information.But remember that monitor completiondoes not signify a passing grade; it merely means that the test sequence has beenexecuted one time. Fortunately, themonitors for the A/F sensors and heatersrun fairly quickly and easily in most instances, so a little driving may be all that’srequired to bring their status to completion so you can check for pending codes.Now it’s time to look into datastream.The relevant PIDs here are AFS1,STFT1 and Equivalency Ratio. Ofcourse, in multibank engines, you’llneed to substitute or add the bank 2PIDs as well. The first problem you’relikely to encounter is accessing the A/Fsensor PIDs at all. These may show upin certain generic interfaces, but theymay not look quite right. See “Throughthe Looking Glass” on page 57 for anexplanation of why.If you have access to the actual A/Fsensor PIDs, it’s probably in a manufacturer-specific interface. Look for themunder the User Specified or the Extended data lists. Still not found? Depending on your scan tool, you mighttry headings such as A/F O2 Data or Fuel and Emissions. The relevant PIDsmay show up in some generic interfaces, often labeled as WRAF (widerange air/fuel sensor), but are not accessible with all scan tools.To achieve a fast enough update rateon your scanner, once you’ve reachedthe A/F sensor PIDs, you’ll want to deselect all other parameters except theones I mentioned above. If you can’taccess them with your scanner, don’tgive up just yet. I’ll be showing yousome alternatives later on.You might be tempted to hook upyour scope at this point to monitor theA/F sensor voltage output. Don’t bother; it won’t work! The “voltage” is not avalue that can be measured at the sensor. Instead, in response to both theamount and direction of current flowthrough the A/F sensor, this voltage isgenerated internally, inside the PCM,where it’s encoded into the datastream.Since our test-drive sequence is going to involve some hard accelerationsand decelerations, have an assistant dothe driving while you monitor the data.Or, perhaps better yet, set up your scanner to record the data as you drive. Fig. 2on page 32 will give you an idea of whatyou’re after.On hard acceleration, look for the reported voltage to drop to somewhere below 2.8 volts, reflecting the effects of ac-Photos & screen captures: Sam Belland at least 140 seconds have elapsedsince start-up (before the 90-second interval begins), DTC P0125 will set.Be sure to check for other pendingcodes as well, since they may offer important clues. (Toyota productsequipped with conventional O2 sensorscan also set this code, for analogous reasons.) In many cases, the fault will lienot in the sensor itself, but elsewhere inthe air/fuel induction system, most likely because of a vacuum leak.Another surprisingly common problem involves familiar lean codes P0171and/or P0174. Expect to find combinedshort-term and long-term fuel trims of50% or more in the freeze-frame data.Once again, these codes frequently stemfrom an underlying heater circuit fault.But if the customer complaint or the repair history reveals recent work, checkto make sure someone hasn’t swappedin a conventional four-wire heated oxygen sensor by mistake. Although theconnector latch is slightly offset anddoesn’t line up, it’s actually possible tointerchange the two types of sensors!When in doubt, verify that you have thecorrect part number. All Toyota air/fuelsensor part numbers start with the prefix“89467”; OE oxygen sensors, in contrast,start with prefix “89465.”In the case of any of these DTCs,once you’ve ruled out heater malfunctions (be sure to check for pendingheater codes) and incorrect parts, it’stime to dig in for more detailed diagnostics. As always, be sure to read andrecord all available freeze-frame dataand to check monitor completion statusSome air/fuel sensor heaters utilize a dedicated fuse; in other applications, the fuse holder wiring may appear to be incomplete. Relax; if the second terminal is not there, power for the heater comes from the same fuse that powers up the injectors.The fuse panel of the Lexus RX 300 (left photo) had been robbed when spare change overflowed into the lighter plug, blowingits fuse. The Camry fuse panel (right photo) never had a fuse installed, regardless of the legend on the fuse box cover.30July 2010
DEALING WITH TOYOTA A/F SENSORSThis jumper harness is inserted between the vehicle wiringand the A/F sensor. Its 1-ohm resistors allow voltage dropmeasurements exactly proportional to current flow.Fig. 1 This low-amp probe scope capture shows a normalduty-cycled heater pattern on channel A and no currentflow through the inoperative heater on the other bank onchannel B. The probes on each channel were set to 100mV/A.celeration enrichment. On a sudden contamination or downstream air leaks. erase freeze-frame memory and resetclosed-throttle deceleration, voltage Since Toyota allows the rear O2 sensor a any monitor information, so you’ll wantshould rise at least as high as 4.0 volts, in- surprisingly large authority over fuel to make sure you’ve read and recordeddicating a very lean fuel-cut condition. trim, you’ll want to test it carefully as well. all of that before taking this step.You’ll note that these voltage trends are (Many generic interfaces call out the rearexactly the opposite of those we expect O2 sensor’s contribution to fuel trim sepa- Testing, Testingfrom a conventional O2 sensor. As you rately under a heading such as FTB1S2.) If your scan tool allows you access tocan see from Fig. 2, your actual readingsIf you believe a rear O2 sensor issue bidirectional control of injector volume,may well go far beyond this narrow volt- underlies an excessive fuel trim correc- you can use that function to verify theage band. I recorded voltages all the way tion, you can remove the PCM battery performance of a suspect air/fuel sensor.from 2.312 to 4.997 volts. If your read- fuse to clear the KAM, temporarily re- Enabling this test function temporarilyings seem to be nearly an order of mag- setting the rear O2 sensor’s trim to zero. suspends normal closed-loop operation,nitude smaller, read the sidebar However, this will also clear codes, allowing you to monitor the A/F sensor’s“Through the Looking Glass.”reaction to increased or deIf you didn’t reach the voltcreased injection quantity. Asage thresholds on your roadyou alternately command atest, start by checking the ba25% increase and a 12.5%sic circuit integrity. Undecrease in injection quantiplugged KOEO, you shouldty, look for the A/F sensorhave 3.0 volts on the (usuallyPID to fluctuate from somewhite) AF wire and 3.3where below 3.0 volts (a richvolts on the (usually blue)indication) to somewhereAF wire at the vehicle sideabove 3.35 volts (a lean indiof the harness plug as meacation). On a test involving ansured with a voltmeter con80,000-mile Highlander, Inected to ground. If theserecorded responses of 3.68voltages are not found, checkvolts at 12.5% lean and 2.71the wiring, then replace the Fig. 2 This “flight recording” from a known-good car shows volts at 25% rich.typical air/fuel sensor voltage and fuel trim data plotted withfaulty PCM.Perform this test, togglingWhat’s the norm? On light rpm. Note the values of the various parameters at the cur- between adding and subto moderate throttle, report- sor-indicated time of 107 seconds. This is the response to a tracting fuel, a few times ined voltages will generally fall sustained full-throttle acceleration. The A/F sensor has quick sucession. The A/Finto a narrow range (perhaps dropped to a low of 2.312 volts, indicating a very rich mixture, sensor should respond withinshown as a calculated equivalency ratio of .896, or an air/fuel .3 volt) centered around ratio of roughly 13.2:1. By time-stamp 116, on closed-throttle 1.1 seconds of each com3.3 volts. Normal fuel trims decel, when fuel cut-off has occurred, the A/F sensor voltage manded fuel shift. Using theshould be 0 10%. If fuel has peaked at 4.997 volts (actually, the available reference Toyota dealer-level interface,trims are out of line, be sure voltage for this sensor circuit leg) at a calculated equivalency the best choice for this test isto check the MAF sensor for ratio of an ultra-lean 1.234 (an air/fuel ratio of about 18.1:1).the A/F Control test, since it32July 2010
DEALING WITH TOYOTA A/F SENSORSallows a quick toggle fromexhaust gas measurementsone extreme to the other,verify their accuracy.whereas the Injector VolumeThe second test is sometest scrolls in 1% increments.what more complex, butIf your scan tool does notmakes for a good cross-checksupport the Injector Volumeof a suspect sensor. Unplugor A/F Control tests, you canthe sensor connector andalso try forcing the mixturecarefully jumper the heaterlean or rich by creating a largepower and ground leads tovacuum leak or by addingtheir appropriate counterpropane. Before jumping toparts in the sensor pigtail.any conclusion, however, beMake sure these leads aresure you’re taking closedproperly separated and doloop responses into accountnot touch one another. Nowby monitoring short-term fu- Fig. 3 Forming a ten-turn wrap of wire around a socket jumper the (usually blue)el trims as well as the A/F or other suitable mandrel allows your low-amp probe to AFS , 3.3-volt lead to itssensor data. Since a good A/F pick up small current variations, as shown in this screen corresponding wire in thesensor responds quickly to capture. Clamp the jaws around the resulting coil and read sensor, being sure to keep iteven very abrupt changes in the output. Remember to divide your results by ten!well insulated and protectedmixture composition, look forfrom inadvertent contact withsignificant variation in STFT, rather the datastream shows closed-loop oper- any of the other wires. Use a longer leadthan in the air/fuel sensor PID itself.ation on all banks. If it does, but lambda for the final AFS jumper, winding it exand equivalence values remain mis- actly ten times around a fairly large socketHow It Worksmatched, you can be pretty sure that at or other circular object and taping theThe A/F sensor produces a small elec- least one A/F sensor is bad.resultant coil in several places. Removetromotive force (EMF) which, in turn,If Equivalence PIDs aren’t shown in the socket, then place your low-ampmay augment or oppose current flow your scan tool, there are still at least two probe around a portion of the circumferacross the nominal .3-volt potential be- ways to check up on an A/F sensor’s per- ence of the ten-turn coil you just made.tween the AF and AF terminals. formance. Unfortunately, both are a bitSet your probe to its maximum sensiThe current flow is positive when the cumbersome and not as informative as tivity (usually 100mV/A) and hook it upmixture is lean and negative when rich. plotting the A/F sensor data directly. to your scope or DMM. Bring the enThere’s no current flow in the detection The first check is to examine STFT re- gine up to temperature, then observe thecircuit when the mixture is at stoi- sponse to a variety of conditions, such as amp readings. At idle, there should bechiometry. Maximum current flow is on artificially manipulating the air/fuel bal- little or no current flow. On snap-throttlethe order of 15 milliamps (mA), but is ance, as outlined above. Fuel trim cor- acceleration, current should flow in oneusually much less.rections that appear to be responsive direction, while closed-throttle fuel cutI said I’d show you some alternatives across a range of conditions are usually a off decel should result in current flow inif you couldn’t reach the A/F sensor in good indication of overall system perfor- the opposite direction. A sample wavedatastream. As you can see from Fig. 2, mance, especially when actual tailpipe form is shown in Fig. 3 above.the Equivalence PID effectiveThe exact magnitude ofly mirrors the data from thethe current flow is not imA/F sensor. This means thatportant here, although youyou can infer the A/F sensorshould read a maximum ofdata by examining the equivaabout 140mA, correspondlency data, provided there areing to a sensor output curno current DTCs that mightrent of one-tenth as much,suspend closed-loop operation.or 14mA. (The purpose ofIt’s also good practice to verifythe ten-coil jumper is tothe accuracy of the equivalencymultiply the sensor’s smalldata calculation by checkingcurrent by a factor of tenthe lambda value of the actualso your probe can pick ittailpipe exhaust gas composiup reliably even at its lowertion. The equivalency datalevels.) It’s this current flowfrom a good A/F sensor shouldwhich the PCM translatesmatch up well with actual Fig. 4 The waveform in this screen capture provides a into its A/F sensor voltagetailpipe lambda measurements. general feel for the air/fuel sensor’s performance. But is it PID, so the purpose of thisIf it does not, check to be sure enough on which to base your diagnosis?test is simply to verify that34July 2010
DEALING WITH TOYOTA A/F SENSORSthe sensor is functioning more or less asintended, and that current magnitudeand direction change appropriately.An alternative approach is illustratedin the top left photo on page 32. I waslucky enough to scavenge the matingconnector from another application, although, as alert readers will notice, the36July 2010white and blue wires change color in theharness in order to match up to the A/Fsensor wire positions. This allowed meto build an extension harness, into whichI then added two 1-ohm resistors—onein the blue wire and one in the white.This in turn allowed me to hook up a labscope to measure the voltage dropacross either resistor while a jumper bypassed the other one. The voltage dropacross a fixed resistor is exactly proportional to the current. Where the resistoris 1 ohm, a voltage drop of 1mV corresponds to a current flow of 1mA.I expected to find a recognizablewaveform when I toggled the air/fuel ratio via my scanner, but was disappointedto capture what looked mostly like random noise when scoping the resistor inthe blue wire while the other resistor wasbypassed with a jumper lead. But when Ibypassed the resistor in the blue wireand connected my scope leads across theresistor in the white wire, I obtainedsome useful information, as illustrated inthe waveform shown in Fig. 4. This corresponds to the changing current flow asI toggled the mixture rich and then lean.How does the information from theseexperiments help us? First, we nowknow that the air/fuel sensor’s two leadsdo not function as they would in a classicseries circuit. Second, we can use thenear-verticality of the waveform’s rise asan indicator of its ability to respondquickly to a change in mixture. (Remember, the PCM sets a DTC for a response slower than 1.2 seconds.) Note,however, that the subsequent fall, as Icommand a fuel reduction, is lessabrupt. This is consistent with thephysics of the situation, as the total available fuel volume cannot be decreased asquickly as it can be increased.An odd mishap led me to discov
sensor functioning. The Toyota air/fuel sensor typically operates at about 1200 F, so relying on exhaust gases alone to bring the sensor up to temp simply doesn’t work reliably. Whatever DTCs you retrieve, be sure to check for relevant TSBs at the outset. For example, a code P0031 and/or P2238 on some app
