Transcription
www.violinlounge.com
Playing the violin beautifully isa set of learnable skillsI’m here to teach you exactly howwww.violinlounge.com
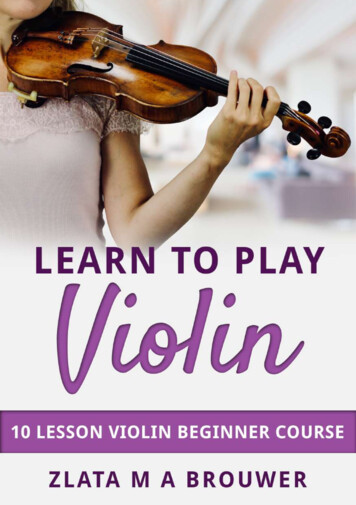
WelcomeCongratulations on picking upthis beautiful, but sensitive anddifficult instrument the violin!In this free beginner course,you’re in the right place to learnthe basics.My name is Zlata Brouwer, violinteacher specialized in bowingtechnique and creator of ViolinLounge TV and Bow like a Pro.In my private violin studio inHolland I’ve taught beginnerstudents of all ages andbackgrounds for over ten years.During these years I developedthe quickest and easiest step bystep way to master the basics ofviolin playing.In this course I’ll help you in thebest way possible to get startedplaying the violin, but please know that it will take many years ofdaily practice, lessons, dedication, love and patience to learn to playthe violin beautifully. Enjoy this course!Love,PS: Questions? Post them in the comments underneath theapplicable video on YouTube right here.PPS: Click here for my recommendations for a decent andinexpensive beginner violin.www.violinlounge.com
Lesson 1: Violin Hold Hold the violin in front of you with the scroll to the leftLift the violin above your headPoint the scroll to the front leftSlide the violin with the chinrest side along your cheekPut the violin on your shoulderLet the violin rest in balance on your collarbone/chestwww.violinlounge.com
Extra tips: Don’t have the scroll too high like you are shooting birds in the air Don’t have the scroll too low like you are shooting mice on theground The violin rests 50% on your collar bone and 50% in your lefthand. You shouldn’t squeeze your violin with your chin andshoulder. The risk of injury is very high. Besides that it’s better foryour intonation (playing in tune) if your violin rests partially in yourleft hand. Your left wrist is straight and your left elbow points to the floor.Your left arm is relaxed and dangles under the violin. Experiment with different chinrests, shoulder rests, cushions ornothing at all to discover what is best for you. There’s no one stopsolution for everybody.www.violinlounge.com
Lesson 2: Bow HoldTips: all fingers round (curved) wrist and knuckles low (in a straight line from your arm)When you’re not playing, keep the bow up straight, so you don’tstrain your hand and fingers.www.violinlounge.com
Exercise 1: Build the bow hold1. Hold your bow with your left hand in the middle of the bowwithout touching the hair.2. Lay down right hand fingers over the bow with a relaxed andflexible feeling in your hand and fingers. Your thumb should notbe locked. Your thumb nail should point in the direction of the tipof the bow. The side of your thumb touches the bow between theleather and the frog.3. Hold your wrist and knuckles on the same height as the bowitself.4. Place the tip of your pinky on the bow. The pinky is curved. Theother fingers lay loosely on the bow.5. Slowly let go of the left hand and hold the bow with your righthand only.www.violinlounge.com
Exercise 2: Window wiperFor the following exercise you might want to hold the bow at thebalance point somewhere between the middle of the bow and thefrog. In this way you can focus on the movement without missingstrength and getting a tensed hand. As you progress, you can holdthe bow closer to the frog and eventually at the frog.Take the bow in the bow hold and move the bow like a windowswiper by pivoting your wrist.By giving your bow a push with your pinky, the bow swings to theright.By giving your bow a push with your index finger, the bow swingsback to the left to the starting position.Experience the ‘ping pong’-ing between your pinky and index finger.During the whole exercise the bow hold stays intact, but your fingersfunction as a spring system. The bow hold is not rigid, but yourfingers are flexible.www.violinlounge.com
Exercise 2: BridgeIn this exercise only your pinky is allowed to move (bendand stretch). If your other fingers, your hand or your wrist movealong, grap the palm of your hand and hold it during the exercise.By bending and stretching (never overstretch and/or lock your pinky),the tip of the bow slowly moves up and down just a couple of inches.It’s important to have a controlled and correct movement. This is notabout how fast, how many times and how far.www.violinlounge.com
Lesson 3: Smooth BowingTips: Use only the middle50% of the bow. Youcan place stickers ifyou find it hard tosee where that iswhile bowing. Keep your upperarm still Move your wrist andfingers, not only yourlower arm Practice in front ofthe mirror to see ifyou are bowingstraight between thebridge and thefingerboard Don’t play too fast,but look for a regularsound and a full tonein long notes Take a lot of breaks and shake your arms to keep relaxedProceed to the next lesson when: You can bow straight between the bridge and fingerboard with aregular sound without looking. It should go automatically and thattakes time. You have a regular beautiful sound on each string with almostseamless bow changes Your bow arm and movement is relaxed and you’re not muting thesound by tensionwww.violinlounge.com
Lesson 4: First Finger Make sure you place yourfinger firmly and confidentlyon the string Your index finger should beround when placed on thestring, so your finger tiptouches the string. Yourknuckles shouldn’t collapse. Listen to yourself are youplaying in tune? Keep your left wrist straight. The other fingers aredangling above the string likean umbrella.Exercise 10011110001011010www.violinlounge.com
Twinkle twinkle (partially) in 3 ways000011000001100000110Color codes for the stringsFrom low to high on the violin: G string is blue, D string is green, Astring is red and E string is yellow.Do you play the viola? C string is blue, G string is green, D string isred and A string is yellow.Tip: Don’t place stickers on yourfingerboard. Your ears won’t be trained andyou’ll never learn to play in tune. Use theD’Addario NS Micro Violin and Viola Tunerinstead. Click here to buy! Don’t use it allthe time, but take it off regularly to learn totrain and trust your earswww.violinlounge.com
Lesson 5: Whole BowTips: Practice in front of the mirror, because you can’tsee if you’re bowing straight when looking at theviolin Practice whole bows with stops in between Analyze what’s your personal bow hold at everymoment of the bow stroke Regular sound requires irregular bowing. Striveto a regular full and healthy tone all the time Make sure your bow hair is rosined everywhereto get a good sound with the whole bow Practice slowly with high qualityProceed to the next lesson when: You’re comfortable using the whole bow The movement of your bow arm, wrist andfingers smooth You don’t fear the frog ;) You can make a regular beautiful sound with thewhole bow One can’t hear the difference between your upbow and down bowDo you experience bow shakes or bounces?Work on relaxing your right shoulder, arm, wristand fingers. Practice with a lot of breaks and dosome relaxation exercises in between, which canbe as simple as just shaking out. Make yourmovements smooth and light. Do less instead ofmore. Don’t beat yourself up, but be curious forthe solution and practice with love and patience.www.violinlounge.com
Lesson 6: Second Finger Make sure to place yourfinger firmly and confidentlyon the string Place your finger curved andwith the cushion of your fingertip on the string When your second finger ison the string, also have yourfirst finger on the string in theright placeDo Re Mi012 210 201 120Father Jacob (partially)0120 0120Mary has a little Lamb2101222 111 2222101222 11 210www.violinlounge.com
Lesson 7: String CrossingSilent string crossingsLet the bow rest on the string (slightly above the middle of the bow)and cross from the G-string to the D-string, to the A-string, to the Estring and back again. Let the bow rest on the string with weight andwithout making a AADADAEAEEAEAwww.violinlounge.com
Lesson 8: Third Finger Your third finger should beplaced right next to thesecond finger As your second finger isround, your third finger canslide over to be placed on it’stip. Only in this way thedistance can be small enoughto play in tuneScalesG major one octave0123 01233210 3210D major one octave0123 01233210 3210A major one octave0123 01233210 3210www.violinlounge.com
Old MacDonald3330110 110030 3330110 1100300333 00333 333 333 333333 3330110 11003Twinkle Twinkle0000110 3322110003321 0033210000110 3322110www.violinlounge.com
Father Jacob0120 0120230 230010320 010320010 010Variation: Practice the above melodies starting on a different string!www.violinlounge.com
Lesson 9: Bow DivisionIf you’ve placed stickers on the bow to mark the middle 50%, it’s nowtime to remove them and just place one sticker right in the middle ofthe bow.For the long notes, use whole bow.For the short notes, use half the bow being either the lower half orthe upper half.Be very precise about the exact lower or upper half and don’t avoidthe extreme frog and tip.Long Long Short Short Short ShortPan-cakes ma-ple- sy-ropShort Short Short Short Long LongMa-ple- sy-rop pan-cakesLong Short Short Long Short ShortStraw-ber-ry Straw-ber-ryShort Short Long Short Short LongCin-na-mon Cin-na-monAt the frog at the tipwww.violinlounge.com
Lesson 10: Fourth Finger Place your finger slightlycurved by tilting your handtowards the neck of the violin Strengthen your pinky bytapping it on the string whilekeeping the other threefingers on the string Give your fourth finger someextra practice, as mostplayers find it the mostdifficult oneCheck the fourthfinger01234 001234 001234 0Pinky training012 34 34 34 3210www.violinlounge.com
Scales with the fourth fingerG major one octave (C major for viola)01234 1233210 3210D major one octave (G major for viola)01234 1233210 3210A major one octave (D major for viola)01234 1233210 3210Lightly Row422 311 0123 444422 311 024401111 123 2222 234422 311 02440www.violinlounge.com
Theme from Beethoven’s 9th Symphony2234 4321 0012 2112234 4321 0012 1001120 12320 12321 01112234 4321 0012 100Variation: Practice the above melodies starting on another string!Tip: Don’t place stickers on yourfingerboard. Your ears won’t be trained andyou’ll never learn to play in tune. Use theD’Addario NS Micro Violin and Viola Tunerinstead. Click here to buy! Don’t use it allthe time: take it off regularly to learn to trainand trust your ears.www.violinlounge.com
Scales with broken thirds (jumps)A third is a distance of two notes. A scale in broken thirds means youdon’t play these notes at the same time.On the way up you go two steps up and one step down.On the way down your go two steps down and one step up.These scales are good to practice for left hand finger independence.Only start practicing them when you really master the regular scales.G major one octave02132431021324342312013423120D major one octave02132431021324342312013423120A major one e.com
Woohoo, congrats on finishing this course!Thank you for following along!So what’s next?After the success of this short beginner course, I decided to continuethese free lessons teaching the violin from the European traditionwith scales, etudes, beautiful classical pieces and inspiring studentconcertos and concertinos.Sign up atwww.violinlessonsforfree.comto continue our lessons together!www.violinlounge.com
you're in the right place to learn the basics. My name is Zlata Brouwer, violin teacher specialized in bowing technique and creator of Violin Lounge TV and Bow like a Pro. In my private violin studio in Holland I've taught beginner students of all ages and backgrounds for over ten years. During these years I developed