Transcription
STEMLESS
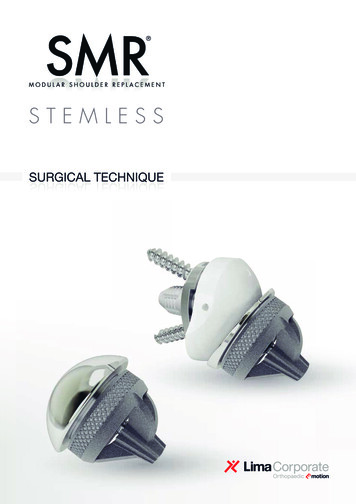
SMR STEMLESS SURGICAL TECHNIQUEIndexIndications, Contraindications, Warnings and Risk Factorspag. 4Introductionpag. 7Humerus Preparationpag. 10Final Implant Insertionpag. 18Anatomical Prosthesispag. 19CTA Heads Usepag. 21Reverse Prosthesispag. 22Components Removalpag. 23Conversion from Anatomical to Reversepag. 25PRODUCT COMBINATIONpag. 28INSTRUMENT SETpag. 29PRODUCT CODESpag. 33SMR STEMLESS SURGICAL TECHNIQUELimacorporate spa is a manufacturer of prosthetic implants and as such does not perform medical procedures.This documentation concerning surgical techniques, which provides surgeons with general guidelinesfor implanting the SMR STEMLESS, was developed with the advice of a team of surgical experts.All decisions as to the type of surgery and most suitable technique are obviously the responsibility of thehealth care professional. Surgeons must make their own decisions as to the adequacy of each plannedimplant technique based on their training, experience and the clinical condition of the patient.LEONARDO DA VINCI: Vitruvian Man. Study of the proportions of the human body (1490).SMR STEMLESS Surgical Technique3
SMR STEMLESS SURGICAL TECHNIQUEIndications, Contraindications, Warnings and Risk Factors INDICATIONSThe SMR Stemless system is intended for partial or total,The patient’s joint must be anatomically and structurallyprimary or revision shoulder joint replacement. Revisionsuited to receive the selected implants and a functionalsurgery is intended only where the Stemless Core is stable,deltoid muscle is necessary to use the device.well positioned and osseointegrated and it is intended inThe SMR Stemless system allows the assembly ofcase of: failed SMR Stemless primary implant with an anatomiccomponents in various humeral and glenoid constructs.implantThe constructs are intended for cemented (only glenoids) orconversion from SMR Stemless anatomic to SMR uncemented use as specified in the following table.Stemless reverse or CTA conversion from SMR Stemless reverse to SMR In the Anatomic shoulder the humeral construct consistsStemless CTAof the stemless core and the humeral head adaptor fromfailed SMR Resurfacing implant.the SMR Stemless system coupled to SMR Shoulder Other revisions of the humeral prosthesis part should beSystem humeral heads. In the Reverse shoulder the humeraltreated with traditional shoulder prostheses.construct consists of the stemless core and the reverse liner.The SMR Stemless Anatomic is indicated for partial or total,The glenoid construct, anatomic or reverse uses SMR primary or revision shoulder joint replacement in patientsShoulder System components. The Anatomic glenoidsuffering from disability due to:construct consists of an all polyethylene glenoid or a metal non-inflammatory degenerative joint disease includingback assembled with a liner while the Reverse glenoidosteoarthritis and avascular necrosis;construct consists of the metal back, the connector andinflammatory degenerative joint disease such asthe glenosphere. On the glenoid side, the fixation of the allrheumatoid arthritis;polyethylene glenoid or the metal back determines if the revision of a failed SMR Resurfacing implant; cuff tear arthropathy (CTA Heads only). The SMR Stemless Reverse is indicated for primary orrevision total shoulder replacement in a grossly rotator cuffdeficient joint with severe arthropathy (disabled shoulder).Is also indicated in case of revision of a failed SMR Stemlessprimary implant with conversion from anatomic to reverse.4Surgical Technique SMR STEMLESSconstruct is cemented or uncemented.
SMR STEMLESS SURGICAL TECHNIQUEIndications, Contraindications, Warnings and Risk FactorsS y st e mU seAnatomicRe v e r s e Com pon en t sMat er i alC emSMRS t e m le s s CoreTi6Al4VXSMR S t e m le s s Hum e r a l He a d A d ap t o r sTi6Al4VXSMR S t e m le s s R e v e r s e Line r sC o C r MoXC o C r Mo *XXT i 6 A l 4VXXS M R Hum e r a l He a ds (S t a ndard , C TA ) U H MW P E X - L i ma S M R Gle nos phe re s S M R Conne c t or sTi6Al4V S M R Ce m e nt e d Gle noidsU H MW P EX S M R 3 P e gs Ce m e nt e d Gle n o i d sU H MW P E X - L i maXT i 6 A l 4V P o r oT iX Not Cem X Ti6Al4VXXS M R M e t a l B a c k Gle noidsT i 6 A l 4V P o r oT i H AX S M R TT M e t a l B a c k B a s e plat esTi6Al4VX S M R TT M e t a l B a c k P e gTi6Al4VXSMR M e t a l B a c k Line rU H MW P E SMR B one s c re wsT i 6 A l 4VX SMR Gle noid P la t e sTiX XXNote: SMR shoulder system CoCrMo Humeral Heads size 38 mm are not allowed to be coupled to SMR Stemless Core andHumeral Head Adaptor. The CTA head must be used only in case of good stability of the Stemless Core. If the CTA Head has to be used, make surethat an Eccentric Adaptor is used (the coupling with the Concentric Adaptor is not allowed) and that the eccentricity is in thecranial direction only.SMR STEMLESS Surgical Technique5
SMR STEMLESS SURGICAL TECHNIQUEIndications, Contraindications, Warnings and Risk Factors WARNINGSPlease follow the instructions for useenclosed in the product packaging.Relative contraindications include: humeral head fracture sequelae; vascular or nerve diseases affecting the concerned limb; metabolic disorders which may impair fixation andstability of the implant;In selecting patients for surgery, the following factors can be critical to the eventual success of the procedure:any concomitant disease and dependence that mightaffect the implanted prosthesis; Partial Shoulder replacement: in cases of a deficient and metal hypersensitivity to implant materials;unreconstructable rotator cuff, a CTA-head is indicated; patient with renal impairment (CoCrMo) Total Shoulder replacement: the rotator cuff must befunctional, intact or reconstructable. In cases of a deficient RISK FACTORSand unreconstructable rotator cuff, a hemiprosthesis witha CTA head or a Reverse Total Shoulder Arthroplasty isThe following risk factors may result in poor results with thisindicated;prosthesis: Reverse Shoulder replacement: the bone stock of overweight;the glenoid and humerus must be able to support the strenuous physical activities (active sports,heavy physical work);implant. In cases of significant bone loss or in whichadequate fixation on the glenoid side cannot be obtained, fretting of modular junctions;a hemiarthroplasty with a CTA-head should be performed. incorrect implant positioning; muscle deficiencies;Note. For SMR Shoulder System components refer to the multiple joint disabilities;proper Instructions for Use leaflet. refusal to modify postoperative physical activities; patient history of infections or falls; systemic diseases and metabolic disorders; local or disseminated neoplastic diseases; drug therapies that adversely affect bone quality, CONTRAINDICATIONSAbsolute contraindications include: local or systemic general infection; septicaemia; drug use or alcoholism; persistent acute or chronic local or systemic osteomyelitis; marked osteoporosis or osteomalacia; neurologically confirmed nerve lesion compromising patient’s resistance to disease generally weakened (HIV,shoulder joint function;tumour, infections); deltoid muscle insufficiency in case of reverse prosthesis; poor meta-epiphyseal bone stock compromising stabilityimproper positioning of implants;of the implant (acute fracture of the humeral head, meta- epiphyseal pseudoarthrosis, osteoporosis, extendedinstruments of another manufacturer.bone loss after previous prosthetic or non-prostheticsurgery); 6tumor.Surgical Technique SMR STEMLESShealing, or resistance to infection;severe deformity leading to impaired anchorage oruse or combination with products, prosthesis or
SMR STEMLESS SURGICAL TECHNIQUEIntroduction PREOPERATIVE PLANNINGRequested surgical positioning (beach chair position) mustbe accurately followed by the anaesthetic staff to avoidStandard X-Rays are used to assist with planning of thehypotension and consecutive brain hypoperfusion.operation. It is recommended to use a normal AP-view ininternal and external rotation as well as an axillary view,Postoperative analgesia is important and can be performedBernageau or Morrison view. It is recommended to use aby intravenous, single injection or “on demand” applicationCT-Scan in fractures cases and for planning of the glenoidof analgesics. Patient-controlled analgesia (PCA) isinsertion.recommended.If required an MRI can be used for clear examination ofthe extent of the bone deficiency and to see the muscle/ POSITIONINGcapsule quality.In post-traumatic cases, such as in special cases ofShoulder arthroplasty is normally performed in a “beach-disabling shoulder, a neurological exam is helpful forchair” position; the surgeon needs complete access to thedecision making.shoulder joint. The arm is free or stabilized by arm-holders.Templates are used in all osteoarthritic cases; they canThe shoulder must be positioned off the edge of the tablealso be used in fracture cases but often in a limited mode,to afford unobstructed arm extension.depending on the type of fracture.The X-Ray templates provided for SMR have a 105%The patient’s head must be supported and stabilized in thescale; digital templates are available as well.neutral position. Nerve injury due to brachial plexus tractionduring positioning and surgery must be avoided. ANAESTHESIAIf possible, one assistant should stay behind the shoulder,the second on the opposite side of the patient, so that theUnderstanding of the surgery and participation by thesurgeon has a complete anterior view of the shoulder andanaesthesiologist is especially important for the outcome ofcan move the joint without any obstacle.the surgery. This applies to accurate preoperative evaluationof the patient as well as intra op techniques.They should have a good understanding of positioning onthe operating table and postoperative pain management.Shoulder prosthetic replacement can be performed withregional (scalenus) anaesthesia combined with sedationand/or with general anaesthesia.The modern technique of interscalenic block was introducedby Winnie in 1970 and soon became the standard foranaesthesia and postoperative pain management inshoulder surgery.SMR STEMLESS Surgical Technique7
SMR STEMLESS SURGICAL TECHNIQUEIntroduction ACCESSclavipectoral fascia incised, a retractor can easily be placedover the superolateral aspect of the humeral head to retractWe recommend two types of surgical approaches to thethe deltoid. The conjoined tendon is retracted medially.shoulder joint. As in every surgical procedure, the accessThe musculocutaneous nerve penetrates the lateraldepends not only on diagnosis and planned surgicalcoracobrachialis muscle 3 to 8 cm distally of the tip of thetreatment but also on the experience of the surgeon.coracoid process. The position of the axillary nerve shouldbe indentified along the anterior surface of the subscapularisRanges of glenohumeral motion are evaluated with themuscle, below the conjoined tendon. The axillary nervepatient under anaesthesia to confirm the preoperativecrosses the inferolateral border of the subscapularis 3 to 5assessment and the extent of capsular release needed tomm medially of its musculotendinous junction and has anrestore the ROM postoperatively.intimate anatomic relation with the inferior capsule of theshoulder joint.DELTO-PECTORAL APPROACHThe anterior humeral circumflex artery and veins arevisualized, ligated and divided.The subscapularis tendon is released, divided 1 cmmedially to its attachment or with some bone chip of thelesser tuberosity. Separation of the subscapularis from thecapsule and incision of the capsule is performed to theinferior border of the glenoid rim, protecting the axillarynerve with a blunt retractor. Release of the subscapularisand 360 capsular release.Closure. In fracture cases, accurate reconstruction of theminor and major tubercles by suture, bone anchors orcerclage is mandatory.If the long head of the biceps tendon is intact, reconstructalso the biceps groove to avoid impingement. Closure ofdelto-pectoral groove.Anterior vertical incision, starting 1 cm laterally of thecoracoid bone, slanting towards the axillary’s pouch.If there is a metaphysal fracture, slanting laterally towardsthe deltoid insertion at the humerus. The cephalic vein isretracted laterally with the deltoid muscle.The clavipectoralfascia is incised along the lateral edge of the conjoinedtendon up to the coracoacromial ligament. With the8Surgical Technique SMR STEMLESS
SMR STEMLESS SURGICAL TECHNIQUEIntroductionANTERO-LATERAL (DELTOID SPLITTING)APPROACHBegin the incision at the anterolateral tip of the acromionand carry it distally over the deltoid muscle about 5 cm.Define the tendinous interval on 4 to 5 cm between theanterior and middle thirds of the deltoid; splitting themuscle here provides an avascular approach to underlyingstructures.Incise the thin wall of the subdeltoid bursa and explorethe rotator cuff as desired by rotating and abducting thearm to bring different parts of it into view.SMR STEMLESS Surgical Technique9
SMR STEMLESS SURGICAL TECHNIQUEHumerus PreparationX-SmallSmallMediumLargeFigure 1Figure 2 FOREWORDHUMERAL HEAD RESECTIONPre-operative planning is highly recommended with the useTwo humeral head resection techniques are possible withof templates showing a 5% enlarged image of the profiles.the SMR Stemless instrumentation: a cut using the externalNormally standard AP and Axial view of the shoulderjig and a resection technique using the intramedullary guide.joint are used; in some cases, a preoperative CT-Scan isThe choice is left to the surgeon according to the clinicalrecommended to perform a more accurate planning. Selectcase.the core size and resection level of the humeral head, whichwill serve as a reference for the final implant height.HUMERAL HEAD RESECTION USING THEEXTERNAL JIGThe SMR Stemless prosthesis can be implanted with one 10of the usual approaches:Take from the instrument set the cutting template (I57); delto-pectoralscrew the alignment rod (E57) (Figure 1) in the chosen antero-lateral (deltoid splitting)retroversion hole (0 , 20 and 30 positions are available).The surgical technique described hereafter referes to theThe cutting template can be used for a first evaluation of thedelto-pectoral approach.Core size (X-Small, Small, Medium and Large) (Figure 2).Surgical Technique SMR STEMLESS
SMR STEMLESS SURGICAL TECHNIQUEHumerus PreparationFigure 3Figure 4Place the cutting template onto the humerus (Figure 3)and align the alignment rod with the forearm flexed at 90 ,finally fix the cutting template using the Ø 3 mm pins (T57)included into the instrument set (Figure 4).The humeral head should be resected exactly at the levelof the anatomical neck. Perform the head resection with anoscillating saw.SMR STEMLESS Surgical Technique11
SMR STEMLESS SURGICAL TECHNIQUEHumerus PreparationGuide forresection jigAnatomicresection jigFigure 7Figure 5Figure 6HUMERAL HEAD RESECTION USING THEConnect the alignment rod (E57) to the assembly on theINTRAMEDULLARY GUIDELEFT or the RIGHT hole of the delto-pectoral (DP) sideto obtain the chosen retroversion angle (0 , 20 and 30 Open the proximal end of the humerus with the awl (F57)positions are available).connected to the T-handle with AO connection (V57)(Figure 5). Connect the Ø 6 mm pin (G57) to the T-handleConnect finally the assembly to the 6 mm pin according towith AO connection (V57) and attach the cutting jigthe side that is being operated. For a left shoulder, the markconnector (H57) (Figure 6), finally insert the assembly intoLEFT shall be frontally visible on the guide and viceversa thethe humerus.mark RIGHT for a right shoulder.Prepare the anatomic resection jig (C57) by properlyconnecting it to the guide for resection jig (B57) (Figure 7).12Surgical Technique SMR STEMLESS
SMR STEMLESS SURGICAL TECHNIQUEHumerus PreparationThreaded rodFigure 8Figure 9RETROVERSIONKeeping the forearm flexed at 90 , rotate the resectionguide until the alignment rod (E57) and the forearm areparallel (Figure 8). Then fix the selected retroversion byscrewing the threaded rod (Figure 9).A resection with the chosen retroversion will then beperformed in this position. If less or more retroversion isrequired, the rod should be externally or internally rotatedrespectively.SMR STEMLESS Surgical Technique13
SMR STEMLESS SURGICAL TECHNIQUEHumerus PreparationFigure 10Figure 11Figure 12Figure 13HEAD RESECTIONAdjust the height of the resection jig level until it is alignedOnce the jig is secured to the humerus with the pins,with the anatomic neck.remove the guide by releasing the red lever and slidingTurn clockwise or counter-clockwise the red knob to moveupwards the guide for resection jig (Figure 12). Next,the jig upwards or downwards respectively (Figure 10).remove the central Ø 6 mm pin from the humeral canal,leaving only the jig onto the humerus.Use the sickle (D57) to assess the resection height andResect the humeral head with a blade through the guidedsecure the guide to the humerus with the Ø 3 mm pins (T57)slot of the jig (Figure 13); finally, remove the pins and the jig.(Figure 11) once the selected height is reached.14Surgical Technique SMR STEMLESS
SMR STEMLESS SURGICAL TECHNIQUEHumerus PreparationFigure 14Figure 15Figure 16 DETERMINATION OF THE STEMLESSCORE SIZEThe instruments feature color coding to support theInsert the Ø 3 mm K-wire (N57) using the centering devicesurgical team using the system. The color code is yellow foras a guide tiil fixing the controlateral cortex (Figure 16).the Small size, orange for the Medium size and purple forthe Large size. In case of X-Small size no color is applied.The K-wire centering sleeve has grooves with the sameDetermine the size of the Stemless Core using the sizerscolor code as per the Core sizes; the K-wire has a laser(L57). Connect the sizer (X-Small, Small, Medium or Large)mark in order to allow the identification of the proper Coreto the K-wire centering sleeve (M57) (Figure 14) and placesize in function of the humerus depth. If the laser mark is atthem over the resected surface (Figure 15).the same level of the groove of the chosen size or above,use the Short Core. Otherwise implant the standard Core.To determine the size, the outer ring of the sizer should beThen remove the components leaving the K-wire in place.centric to the resected humeral surface without involvingthe cortex.SMR STEMLESS Surgical Technique15
SMR STEMLESS SURGICAL TECHNIQUEHumerus PreparationFigure 17Figure 20Figure 21Figure 18Note the position of the compactor’ finsin order to reproduce it with the finalimplantFigure 19Figure 22 HUMERUS REAMINGcorrespondence to the greater tuberosity, in order toAssemble the reamer (P57) of the selected size with theprevent humerus breackages or nerve damages.reamer shaft (O57) by pulling the red part of the handleThe marking L (left) or R (right), corresponding to the shoulder(Figure 17) and ream the metaphysis using the K-wireside that is being operated, should be placed in superolateralas a guide. Ream carefully in order to prevent humerusposition. Impact the compactor into the bone using the K-wirebreakages.as a guide (Figure 21). Note the position of the compactor’ finsThe reaming is completed once the collar of the reamerin order to reproduce it with the final implant (Figure 22) bysits flush with the resected surface (Figure 18). Remove theusing the R and L reference of the introducer as guide.reamer leaving the K-wire in place.Stop impacting when the introducer sits flush within thePrepare the seat for the Stemless Core’s fins using theprepared area. Remove the compactor by tapping it out usingcompactor (S57). First insert the introducer (R57, X-Small,the positioning handle.Small, Medium or Large) onto the positioning handle (Q57)16(Figure 19), then attach the appropriate size compactor (S57)Note. Be aware high impact force may cause breakage to theonto it by screwing (Figure 20). Aling the R and L marks ofhumerus. The compactor can be used as a trial core. In thisthe introducer with the Rigth and Left fins of the compactor.situation, unscrew the compactor handle, remove the K-wireThe curved fins of the compactor have to be placed inand perform the trial reduction as described on page 19.Surgical Technique SMR STEMLESS
SMR STEMLESS SURGICAL TECHNIQUEHumerus PreparationFigure 24Figure 23 HUMERAL COVER USETo prevent humerus damages or breakages during theThe humeral cover have been developed in order to allowglenoid preparation, humeral covers are provided into thethe use in both the following cases:SMR Stemless General Set. The humeral covers (K57) are available in three sizes after resection of the humeral head: the cover is(Small, Medium and Large) in order to fit with the humerusplaced on the resected surface and the fixation isdimensions; please note that they are not related to theobtained by means of the spikes.Core sizes. with compactor (S57) or Stemless Core in situ: connectthe humeral cover adaptor (J57) to the humeral coverand then place it into the compactor or the StemlessCore (Figure 23).The connection/disconnection of the humeral coveradaptor to/from the humeral cover is obtained by means ofthe extracting pliers for reverse trial liners (J58), (Figure 24).SMR STEMLESS Surgical Technique17
SMR STEMLESS SURGICAL TECHNIQUEFinal Implant InsertionFigure 26Figure 25 FINAL IMPLANT INSERTIONRemove the Stemless Core of the chosen size fromsterile packaging and impact it into the humerus cavityusing the positioning handle (Q57) and the introducer(R57) (Figure 25).Place the Stemless Core in the same position as thecompactor taking the laser marks as a reference (Figure 26);use the R and L reference of the introducer as a guide forproper positioning.If a total replacement (anatomical or reverse) has to beperformed, proceed with the glenoid preparation asdescribed in the SMR Primary Implant surgical technique.18Surgical Technique SMR STEMLESS
SMR STEMLESS SURGICAL TECHNIQUEAnatomical ProsthesisFigure 27Figure 29Figure 30Figure 28 TRIAL REDUCTIONThe head diameter is determined using the head gaugeTo remove trial adaptors from the trial humeral head use the(A57) (Figure 27).extracting pliers for trial adaptors (O58) (Figure 30).If an eccentric adaptor is used, mark the position of the trialInsert the connector for trial head adaptors (D58) into theadaptor with an electric scalpel, using the direction point as aStemless Core by aligning the grooves to the core laserreference (Figure 31). This procedure helps to place the finalmarking (Figure 28). Apply the trial neutral adaptor (C58) tohead in the correct position.the trial humeral head (B58) by hand and fit the head to thestemless connector (Figure 29). Reduce the joint and checkthe match with the glenoid.If it is not well aligned with the glenoid cavity, substitute theIn case of eccentricadaptor note this positionneutral trial adaptor with an eccentric one (2 mm and 4 mmare available).Figure 31SMR STEMLESS Surgical Technique19
SMR STEMLESS SURGICAL TECHNIQUEAnatomical ProsthesisReproduce the positionFigure 32Figure 33Figure 34Figure 36Counter torqueMultipurpose handleFigure 37Figure 35 INSERTION OF THE DEFINITIVECOMPONENTSRemove the appropriate final adaptor taper and final headApply the definitive humeral head to the adaptor taperfrom the sterile packaging. Apply the adaptor taper to the(Figure 36) and secure the coupling by tapping with theStemless Core (Figure 32). If an eccentric adaptor taperhumeral head impactor (A58) (Figure 37). The head shouldis used, insert it by aligning the marking with the previoussit flush on the osteotomy plane.marked reference (Figure 33).Make sure that the contact surfaces are perfectly cleanA safety screw is used to secure the coupling between theand that the head or adaptor does not contact the bone,adaptor taper and the Stemless Core (Figure 34). Tightenas this could compromise the stability of the Morse taperthe screw using the 3.5 mm allen wrench (G58) with thecoupling.T-handle with Zimmer connection (U57) and the countertorque (F58) attached to the multipurpose handle (P58) inorder to prevent load transmission (Figure 35).20Surgical Technique SMR STEMLESSFinally reduce the shoulder joint.
SMR STEMLESS SURGICAL TECHNIQUECTA Heads UseFigure 38 CTA HEADS USEThe clinical indication for prosthetic treatment with CTAadaptor (D58) and the trial adaptor taper ecc. 2 mm orheads is secondary osteoarthritis by cuff tear arthropathy.ecc. 4 mm (C58). Use the slots of trial head as referenceto evaluate the area of the greater tuberosity where theNote: In case of Stemless prosthesis the CTA head mustbone has to be removed to host the CTA heads (Figure 38).be used only in case of good stability of the Stemless Core.If the CTA Head has to be used, make sure that an EccentricUse the trial CTA heads (B9) with the trial adaptor taper ecc.Adaptor is used (the coupling with the Concentric Adaptor2 mm or ecc. 4 mm (C58) to properly assess the preparedis not allowed) and that the eccentricity is in the cranialseat. Refine the seat if required until perfect seat of the trialdirection only.CTA Head is achieved prior to implant the final CTA Head.To prepare the seat for the CTA Head, connect the trialhumeral head dia. 40 mm (B58, in case of dia. 42 and46 mm definitive CTA Head) or dia. 46 mm (B58, in caseof dia. 50 and 54 mm definitive CTA Head) to the StemlessCore by means of the dedicated connector for trialSMR STEMLESS Surgical Technique21
SMR STEMLESS SURGICAL TECHNIQUEReverse ProsthesisFigure 39Figure 41Align this groove with theStemless Core marking L or RFigure 40Figure 42Important! In the reverse configuration, the SMR Reduce the implant to verify the shoulder tensioning andStemless is intended for use only with 40 mm or 44 mmaddress any laxity by replacing with the next liner size. Toglenospheres.remove and replace the trial reverse liner use the extractingpliers for reverse liners (J58) (Figure 41). TRIAL REDUCTION INSERTION OF THE DEFINITIVEThe trial components feature color coding to support theCOMPONENTsurgical team using the system. The color code for the40 mm components is blue and for the 44 mm ones isOpen the packaging of the reverse liner that was selectedgreen.during the trial reduction. Clean the Stemless Core andimpact the liner by means of the cemented glenoid impactorChoose the trial reverse liner (K58) according to the(E3) (Figure 42). To allow an easier positioning of the polyimplanted 40 mm or 44 mm glenosphere and insert it into theglenosphere, the Dia.40-44 mm glenosphere orienters-Stemless Core (Figure 39). Align the groove of the liner withLeft and Right (N58) have been introduced. They allow thethe Stemless Core marking L (Left) or R (Right) according toorientation of the glenosphere and its introduction by meansthe shoulder side that is being operated (Figure 40).of the glenosphere impactor-extractor (M58).Finally reduce the shoulder joint.22Surgical Technique SMR STEMLESS
SMR STEMLESS SURGICAL TECHNIQUEComponents RemovalFigure 44Figure 43 HUMERAL HEAD REMOVALFigure 45 REVERSE LINER REMOVALTo remove the humeral head, slide the extractor (L58)To remove the reverse liner from the Stemless Core, slidebetween the collar of the Stemless Core and the undersurfacethe extractor (L58) between the collar of the Stemless Coreof the humeral head. Firmly tap the end of the instrument toand the undersurface of the liner. Firmly tap the end of theloosen the head.instrument to loosen the liner (Figure 45).By means of the 3.5 mm allen wrench (G58) plus T-handlewith Zimmer connection (U57) remove the safety screwinside the adaptor whilst using the counter torque (F58) andthe multipurpose handle (P58) to prevent load transmission(Figure 43).Afterwards insert the humeral head adaptors extractor(E58) attached to the T-handle (U57) into the counter torque(F58) (Figure 44). Tighten the extractor until the disassemblyoperation has been completed.SMR STEMLESS Surgical Technique23
SMR STEMLESS SURGICAL TECHNIQUEComponents RemovalFigure 46Figure 47 STEMLESS CORE REMOVALIf necessary to remove the Stemless Core, screw the stopperIntroduce the reamer onto the stopper and proceed tofor removal reamer (H58) into the Stemless Core (Figure 46).remove the Stemless Core (Figure 47).Select the Stemless Core removal reamer (I58, X-Small,Small, Medium or Large) according to the implant size andattach it to the T-handle with Zimmer connection (U57).24Surgical Technique SMR STEMLESS
SMR STEMLESS SURGICAL TECHNIQUEConversion from Anatomical to ReverseFigure 49Figure 48Figure 50 CONVERSION FROM ANATOMICALTO REVERSEINSERTION OF TRIAL COMPONENTSApply the trial 40 or 44 mm glenosphere (E42 or F42) andposition it near the glenoid Metal Back (Fig. 49) using theNote: the conversion of the implant must be performed onlytrial glenosphere positioner (H42). Slide the trial glenospherein case of good stability of the implanted Stemless Core.screw (C42 or D42) through the central hole and tighten untilreaching the end stop.REMOVAL OF THE HUMERAL HEAD AND ADAPTORIf necessary, the system allows a corrective version of the44 mm diameter size with a 4 mm eccentric component.Remove the humeral head and the adaptor as describedMaintain the eccentricity of the component in one of theon page 23 of the present surgical technique.bottom quadrants of the glenoid and tighten the module inIf no metal back glenoid has been implanted previously,the same way as for the concentrical 44 mm glenosphere.proceed with the glenoid preparation as described in theSMR Primary Implant surgical technique.Expose the humerus, choose the trial reverse liner (K58)according to the implanted 40 mm or 44 mm glenospherePREVIOUS METAL BACK GLENOIDand insert it into the Stemless Core as described on page22 of the present document (Figure 50).Remove the polyethyle
SMR STEMLESS Surgical Technique 5 SMR STEMLESS SURGICAL TECHNIQUE Indications, Contraindications, Warnings and Risk Factors System Use Anatomic Reverse Components Material Cem Not Cem SMR Stemless Core Ti6Al4V X SMR Stemless Humeral Head Adaptors Ti6Al4V X SMR Stemless Reverse Liners CoCrMo X SMR Humeral Heads (Standard, CTA) .
