Transcription
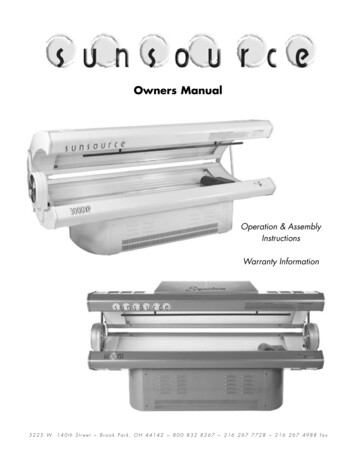
Owners ManualOperation & AssemblyInstructionsWarranty Information5 2 2 5 W. 1 4 0 t h S t r e e t B r o o k P a r k , O H 4 4 1 4 2 8 0 0 8 3 2 8 2 6 7 2 1 6 2 6 7 7 7 2 8 2 1 6 2 6 7 4 9 8 8 f a x
International Tanning Technologies1-800-832-8267XP Models100WSunsource This product is in conformity with the performance standard for sunlamp products under 21CFR part 1040.20. This product is compliant with standards UL 482,7th edition UL 1598, 4th edition, and CAN/CSA-C22.23 YEAR LIMITED WARRANTYInternational Tanning Technologies, Inc., warrants to the original purchaser, that the Sunsource indoorsuntanning products (hereafter referred to as the “product”) to be free of defects in workmanship and materialsfor a period of three years from the date of purchase from International Tanning Technologies Inc., its’ franchisesand authorized distributors. Warranty excludes pistons and acrylics which are warranted for a period of 90days from the date of purchase. Tanning lamps are warranted by the manufacturer of the lamp itself for aperiod of 30 days. Within this period we will replace or repair, at our option, the product or any part or partswithout charge for materials. Labor will be rendered at no charge for a period of 90 days from the date ofpurchase. This warranty does not cover transportation and or shipping costs. This warranty does not cover anyproduct or part thereof subjected to misuse, abuse, accidental or intentional damage or improper maintenance,alteration or where replacement parts not expressly authorized by International Tanning Technologies, Inc. areutilized except as expressly stated herein.This limited warranty is in lieu of any other warranties expressed or implied including any impliedwarranties of merchant ability or fitness; International Tanning Technologies Inc., or its’ authorized distributorsshall not be liable to purchaser or any user of the product for any injuries to person or property caused directlyor indirectly by the product or any part or component thereof.Purchaser remedies shall be limited to the remedies provided in this limited warranty and shall in noevent include any incidental, indirect, special, or consequential damages or loss of use, revenue,or profit even if International Tanning Technologies Inc. has been advised of the possibility of suchdamages.In the event of a claim under this limited warranty, purchaser shall contact International TanningTechnologies in writing or by phone at 1-800-832-8267, or your authorized Sunsource distributor within thewarranty period. In the event International Tanning Technologies Inc. or its’ authorized distributor determine theproduct or any part thereof requires repair or replacement, purchaser shall be directed to where the product orany part thereof should be shipped for repair or replacement as provided hereunder.Some states do not permit limitation or exclusion of implied warranties; therefore the limitation orexclusions set forth above may not apply to purchaser. This warranty gives specific legal rights and purchasermay also have other rights which may vary from state to state.2
WARNINGDANGER! ULTRAVIOLET RADIATIONIf you have been diagnosed by a physician as being allergic to the sun or are currently taking any photosensitivemedications; consult your physician before using this product.This tanning system is designed for use by one person at a time. Always use the protective eyeware that is providedwhen tanning.International Tanning Technologies strongly discourages the use of this product by pregnant women. Although there isno evidence of direct harm caused by UVA/UVB exposure to the women or unborn child, a tanning bed does, however;generate a great deal of heat that may raise your core body temperature.FOLLOW INSTRUCTIONS. Avoid overexposure, as with natural sunlight, overexposure can cause eye and skin injuryand allergic reactions. Repeated overexposure may cause premature aging of skin and skin cancer. WEAR PROTECTIVEEYEWARE. FAILURE TO DO SO MAY RESULT IN SEVERE BURNS OR LONG TERM INJURY TO THE EYES. Medications orcosmetics may increase your sensitivity to the ultraviolet radiation. Consult a physician before using a sunlamp if you areusing medications or have a history of skin problems or believe yourself to be especially sensitive to sunlight. If you do nottan in the sun you are unlikely to tan from the use of this product. Minimum use distance is 1 inch or 2.54 centimeters.Tanning may appear after one application provided your skin is capable of developing a suntan. Allow 48 hours betweensessions to obtain a base tan. Use once 10 MINUTEEMAXIMUM EXPOSURE TIME IN MINUTESRECOMMENDED EXPOSURE SCHEDULEor twice a week to maintain appearWeek 1Week 2Week 3Week 4 Maximumance. ONLY THE INDICATED LAMPSSkin Type10th-12th Subsequent1st-3rd4th-6th7th-9thHAVE BEEN CERTIFIED FOR USE INsessionssessionssessionssessions sessionsTHE SPECIFIED EQUIPMENT. TheseBurns easily and severelySensitive SkinNot Recommended for tanningproducts are in conformity with perform- Idoes not tan.ance standards for sunlamp productsBurns easily and tans246810Light SkinIIunder 21 CFR part 1040.20.minimally.Recommended eyeware provided eyeBurns moderately and tansIIINormal Skin3681010shields (Lucas products corp., Supermoderately.Sunnies) or equivalent eyeware asBurns minimally and tansdefined under 21 CFR 1040.20 2IVDark Skin5791010above average.(b)(6). One pair of protective eyewareRarely burns, tans easily andis furnished with this equipment andVVery Dark Skin6891010substanually.should be worn by all person in theroom when lamps are on.15 MINUTEEDISCONNECT POWER CORD BEFORE RECOMMENDED EXPOSURE SCHEDULEMAXIMUM EXPOSURE TIME IN MINUTESATTEMPTING TO CLEAN, RELAMP, ORWeek 3Week 1Week 2Week 4 MaximumENGAGE IN THE MAINTENANCE OF10th-12th Subsequent1st-3rd4th-6th7th-9thSkin Typesessions sessionssessionssessionssessionsTHIS PRODUCT.Burns easily and severelyWARNING: Read the instruction book- ISensitive SkinNot Recommended for tanningdoes not tan.let before using lamps. When using thisBurns easily and tansbed lie down on the bench and pull2491515Light SkinIIminimally.canopy down until it will move no farther. Operation of this device belowBurns moderately and tansIIINormal Skin46121515moderately.recommended minimum distance for usemay result in overexposure.Burns minimally and tansSKIN TYPESDetermine skin type by the following information:Skin Type 1: always burns easily and severely, then peels- never tans very fair skin, red or blond hair & freckles(unexposed skin is white)Skin Type 2: burn easily, tans minimally or lightly and peels, usually fair skinned (unexposed skin is white)Skin Type 3: burn moderately, tans eventually (unexposed skin is white)Skin Type 4: burns minimally, always tans well (unexposed skin is white)Skin Type 5: rarely burns, always tans readily (unexposed skin is brown)CAUTION: SOME AREAS OF SKIN MAY NOT HAVE EVER BEEN EXPOSED TO NATURAL SUNLIGHT, THESE AREASWILL BE VERY SENSITIVE AND WILL BURN VERY EASILY. CARE SHOULD BE TAKEN TO AVOID OVEREXPOSURE TOTHESE AREAS, REGARDLESS OF SKIN TYPE.Determine your skin type and refer to the exposure schedule on the following page. Be patient with your tanningresults and NEVER tan more than once in a 24 hour period.Use only a quality tanning lotion that has been marked for indoor use. Some lotions may contain ingredients that willcloud or damage the acrylic sheet, these must be avoided.UNIT SPECIFICATIONSLength: 84” overallWidth: 38.5”Weight: 3000XP-4001bs. 4000XP-415 Ibs. 5000XP-425 Ibs.Room dimensions (minimum) 8’x8’NOTE: Smaller rooms may be used as long as there is adequate ventilation for the unit. Higher temperatures will result inshortened lamp life and possible component failure.Electrical:220-235VAC, 220 Volt, 3 wire (2 hot, 1 ground)Receptacle:USE ONLY NEMA 6-20R, or NEMA 6-30RAmperage:3000XP-14 amp draw, 20 amp double pole breaker4000XP-16 amp draw, 20 amp double pole breaker5000XP-18 amp draw, 30 amp double pole breakerNOTE: If actual voltage is not between 220-235 VAC, you will need a buck boost transformer to correct the deficiency inyour incoming power. Failure to do so will create undue stress on your unit and will void warranty.320 MINUTE BED LAMPSWolff System Everglo/100w,Cosmedico Goldarium S Plus 100w,Cosmedic VLR 100w, CosmedicoCosmostar S 100w, Light SourcesMidday Sun 5.0/100W, LightSources Dual Sun 100w or FDAequivalent.15 MINUTE BED LAMPSLight Sources Midday Sun Reflector5.0/100W, or FDA equivalent.IVDark SkinVVery Dark Skinabove average.913151571014151520 MINUTEERECOMMENDED EXPOSURE SCHEDULESkin TypeMAXIMUM EXPOSURE TIME IN MINUTESWeek 11st-3rdsessionsWeek 24th-6thsessionsWeek 37th-9thsessionsWeek ive SkinBurns easily and severelydoes not tan.IILight SkinBurns easily and tansminimally.38121620IIINormal SkinBurns moderately and tansmoderately.510152020IVDark SkinBurns minimally and tansabove average.611162020VVery Dark SkinRarely burns, tans easily andsubstanually.81217202010 MINUTE BED LAMPSLight Sources Equator Sun 100W,Light Sources Beach Sun ReflectorCosmedico Hi-Tan100w or FDAequivalent.Rarely burns, tans easily andsubstanually.6Not Recommended for tanning
XP ASSEMBLY INSTRUCTIONS1A. Remove lounge from box. Place lounge, bulbs facingdown, on a soft surface. Remove the eight 5/16” x 1”bolts from the bench panel.1B. Attach legs to lounge.1B. Remove the 42” x 16” pieces of styrofoam from thebox and place them across the bench rails (or use 2 x 4’s).Remove the clevis pins from the pistons. Attach the pistonsto the ball stud at each end (the smaller shaft is attached tothe bench).See step #4.XP ASSEMBLY INSTRUCTIONS(continued)4. Slowly raise canopy, remove 2 x 4’s and attach thelarge end of the piston to the top ball stud. Canopy shouldstay in the open position.1A45. Attach the body fan at either end of the bench using thescrews provided. Plug the body fan into receptacle locatedbeneath the bed. DO NOT ATTEMPT TO PLUG ANYOTHER DEVICES INTO THESE RECEPTACLES.6. Remote timer port islocated at the rear of thebed across from the timer. Ifyou are not using a remote;be sure that the plugs areattached to each other.A) When using a remotetimer other than the T-max;remove the red jumper wirefrom the removable sectionof the plug.B) Install new timer wireswhere the red jumper waslocated. DO NOT ATTEMPTTO BYPASS ON BOARDTIMER WITHOUT A SUITABLE TIMER INSTALLED ASSHOWN IN FIGURE 6C.1B1C. Attach front skirt and side skirt. Side skirt installsbehind front skirt with the 8 screws provided (you shouldbe able to see into the slotted louvres) Turn bench over soit is standing on the legs. CAUTION: DO NOT REMOVEFOAM PROTECTING THE TIMER, AS THE BUTTONS MAYTEAR WHEN TURNING OVER THE BED.2. Remove the 3/8” x l” bolts from the ends of the lounge.Attach hinge plates. Nylon washers go between the hingeand the bed endcap.1C26AJumper Wire6BNThis unit is equiped with a24 volt solid state backuptimer that cannot bebypassed. The backup timerwill shut down the bed andis set for the maximumexposure.3. Remove canopy from the box. Remove the 3/8” x 1.5”bolts from the ends. Place the canopy CAREFULLY on thestyrofoam or 2 x 4’s that you placed on the bench. MAKESURE YOU LINE UP THE RAILS OR THE STYROFOAMWILL BREAK. Align the top hole of the hinge with the holein the canopy. Install the 3/8” bolt through the shoulderwasher and bushing. Tighten all bolts at this time.7. Connect canopy andbench cords together; whiteto white; and black toblack. Plug power cord intowall receptacle. Turn bedon using the timer. Check tomake sure all lamps are lit.L1NL15Jumper removed, remote timerused in conjuction with onboard timer.SAFETY INSTRUCTIONSTHIS PRODUCT HAS A POLARIZED PLUG (ONE END IS6CWIDER THAN THE OTHER). AS A SAFETY FEATURE,THIS PLUG WILL FIT IN A POLARIZED OUTLET ONLYONE WAY. IF THE PLUG DOES NOT FIT FULLY IN THENL1OUTLET, REVERSE THE PLUG., IF IT STILL DOES NOT FIT,CONTACT A QUALIFIED ELECTRICIAN. NEVER USEWITH AN EXTENSION CORD UNLESS PLUG CAN BEFULLY INSERTED. DO NOT ATTEMPT TO DEFEAT THISFEATURE!53Onboard timer bypassed,remote timer used as only timer.6
VSS Models160WDANGER! ULTRAVIOLET RADIATIONFOLLOW INSTRUCTIONS. Avoid overexposure, as with natural sunlight, overexposure can cause eye and skin injuryand allergic reactions. Repeated overexposure may cause premature aging of skin and skin cancer. WEAR PROTECTIVEEYEWARE. FAILURE TO DO SO MAY RESULT IN SEVERE BURNS OR LONG TERM INJURY TO THE EYES. Medications orcosmetics may increase your sensitivity to the ultraviolet radiation. Consult a physician before using a sunlamp if you areusing medications or have a history of skin problems or believe yourself to be especially sensitive to sunlight. If you do nottan in the sun you are unlikely to tan from the use of this product. Minimum use distance is 1 inch or 2.54 centimeters.Tanning may appear after one application provided your skin is capable of developing a suntan. Allow 48 hours betweensessions to obtain a base tan. Use once or twice a week to maintain appearance. ONLY THE INDICATED LAMPS HAVEBEEN CERTIFIED FOR USE IN THE SPECIFIED EQUIPMENT. These products are in conformity with performance standardsfor sunlamp products under 21 CFR part 1040.20. Recommended eyeware provided eye shields (Lucas products corp.,Super Sunnies) or equivalent eyeware as defined under 21 CFR 1040.20 2 (b)(6). One pair of protective eyeware is furnished with this equipment and should be worn by all person in the room when lamps are on. DISCONNECT POWERCORD BEFORE ATTEMPTING TO CLEAN, RELAMP, OR ENGAGE IN THE MAINTENANCE OF THIS PRODUCT.WARNING: Read the instruction booklet before using lamps. When using this bed lie down on the bench and pullcanopy down until it will move no farther. Operation of this device below recommended minimum distance for use mayresult in overexposure.12 MINUTE BED LAMPSCanopy-Cosmedico VHR 160W,Bench-Cosmedico VLR 100W, LightSource Signature Series Reflector160 W, Light Source Signature SeriesPlus Reflector 100 W or FDA equivalent.7RECOMMENDED EXPOSURE SCHEDULESkin TypeMAXIMUM EXPOSURE TIME IN MINUTESWeek 11st-3rdsessionsWeek 24th-6thsessionsWeek 37th-9thsessionsWeek ive SkinBurns easily and severelydoes not tan.IILight SkinBurns easily and tansminimally.2481012IIINormal SkinBurns moderately and tansmoderately.3691212IVDark SkinBurns minimally and tansabove average.57101212VVery Dark SkinRarely burns, tans easily andsubstanually.79111212Not Recommended for tanning8
VSS ASSEMBLY INSTRUCTIONS1A. Remove lounge from box. Place lounge, bulbs facingdown, on a soft surface. Remove the eight 5/16” x 1”bolts from the bench panel.VSS ASSEMBLY INSTRUCTIONS1A1B. Attach legs to lounge.1C. Attach front skirt and side skirt. Side skirt installsbehind front skirt with the 8 screws provided (you shouldbe able to see into the slotted louvres) Turn bench over soit is standing on the legs. CAUTION: DO NOT REMOVEFOAM PROTECTING FROM THE TIMER, AS THE BUTTONS MAY TEAR WHEN TURNING OVER THE BED.2A. Remove the3/8” x l” bolts fromthe ends of thelounge. Attach hingeplates. Nylon washers go between thehinge and the bedendcap.1B2A1C2B. Remove the 42” x 16” pieces of styrofoam from thebox and place them across the bench rails (or use 2 x 4’s).Remove the clevis pins from the pistons. Attach the pistonsto the ball stud at each end (the smaller shaft is attached tothe bench). See step #4.5. Attach the body fanat either end of thebench using the screwsprovided. Plug thebody fan into receptacle located beneath thebed. DO NOTATTEMPT TO PLUGANY OTHER DEVICESINTO THESERECEPTACLES.9Length: 84” overallWidth: 38.5”Weight: 4000VSS-440 Ibs. 5000VSS-450 Ibs.6000VHR-465 Ibs.Room dimensions (minimum) 8’x8’NOTE: Smaller rooms may be used as long as there isadequate ventilation for the unit. Higher temperatureswill result in shortened lamp life and possible component failure.56B6AL1Electrical:220-240VAC, 220 Volt, 3 wire , (2 hot, 1 ground)Receptacle:USE ONLY NEMA 6-30RAmperage:4000VHR-18 amp draw, 30A double pole breaker5000VHR-22 amp draw, 30A double pole breaker6000VHR-24 amp draw, 40A double pole breaker6CNL1NL14. Slowly raise canopy, remove 2 x 4’s and attach thelarge end of the piston to the top ball stud. Canopy shouldstay in the open position.NOTE: If actual voltage is notbetween 220-240 VAC, you willneed a buck boost transformer tocorrect the deficiency in yourincoming power. Failure to do sowill create undue stress on yourunit and will void warranty.SAFETY INSTRUCTIONSJumper Wire3. Remove canopy from the box. Remove the 3/8” x 1.5”bolts from the ends. Place the canopy CAREFULLY on thestyrofoam or 2 x 4’s that you placed on the bench. MAKESURE YOU LINE UP THE RAILS OR THE STYROFOAMWILL BREAK. Align the top hole of the hinge with the holein the canopy. Install the 3/8” bolt through the shoulderwasher and bushing. Tighten all bolts at this time.VSS UNIT SPECIFICATIONS6. Remote timer port is located at the rear of the bedacross from the timer. If you are not using a remote; besure that the plugs are attached to each other.A) When using a remote timer other than the T-max;remove the red jumper wire from the removable section ofthe plug.B) Install new timer wires where the red jumper waslocated. DO NOT ATTEMPT TO BYPASS ON BOARDTIMER WITHOUT A SUITABLE TIMER INSTALLED ASSHOWN IN FIGURE 6C.N3(continued)Jumper removed, remote timerused in conjuction with onboard timer.Onboard timer bypassed,remote timer used as onlytimer.7. Connect canopy and ballast box cords together, white to white. Plug inblack pole connector from bench to mate on ballast box. Plug in 16 poleconnector (grey) to mate inside ballast box. Plug in 8 pole connector (white)to mate inside ballast box. Attach ground wireto box with screw provided. Attach strain reliefplate with 4 screws. Connect 3 wires (10AWG)from electrical box on the back of ballast box toyour incoming power source. You must use asuitable strain relief. BE SURE TO OBSERVE ALLLOCAL CODES AS WELL AS THE NATIONALELECTRICAL CODE WHEN WIRING THIS BOX.Turn bed on using the timer.23THIS PRODUCT HAS A POLARIZED PLUG(ONE END IS WIDER THAN THEOTHER). AS A SAFETY FEATURE, THISPLUG WILL FIT INA POLARIZED OUTLETONLY ONE WAY. IF THE PLUG DOESNOT FIT FULLY IN THE OUTLET, REVERSETHE PLUG., IF IT STILL DOES NOT FIT,CONTACT A QUALIFIEDELECTRICIAN. NEVERUSE WITH AN EXTENSION CORD UNLESSPLUG CAN BE FULLYINSERTED. DO NOTATTEMPT TO DEFEATTHIS FEATURE!10
DIGITAL TIMER INSTRUCTIONS Sunsource-Tmax Series2.2.1 Setting the AddressSetting Parameters1) Apply power to the T-Max 3A. It will be buzzing with a 99. Press the Start/Stop button, and it will flash an 88. Pressthe Up button and the 88 will stop flashing,Note: If you are using a T-Max 3A as a stand-alone timer, you need not go any further.2) Press and hold the Start/Stop and Up buttons until a .1 appears on the display. This should take about 5-6 seconds.Release the Start/Stop button.3) Press and release the Start/Stop button. A period, number (i.e. .3) will be illuminated with the number flashing.Pressing and holding the Up button will cause the display to count up. Once the count reaches 100, the center periodwill flash rapidly. This is an indication that you are over 99. For example, if the display shows a 0.2 with the periodflashing, this is address 102. The highest the display will count up is 254.4) Press the Up or Down buttons until the address is displayed.Note: Set each T-Max 3A to a unique address. Do not set any address to 00. Do not set any address over 100.If the period is flashing, you are over address 100.5) Press the Start/Stop button. A .1 will be displayed, with the 1 not flashing.To exit Parameter Mode, press and hold the Up and Down buttons until a 0 is displayed.Note: If you are using a T-Max Manager and multiple T-Max 3As, remove power from the T-Max Manager. Keep power removedfrom the T-Max Manager until all parameter changes are complete.1)Apply power to the T-Max 3A2)Press and hold the Start/Stop and Up buttons on the T-Max 3A until a .1 appears on the display. This should take about 5-6seconds. Release the Start/Stop button.3)Press the Up and Down Buttons until the parameter number that you want is displayed.4)Press the Start/Stop Button to observe the current value for that parameter.The Display will show a number with a period in the lower center of the display. The numbers will stop flashing and stayilluminated. The number shown is the current value for that parameter.For Lamp Hours, Session Counts, etc. the value displayed can be as high as 9999. To display this value, the T-Max 3A will flashtwo numbers-three times, then two numbers-three times, pause, two numbers-three times, two numbers-three times, pause, etc. Forexample, if you are checking lamp hours (Parameter 6) and the display flashes the numbers 53 three times, then 14 three times,pauses then repeats, then the total lamp hours stored in that T-Max 3A is 5314.5)Press the Up and Down buttons to change the parameter to the desired value.If you want to clear the value for that parameter, press the Up and Down buttons at the same time until the display shows “.0”.6)Press the Start/Stop Button.The display will show the parameter number you just changed and a solid period in the lower center of the display. You may nowchange another parameter by pressing the Up and Down buttons until the parameter you want displayed. Repeat Steps 2-4.7)To exit the Parameter mode and make the T-Max 3A available for the next session, press and hold both the Up andDown buttons until the display shows a 0 with no periods displayed.Table 1 - Parameter Numbers for Observing and Changing Parameters.Parm #1DescriptionAddressMax #Default255254NotesBeep Mode10Used for Half session alarm 0 No Alarm only, 1 Alarm for 10 seconds3Delay Time50Delay in minutes stored in the T-Max 3A.5Session Counts655350Total session counts for T-Max 3As.6Lamp Hours655350Bulb hours for each bed.7Bed Hours655350Number of hours a bed is on.8Manual Session655350Counts the number of sessions the T-Max 3A has run while in Stand Alone3.1 Starting a Session1) Press the Up or Down Button on the T-Max 3A until the session time is displayed. If the display shows a 0, and youwant to count down from the maximum time, press the down button.2) Press and release the Start/Stop button to start the session.If a delay other than 0 is entered, the delay will count down. A period on the lower right corner of the display willflash rapidly. When the session starts, the period will flash at a once per second rate.Counts Mode9Clean Room110 Clean Room Disabled, 1 Enabled10*Manual Lockout100 Stand Alone Enabled, 1 Disabled13Cool Down Mode1000 Disabled, 1-10 Enabled. Time delay in minutes allowing bed to cool.15Fixed Session655350Counts number of sessions ran through the T-Max 3A. This value cannot beCounts17Clean Clear3.2 Pausing a SessionTo pause the session press the Start/Stop button. The flashing period on the lower right corner of the display will stopflashing. The session time will continue to count down. To restart the session, press the Start/Stop button on the T-Max 3A. The period on the lower right corner of the display will resume flashing.changed at all. Used as point of reference.100 Press and hold the Up button for 3-4 seconds to clear the clean room.3.3 Canceling a Session.1 Press and release the Up button to clear instantly18Redisplay200 After a session ends and the clean room is cleared, the T-Max 3Awill show a 0. 1 After session ends and the clean room is cleared, the T-1) Press and hold the Start/Stop and Up buttons until a .1 appears on the display. This should take about 5-6 seconds.Release the Start/Stop button.2) Press the Up and Down Button until a .3 is displayed.3) Press and release the Start/Stop button. A number will appear on the display and be flashing. A period will beilluminated in the center of the display. This isthe current delay time.4) Press the Up and Down Button until the desired delay time is displayed. The highest delay time that can be set on theT-Max 3A is 10 minutes. If you want no delay time, set the display to 0. If you set the Delay Time to 0, the sessiontime will start immediately after the Start/Stop button is pressed.5) Press the Start/Stop button until a .3 is displayed. The 3 will not flash.To exit Parameter Mode, press and hold the Up and Down button until a 0 is displayed.3. IN-ROOM SINGLE BED CONTROLAddress of T-Max 3A22.2.2 Setting Delay Time.Max To cancel a session, press the Start/Stop button to pause the session then press the Up button. The display will show a solitary 0.3A will show the last session time entered. 2-10 After the session ends and theclean room is cleared, the max. time will show on the T-Max 3A.2211Pause time100 When bed is paused, session time will continue to count down. 1 When bed is pause, session time will not count down.242512
4.1 WIRING10.FIGURESPlace one T-Max 3A at the desired remote location. Connect the 9V @ 200mA power supply to the power in on theback of the T-Max 3A. Plug the power supply into a 120VAC outlet (refer to Figure A, Section 10.1). Connect theT-Max 3A in the remote location to the tanning bed as described in Section 2. Run the provided modular cable from thetanning room to the remote T-Max 3A. Connect the modular cable to one of the RJ-22 ports on each T-Max 3A.10.1FIGURE A - FRONT AND REAR VIEWS OF THE T-Max 3AExt. Start4.2 CONFIGURATIONPin 1J100 Jumper SettingsSwitch: 2 & 3 ONSet the address on the T-Max 3A in the tanning room to “1”, and the address on the T-Max 3A at the front desk to “0”as described in Section 2.2.1. Disconnect the modular cables when setting the addresses on both T-Max 3As.Use the Front Desk T-Max 3A to set the Delay as described in Section 2.2.2. Any delay time set on the T-Max 3A inthe tanning room will be ignored.4.3 SESSION CONTROLJ99SettingsSent: 1-2 ONTPI: 2 & 3Front View of T-Max 3AStarting a sessionRear View of T-Max 3A PCBScrew Terminal Descriptions:1) Press the Up or Down Button on the T-Max 3A at the front desk until the session time is displayed.2) Press the Start/Stop button on the front desk T-Max 3A to start the session. If a delay other than 0 is set, the delay willcount down. A period on the lower right corner of the display will flash rapidly. When the session starts, the period willflash at once per second rate. If there is no delay entered, the session will start immediately.J4 - PWR IN 9-12V: Connect 9-12V power supply to this terminal.J3 - Contact: Connect the two wires from the tanning bed to these screw terminals.J5 Sense: Connect the two wires from the T-Max Sentry to these screw terminals.J6: Connector to connect external speaker for higher volume alarm.Pausing During the SessionTo pause the session press the Start/Stop button on the T-Max 3A in the tanning room. The flashing period on the lowerright corner of the display will stop flashing and stay illuminated. The session time will continue to count down and reflectthe remaining session time. To restart the session, press the Start/Stop button on the T-Max 3A in the tanning room. Theperiod will continue flashing.Canceling a Session10.2 FIGURE B - MODULAR CABLE PINOUTSPress the Up and Down buttons on the T-Max 3A at the front desk at the same time.Note: with clip facing up and the cable facing you, the black wire is on the right for both ends5. USING THE T-Max 3A WITH A T-Max Manager or T-Max Manager/PlusRJ-22 ConnectorUntwisted Modular CableRJ-22 ConnectorUntwisted Modular CableRJ-22 Connector1) Connect the T-Max 3A to the tanning bed as described in Section 2.1.2) Set the address on each T-Max 3A as described in Section 2.2.1.3) Connect T-Max 3As together using the provided modular cables. Connect T-Max Manager or T-Max Manager/Plusto the closest T-Max 3A in the line. Refer to the T-Max Manager or T-Max Manager/Plus User’s Guide for operation.Note: The T-Max Manager or the software you are using if you are using a PC controls Delay.6. CLEAN ROOMOnce the session time has elapsed, the display will show two solid periods only. This is an indication that the room needsto be cleaned. To clear the clean room indication, press and hold the Up button on the T-Max 3A in the tanning roomuntil the two periods disappear and a “0” appears. To disable the clean room feature, set parameter 9 to a 0. (Refer toSection 2.2)7. HALF SESSION ALARMWith this option, the T-Max 3A on the bed will sound an alarm half way through the tanning session. This is anindication that the person has half of their time left. Parameter 2 enables or disables the Half Session alarm. Refer toSection 2 on changing parameters. When enabled, the T-Max 3A will beep for 10 seconds half way through theactive session.13RJ-22 ConnectorModular Cable PinoutsModifying the cables provided with each T-Max 3A voids the stated warranty on the T-Max 3A. If you need longercables, contact your dealer or Salon Systems, Inc. If you are not careful in making your own cables, the system may notwork properly!Note: If you are making your own cables, you will need a tool for connecting RJ-22 connectors.Call Techni-Tool @ 1-800-832-4866 and ask for part.262714
TROUBLE SHOOTING1. BED WILL NOT LIGHTA. Bed is not plugged inB. Breaker is not onC. Timer is not turned onD. Incorrect VoltageE. Remote Timer plug missing or looseF. Faulty wiring- contact service departmentG. 7-Pole Plug not intact2. CANOPY WILL NOT LIGHTA. Canopy not plugged into boxB. Faulty wiring- contact service department3. LAMP WON’T LIGHTA. Lamp not seated in socket correctlyB. Faulty LampC. Faulty or Loose starter or socketD. Faulty or Loose wiringCall 800-832-8267 or your nearest Sunsource dealer.4. BED RUNNING HOTA. Incorrect VoltageB. Improper ventilationC. Fan clogged or not workingD. White cords in back not connectedSUNSOURCE MAINTENANCE SCHEDULEDAILY1/ Visually inspect bed
Sunsource International Tanning Technologies 1-800-832-8267 This product is in conformity with the performance standard for sunlamp products under 21 CFR part 1040.20. This product is compliant with standards UL 482, 7th edition UL 1598, 4th edition, and CAN/CSA-C22.2 3 YEAR LIMITED WARRANTY International Tanning Technologies, Inc., warrants to the original purchaser, that the Sunsource .


