Transcription
EarthBound Hacking101First Edition
Table of ContentsIntroductionI.CoilSnakeChapter 1. Getting StartedChapter 2. Your First HackChapter 3. NPCsChapter 4. Playable CharactersChapter 5. PSI AbilitiesChapter 6. Battle – ActionsChapter 7. Battle – EnemiesChapter 8. Battle – BackgroundsChapter 9. ItemsChapter 10. StoresChapter 11. The User InterfaceChapter 12. MusicChapter 13. MiscellaneousII. CCScriptIII. Earthbound Music EditorIV. PSI Animation EditorV. Earthbound Save State Editor
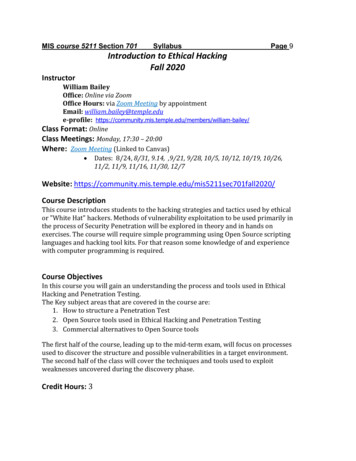
IntroductionGreetings, and congratulations on your acquisition of this document! By doing so, you have not onlyensured the renewal of hope for all of humanity, you have also saved an average of nine puppies from ahorrible demise! On a related note, you have also taken the first step towards learning how to hackEarthBound.This guide will hopefully instruct you in all the basic techniques required to get you up and hackingone of the greatest games in modern history. Beyond reasonable computer skills and a willingness tolearn, there are no real prerequisites, so let’s jump right in!How can EarthBound be hacked? It’s on a console!EarthBound, like any other console game, can have its data extracted and manipulated on a computerwith special tools that are able to grab its ROM (Read-Only Memory) from its cartridge, where all thegame’s programming and art is located. The ROM can then be passed through something called anemulator, which attempts to recreate an SNES environment so that you can play EarthBound on apersonal computer.The ownership of a ROM is legally-dubious at best, and distributing a ROM can frequently lead tolegal action from the creators of the game. Since STARMEN.NET would rather avoid a lawsuit ifpossible, it does not distribute the EarthBound ROM, so you’re on your own to find one (and in any case,a quick Google search should be enough to find one within aminute).Once you have your ROM, you’ll need to get an emulator.ZSNES is highly recommended, as it is cross-platform, possessesa plethora of features, and is easy to use. Just open your ROMwith ZSNES and voilà – you can now play EarthBound on yourcomputer.Now that you have the game data on your computer, you canstart modifying the game. To do so, you can either manuallytweak the hexadecimal values (an explanation is beyond the scopeof this manual, but there are many useful resources on theA screenshot of ZSNES' menu screen.Internet) contained within the ROM (which is useful if your objective is to discover new features), or youcan use some of the many tools that have been written over the years to automate the processconsiderably (particularly useful if you’re less of a technical person and more of an artist-type). Thismanual will focus on some of these tools (keep reading.).Well, okay, so what about Mother? And Mother 3?
For varying reasons, less efforts have been invested into hacking the games that preceded andfollowed EarthBound, namely Mother/EarthBound 0 and Mother 3. In the case of the former, this ismostly because it is much less interesting to work with the original Mother engine than with theEarthBound engine, since the latter offers a greater degree of customization. In the case of Mother 3,the architecture of its ROM makes it difficult to hack, so few efforts have been expanded toward doingso.There are a few tools, however; check them out at STARMEN.NET’s PK Hack section, under “EditingTools for Mother 1 and Mother 3”. These tools will not be covered in this manual.How is this manual organized?This document has been split into several parts, each dealing with a specific tool used to hackEarthBound. These are the tools which will be covered, in order: CoilSnake: CoilSnake is a replacement for PK Hack (the original hacking software, also known asJHack), whose propensity towards ROM corruption was a severe limitation for hacking. Whereas PKHack edited the ROM directly with custom editors, CoilSnake extracts the required data so that it canbe edited with external programs. It can be used in conjunction with CCScript (see below). CoilSnakehas both a CLI (Command-Line Interface) and a GUI (Graphical User Interface, written in Tkinter); thismanual will cover both for each technique where possible. However, if you’re just starting out, youmight be more comfortable using the GUI. CCScript: the ultimate dialogue editor, CCScript is used to edit characters’ and objects’ dialoguewith the player throughout EarthBound. It possesses a simple, human-readable and easy-to-use syntaxfor creating complex dialogs, with much more than just text. CoilSnake is able to bind these dialogues tothe exported ROM automatically. While CCScript files can be created using Visual CCScript, this is notrecommended as CoilSnake can handle CCScript compilation itself, when tied to an appropriateCCScript compiler. EbProjEdit: the best map editor beginning with Eb and ending with Edit, use EbProjEdit tographically edit EarthBound map files generated with CoilSnake. EarthBound Music Editor: not only does this tool allow you to edit music, it also allows you toplay back songs! Recommended for musicians bound to Earth. PSI Animation Editor: a really useful tool if you’re looking for a way to animate new PSI effectsin EarthBound. EarthBound Save State Editor: a useful tool when debugging to quickly skip ahead, this toolallows you to jump to another point in the game by modifying your save data.What do I need to start hacking?Operating system: CoilSnake and CCScript are cross-platform programs, and will work on Windows,Max and Linux. EB Hack and EbProjEdit will run on any system with Java installed. The Earthbound
Music Editor, PSI Animation Editor and EarthBound Save State Editor are Windows-only programs, butusing the Mono library on Wine, they could potentially be made to run on Linux and Mac.Text editor: Apart from an appropriate operating system, you’ll need various standard utilities to editgame files: a text editor to edit .yml files, such as NotePad (Windows), TextMate (Mac), or Gedit(Linux). A word processor (such as Microsoft Word) is unlikely to work.Image editor: Photoshop is the industry standard for image editing, and with good reason, butremains an extremely expensive program. If you can’t afford it, there are many other programs available,such as GraphicsGale (free). Warning: while GIMP is an extremely popular open-source alternative toPhotoshop, there is currently a bug in recent versions when saving indexed PNGs; it is therefore notrecommended to use GIMP.Dependencies: Individual programs might have third-party dependencies, or might even depend uponeach other to work. Each tool’s documentation will outline what is needed.One human brain: Preferably not in a jar.How complete is this manual?Not completely complete. This First Edition deals only with CoilSnake and skims over some parts,but later editions will try to cover all the other important tools, while also providing appendices ofreference for control codes, various values, and more!But that is for another day.
I. CoilSnakeCoilSnake is perhaps the single most important tool in your hacking arsenal, as it allows you todecompile ROM files to an organized directory which will contain (almost) everything from the game,including PSI power lists, enemy statistics, artwork and more. Its purpose is to eventually supersedePK Hack/JHack through the progressive addition of new features.The main advantage of CoilSnake over PKHack is that it does not directly modify the ROM file: thismeans that the chance that the ROM will get corrupted is a lot less significant. It also gives you morefreedom over your hacking, letting you choose your own image editors, text editors, and so on, whilepreserving the human-readable YAML format for its text data files.CoilSnake is written in Python and is therefore cross-platform. It requires Python 2.7, Python’sYAML extension, and the Python Image Library (PIL). If you wish to use its Graphical User Interface,you’ll also need to have Python’s Tkinter extension.Additionally, if you wish to make use of CCScript within your hacking projects (which you probablyshould if you intend to write some dialogue), you’ll have to obtain a CCScript compiler binary andspecify its location within CoilSnake’s preferences (see below for more instructions). For instructions oncompiling CCScript for your system, see the appropriate section.Note for non-Windows users: CoilSnake uses a pre-built binary blob for the NativeComp Pythonmodule; however, this binary will not work on other systems, so you’ll have to compile your own.Scared? Don’t be! build NativeComp.py is a user-friendly Python script that will build the modulefor you. On *nix systems (like OSX or Linux), simply enter the following commands into the terminal(tested on Debian Testing):cd path/to/coilsnake/modules/eb/python build NativeComp.py buildcp build/lib.*/NativeComp.so NativeComp.soOnce your CoilSnake installation is ready, you’re ready to get started!Official Thread: CoilSnake v1.2: Based on a True StoryDownload Link (current version: 1.2): CoilSnake 1.2.zipSource: https://github.com/kiij/CoilSnake
Chapter 1.Getting StartedAt a first glance, CoilSnake can seem pretty bare, but this bellies its powerful nature. For example,while the GUI doesn’t seem to provide that many options, this is by design. Its true strength becomesapparent once you run the software a first time. Let’s take a look at the GUI first, before moving on tothe command-line options. In the next chapter, we’ll actually make it do something.1. CoilSnake’s Graphical User InterfaceTo start up the visual version of CoilSnake, run CoilSnakeGUI.py (either from the terminal or bydouble-clicking on it, depending on your system setup).CoilSnake's GUI. Isn't Tkinter a beauty?Even though it’s not much to look at, it gets the job done, and it does it well. And while much of theinterface appears self-explanatory, it never hurts to give more explanations.The main screen is the center of operations, and each section has a clearly different purpose.The ROM - New Project section is used to take anexisting, vanilla ROM of Earthbound (modified/hackedROMs will probably not work as well) and to decompileit to a directory on your hard drive. You specify thesource ROM, the directory where CoilSnake will place its files, and you hit Decompile. The progress ofthe operation will appear in the white textbox below.The section to the right, Project - New ROM, doesthe exact opposite: it takes a modified project directory(such as one exported using the previous section) and
compiles it into a new ROM, which you can then play to enjoy your hacks and modifications. You’ll needto select a base ROM for this task – one which you have already expanded by using CoilSnake (see lateron). Hit Compile and let CoilSnake do its magic – it shouldn’t take too long.Finally, the last section, Upgrade Project, is used toconvert a CoilSnake project made with a previousversion of CoilSnake (at the time of this writing, thiswould be versions 1.0 and 1.1 of CoilSnake) to thelatest format, while preserving existing data. You need to provide a Base ROM to serve as a reference,and the Project Directory to be upgraded by CoilSnake.But wait! What if your project contains CCScript files? How will CoilSnake know how to compileyour files? By not doing it, of course! Instead, it delegates the task to the CCScript compiler binary. Tospecify its location, navigate to Preferences CCScript Compiler Executable, and open the file withthe dialog box.Similarly, if you’d like being able to test your ROM directly from CoilSnake, you can also set theemulator program to be used by an analogous method, using Preferences Emulator Executable.Additionally, if you like seeing more error messages, you can toggle the setting by navigating toPreferences Toggle Error Details (by default, this is set to a lower setting).An important step in the hacking of an EarthBound ROM is to expand its size to allow for contentadditions. This can be achieved through the GUI by using the menu entry Tools Expand ROM to32MBit (if you don’t plan on a big hack) or Tools Expand ROM to 48MBit (if your hack needs theextra space), and selecting the ROM to expand.Additionally, in the Tools menu, you can choose to add or remove an SNES cartridge header to yourROM, although you probably won’t need to do this in the course of your hacking.This is about it for the GUI – there’s not much more you can do here. So let’s move on to the CLI.2. CoilSnake’s Command-Line InterfaceCoilSnake's command-line functionality is pretty much identical to the GUI’s functionality, albeit witha few missing features (the ability to expand your ROM is available, but it requires usingtools/EbRomExpander.py instead of CoilSnake.py; it will be covered in a later edition). You muststart it either directly from the console (./CoilSnake.py on *nix operating systems) or by doubleclicking it to open up the terminal/console (note: this might immediately close the console, depending onyour OS and setup; an alternative is to open it with IDLE, the Python IDE). There are three differentoperations that can be performed (the syntax of the commands is for *nix systems, but it is usuallyanalogous on other systems):
cccCCC]: thiscommand achieves the same result as the GUI’s Compile option. The three arguments are paths to thelocations of your project directory, base expanded ROM and output ROM, respectively. Remember tosurround these paths with “.” if the paths contain spaces! There is a fourth, optional argument,which you can use if your project contains CCScript files that need to be compiled; appending it andproviding the path argument will tell CoilSnake where it can find the CCScript compiler binary. ./CoilSnake.py -d ROM ProjectDirectory: decompiles the ROM at the specifiedlocation to the specified project directory. ./CoilSnake.py -u BaseROM ProjectDirectory: finally, this is the equivalent of theUpgrade option in the GUI, and takes the path of the base ROM and the folder to output to.Now that you know how CoilSnake's interfaces work, let’s look at the layout of the project directory.3. The Project DirectoryThe typical appearance of a ROM decompiled with EarthBound is a great amount of folders and files,the latter being usually either in the .yml or .png format.The standard folder layout (on Linux Mint).It may appear a bit overwhelming at first through the sheer amount of configurability available to you,but each file is logically named and located to make things easier to manage.We will go into more detail on the subject of each individual file in the later chapters, but let’s take ageneral look at them first. The Project.snake file: this is what makes this folder more than a collection of pretty imagesand gibberish: it provides CoilSnake with information on the location of every resource file there is, as
well as some metadata like the ROM type (EarthBound) and the CoilSnake version (1.0 1, 1.1 2,1.2 3, and so on). You should never have to edit this file manually. The .yml files: these are among the most numerous files, and for good reason. They contain theactual settings of the game, such as “Don’t Care” name options (when choosing names for yourcharacters in EarthBound) in the dont care names.yml file. YAML possesses a very self-explanatorysyntax, but if you ever encounter something that confuses you, there is a wealth of onlinedocumentation available. You’ll also notice a great number of address code, either as 0x82ab or ef8543 (for example): these are actually called pointers to data, indicating EarthBound where to lookfor the specified resource. The BattleBG directory: contains all the different types of battle backgrounds which should bestretched, deformed, etc. during battles. The BattleSprites directory: a list of enemy sprites used during battles. The ccscript directory: a place to put all your CCScript dialogue so that it can be compiled. The Fonts directory: the fonts used by EarthBound (including Saturnian, zoom!). The Logos directory: the logos displayed at the beginning of the game for the creators ofEarthBound. The SpriteGroups directory: the sprites used to animate the characters on the world map(NPCs, player characters, enemies, etc.). The Tilesets directory and map tiles.map: the files in Tilesets contain the tiles used forthe maps and should not be manually edited. Likewise, map tiles.map arranges those tiles into themaps used for the locations in EarthBound. The TownMaps directory: the small maps of towns displayed to the player. The WindowGraphics directory: the various GUI elements used to display the HUD, with thedifferent flavors available to the player.To modify the game, simply modify existing files to your liking. For now, however, there is no way toadd new files (except for CCScript files, which must all be placed in the ccscript directory, wherethey will be automatically detected).ConclusionNow that you know how CoilSnake works and is organized, you’re (un)officially ready to write yourfirst hack! Keep reading.
Chapter 2.Your First HackThe standard program most programmers write when learning a new language is Hello World, whichaims to output “Hello World!” in some fashion to the user. Sounds exciting, right?It isn’t. It’s boring.So let’s do a twist on that that’s a bit more involved, but is hopefully a lot more rewarding.1. Planning the HackA hack without a plan is like a train without a steering wheel: it works just fine. However, you mightwant some levers and other controls on that train, because unless derailing trains is your weekendhobby, you’re not likely to enjoy the trip in the long-run, once you realize you don’t know where you’regoing. So let’s think a bit before making this hack.Additional note: There a few good tips here on an old tutorial for JHack which might be of interest toyou once you start fleshing out your own hacks; check it out!EarthBound is a game, so it would make sense if you saw “Hello World” said by a NPC instead of justprinted on-screen. So we’ll need to make a character say this at some point in the game. Oh, but that’spretty easy – you just need to substitute some dialog at one point. And it’s boring besides. Maybe thecharacter could be in a place where he’s not supposed to be? Say (spoiler alert!) Robot Ness in Ness’house at the beginning of the game? Yeah, that sounds a bit more interesting (or not; everyone’s entitledto his opinion). Let’s work with that.So, what would we need to do? Well, the sprite already exists, so there’s no need to create a newone. The map would have to be edited, though, so that Robot Ness can be placed somewhere in Ness’bedroom. But wait, since we can’t create new NPCs (yup; that’s a limitation currently), we’ll have to usean existing NPC and modify it for our purposes. Maybe a more-or-less useless one could be used, like apresent box (yes, a NPC CAN be an object!). And some dialogue should be tied to him; CCScript shouldget the job done. Alright, so we need:1) To replace a mostly useless NPC (such as a present) with our custom one.2) To add Robot Ness to Ness’ bedroom using EbProjEdit.3) To tie some dialogue to him with CCScript.Doesn’t sound that hard, right? So let’s hop to it!2. Replacing a NPCAll NPCs are configured in npc config table.yml, and are identified by their ID. Let’s take at
look at 744:744:Direction: downEvent Flag: 0x274Movement: 708Show Sprite: when event flag setSprite: 195Text Pointer 1: c7db3fText Pointer 2: 0Type: objectWe need to change a few things about this (don’t worry about the exact details, they will be coveredlater):744:Direction: downEvent Flag: 0x0Movement: 605Show Sprite: alwaysSprite: 5Text Pointer 1: robot.hello worldText Pointer 2: 0Type: personA few explanations are in order: since this sprite will always appear, we don’t need to set an eventflag to it (thus, 0x0 as an event flag and Show Sprite: always). Setting 605 as Movement willmake the robot static until interacted with. Sprite: 5 sets the sprite group #5 (Robot Ness) as thesprite animation group for Robot Ness. Type: person ensures that the correct interaction option is“Talk to”. Finally, Text Pointer 1: robot.hello world specifies that the text is located at thehello world location in memory, which is a label we will define later on (in the robot.ccs file, thusthe robot prefix) when writing CCScript.Now that we have our NPC ready, let’s place him in the appropriate location.3. Editing the MapYou’ll need EbProjEdit for this step, although for the purpose of this first hack,you won’t need to be fully knowledgeable with it yet (read the tutorial on it lateron if you lack confidence on your ability to follow step-by-step directions). Justdownload the .jar Java program specified and run it.When you first open it, you should see a tiny, unassuming initial screen, picturedto the right. You can’t really do anything yet with it, so click on the folder icon toopen your Project.snake file. It will take a while to load all of its data, but itEbProjEdit
will get there eventually; you’ll know when it’s ready when all three buttons light up. We don’t want toedit existing tilesets or handle door mechanisms, so open up the Map Editor.A new screen will pop up with a default maploaded. Since we want to edit Ness’ bedroomat the beginning of the game, scroll over themap until you find it – it’s somewhere aroundthe top-right corner.So now that that’s done, you want to bringup the Sprite Edit mode – do so by hitting F2.Then, right-click someplace within Ness’bedroom, and select “New NPC”. By default,this is Ness, so let’s select a different sprite byright-clicking on it and choosing “Switch NPC(0)”. Type 744 into the box that pops up, 744being the ID of the NPC we have replaced.The Map Editor with Ness' bedroom visible.Ness’ bedroom should now look something like this:Ness' Bedroom - now with 100% more robot!4. Scripting Some DialogueFor this step, you’ll need a working CCScript compiler; obtaining one is described in the CCScriptsection. Then, you’ll need to specify its location in CoilSnake's preferences before compiling. However,you don’t need to know anything else about CCScript for this step.CCScript files must all be placed in the ccscript of your CoilSnake project. Go ahead and create anempty robot.ccs file with a text editor of your choice, and write this text into it:hello world:"@?: Hello World!" endThis will effectively make our NPC (here called “?”) say “Hello World!” to Ness, then stop theconversation. Neat, isn’t it?
5. Compiling and RunningLooks like we’re good to go. Load up CoilSnake, give him the location of your Project Directory and apath to a ROM file, either one that you don’t mind getting overwritten or one to be created, and hitCompile. Then, open up your favorite emulator, and try out your work!Clash of the titans.And there you have it. Your first hack. Isn’t he cute?Of course, this is just the beginning, and there’s a lot to learn yet.ConclusionYou got to build your first hack for EarthBound and you got familiar with some of the tools you’ll beusing, as well as getting a glimpse at some of the techniques you’ll be using time and again. From nowon, you can read this manual in almost any order, since most chapters aren’t dependent on others. You’llstart learning all sorts of techniques one by one, until you’re ready to make the Next Big Hack.Is your heart beating incredibly fast?
Chapter 3.NPCsNon-Player Characters are a staple of many (if not all) RPGs, and EarthBound is obviously noexception. Whether they are as simple as a present box or as complex as Pokey Minch, almost all NPCsare handled in the same fashion by CoilSnake. You got a brief glimpse at how they work in the previouschapter, so let’s go into more detail in here.Before we begin, you have to remember (and this applies in almost every case) that there is no wayto add new objects directly: each time you want to add a new object, be it a phone, a character, oranything else, you have to edit an existing entry and overwrite it with your new data. So before youstart creating new things, make sure your hack can do away with at least one object which the playerwon’t need to enjoy your hack.List of files used: SpriteGroups/npc config table.ymlsprite groups.yml1. NPC SpritesAll the NPC sprites CoilSnake can extract from EarthBound are located within the SpriteGroupsdirectory.Each sprite group is composed of 16 “slots” for sprites, some of them being unused (since not allNPCs use all of their possible animations). Each individual sprite represents a possible position for theNPC, such as sideways, forward-facing, and so on. Sprite groups are identified by their filename, whenthey are used in other files produced by CoilSnake; for example, 079.png would be identified by 79.The sprite groups images can be modified using one of the programs suggested in the introduction ofthis manual.Sprite groups also need to be configured so that the game engine knows how to animate characterscorrectly. Their properties are all defined in sprite groups.yml, using a rather self-explanatoryformat (as you will soon find out, a lot of CoilSnake's project files are easy to understand):1:Collision Settings: [8, 8, 8, 8]Length: 16Size: 16x24Swim Flags: [false, false, false, false, false, false, false, false,false, false, false, false, false, false, false, false]This is the definition for the group sprite 1 (Ness), as is indicated by the 1: at the top. Let’s take a
look at each individual property.Collision Settings defines how EarthBound should handle collisions with this sprite group.Collisions are counted starting from the bottom center of the sprite. The first and third numbers definethe width of the sprite on each side (so 8 and 8 means that the sprite is 16 pixels wide). Likewise, thesecond and fourth numbers indicate the height of the sprite (when it comes to collisions that is).Length sets the number of available sprites within that sprite group (16 for 16 sprites. you get theidea).Size specifies the pixel size of an individual sprite.Swim Flags sets whether or not a sprite should be affected when entering a swim region (bypartially submerging the sprite), by specifying a boolean (true/false) for each sprite, in left-to-rightorder.However, configuration of sprite groups is obviously insufficient to place new NPCs, so additionalsteps are required.2. NPC ConfigurationThe configuration associated with NPCs can be found in the npc config table.yml file. Each setdefines a specific NPC (such as a Tenda bystander or an aggressive Shark), with appropriate behaviorfor each. Let’s take a look at a definition for one of the non-aggressive bag-wielding ladies, of ID 82:82:Direction: rightEvent Flag: 0x0Movement: 12Show Sprite: alwaysSprite: 57Text Pointer 1: c72822Text Pointer 2: 0Type: personLet’s once more look at these properties one by one.Direction indicates the initial direction the NPC should be facing (and thus which sprite to useinitially). This can be right, left, down and up. This is mostly useful if your NPC will be static, asother types of movements (see below) will make it change its direction as time goes. Item boxes shouldalways start with the down direction, to indicate their closed status.Event Flag identifies the event to be used to trigger the appearance of this NPC, if necessary(example: 0x1a6); if an event flag is not needed (for example, if the sprite must always be displayed),this should be the null flag: 0x0. If the NPC is an item type, this flag indicates whether or not the itemhas been taken from the NPC.Movement identifies the type of movement to be applied to the NPC; there are hundreds of optionsto choose from. In this case, 57 makes the lady walk very quickly to the bottom left, passing through
anything in her way, once the player gets close enough.Show Sprite sets the condition for the NPC’s visibility; in this case, since there is no Event Flag,the sprite should always be shown. Other options, to be used when an event flag is specified, arewhen event flag set and when event flag unset. For item NPCs, this should always be setto always.Sprite specifies the sprite group to be used (as explained in the previous section).Text Pointer 1 takes a pointer to some dialogue to be displayed when the user interacts (byexamining it or talking) with the NPC. This can either be hex code, or it could be a CCScript label.Text Pointer 2 takes a pointer to some dialogue to be displayed when an item is used on theNPC. It if is an item, this should point to the item to be obtained; 100 will make it an empty box, anysetting higher than that provides money to the player (for example, 10A gives the player 10 ).Type specifies whether the NPC is a person, an object (such as an ATM machine) or item (suchas a present box).Notice: while it may seem like a NPC definition lends itself to re-usability, you should never haveseveral instances of a NPC on your map, as this might cause instability.ConclusionOnce your NPCs have been set and configured, you can use them from EbProjEdit to place them inthe appropriate location; you can also assign them some dialogue using CCScript (see the CCScripttutorial).Note however that NPCs do not include enemy characters (these are handled differently, as we willsee in the following chapters), so make sure you don’t assign them movements which will provoke anattack, as a general rule (there might be exceptions, of course, depending on your hack).
Chapter 4.Playable CharactersWhat is an RPG without a character to control?Probably either a very terrible or a very innovative game. But we digress.Playable characters are handled differently from NPCs, and have different, more fleshed-outproperties assigned to them. Customizing them can produce highly interesting results. However, likeNPCs, their sprite groups are located in SpriteGroups.List o
EarthBound Hacking 101 First Edition. Table of Contents Introduction I. CoilSnake Chapter 1. Getting Started Chapter 2. . This guide will hopefully instruct you in all the basic techniques required to get you up and hacking . Beyond reasonable computer skills and a willingness to learn,