Transcription
MA-1.02UNITED STATES MARINE CORPSMartial Arts Center of ExcellenceThe Basic SchoolMarine Corps Combat Development CommandQuantico, Virginia 22134DETAILED OUTLINEFUNDAMENTALS OF MARINE CORPS MARTIAL ARTSINTRODUCTION(3 MIN)1. GAIN ATTENTION. There are several fundamentals of the physicaldiscipline of our martial arts that are used throughout any type ofconfrontation or situation. These fundamentals form the basis for all martialarts instruction and techniques. Additionally, you must prepare your bodyfor the rigors of combat. To do so your body must possess the attributes ofboth toughness and flexibility. Like iron, you must be able to absorb andgive out punishment but have the flexibility to prevent injuries. The properexecution of these fundamentals will enable you to effectively performmartial arts techniques that may very well save your life or the lives offellow Marines one day.2. OVERVIEW. This lesson will cover the fundamentals of Marine CorpsMartial Arts to include the purpose of close combat, ranges of close combat,weapons of the body, target areas of the body, pressure points, basicwarrior stance, and angles of approach and movement, and body hardening.3. LESSON PURPOSE. The purpose of this period of instruction is to providean explanation of the martial arts skills taught in the tan belt course. Astudent will teach the material to provide additional practice in instructingclose combat skills. There are no Terminal Learning Objectives or EnablingLearning Objectives pertaining to this lesson.4. INTRODUCE LEARNING OBJECTIVES. The Learning Objectives pertainingto this lesson are as follows:a. TERMINAL LEARNING OBJECTIVE. Without the aid of reference, giventhe requirement, identify the fundamentals of the Marine Corps MartialArt per MCRP 3-02B (8550.01.01a)a. ENABLING LEARNING OBJECTIVES
Ma-1.02(1) Without the aid of reference, given the requirement, identify theranges of close combat per MCRP 3-02B (8550.01.01a).(2) Without the aid of reference, given the requirement, identify thetarget areas of the body per MCRP 3-02B (8550.01.01a)(3) Without the aid of reference, given the requirement, identify theweapons of the body per MCRP 3-02B (8550.01.01a).(4) Demonstrate the basic warrior stance per MCRP 3-02B(8550.01.01a).(5) Demonstrate angles of approach and movement per MCRP 3-02B(8550.01.01a).(6) Demonstrate body hardening tachniques per MCRP 3-02B(8550.01.01a).5. METHOD/MEDIA. This class will be taught by lecture, demonstration, andpractical application.6. EVALUATION. Topics from this lesson will be evaluated by performanceexamination.BODY(55 MIN)1. INTRODUCTION TO CLOSE COMBAT(3 MIN)a. Purpose of Close Combat. The purpose of close combat isto execute unarmed and armed techniques, in close proximity toanother individual, that comprise both lethal and non-lethal ends, acrossa spectrum of violence within a continuum of force.1) Unarmed techniques include hand-to-hand combat anddefense against hand-held weapons.2) Armed techniques include techniques applied with yourT/O weapon or a weapon of opportunity.b. Ranges of Close Combat. There are three ranges in which closecombat engagements can take place: long range, mid range, and closerange. In any engagement, these ranges may blur together or mayrapidly transition from one to another and then back again until theopponent is defeated or the situation is handled.2
Ma-1.021) Long Range. At long range, the distance between combatantsallows engagement with a rifle and bayonet, weapons of opportunity ornon-lethal baton .2) Mid Range. At mid range, the distance between combatants is suchthat they can engage each other with knives, punches, or kicks.3) Close Range. At close range, the distance between combatants issuch that they can grab a hold of each other and may involve elbowand knee strikes and grappling.2. WEAPONS OF THE BODY(5 MIN)a. Arms. The hands, forearms, and elbows are the individual weapons ofthe arm.(1) Hands. There are several areas of the hands that can be utilized asweapons.(a) Fist. The fist can be used as a weapon directed at soft tissueareas such as the throat. This will minimize the risk of injury to thefist. The striking surfaces of the fist are the first two knuckles ofthe hand or the meaty portion of the hand below the little finger.(b) Edge of Hands. The edge of the hand (knife edge) can be usedas a weapon. Similar to the fist, all strikes should be directedtoward soft tissue areas.(c) Palm. The heel of the palm, because of its padding, can be usedfor striking, parrying, and blocking.(d) Fingers. The fingers can be used for gouging, ripping, andtearing soft tissue (e.g., eyes, throat, and groin).(2) Forearm. The forearm can be used as a defensive tool to deflect orblock attacks. The forearm can also be used as a striking weapon todamage or break joints and limbs. Strikes with the forearm do notpose as high a risk of self injury as do strikes with the fist and fingers.(3) Elbow. The elbow can be used as a striking weapon. Because ofthe short distance needed to generate power, the elbow is an excellentweapon for striking in the grappling range of close combat.3
Ma-1.02b. Legs. The legs are more powerful than the other weapons of the bodyand are less prone to injury when striking. The feet are protected byboots and are the preferred choice for striking.(1) Foot. The ball of the foot, the instep, and the toe can be used tokick an opponent. The toe is only recommended for striking whenwearing boots. The cutting edge of the heel and the heel can be usedto stomp on an opponent.(2) Knee. Like the elbow, the knee is an excellent weapon in thegrappling range of close combat. Knee strikes are most effective whilefighting close to your opponent where kicks are impractical. The groinarea is an ideal target for the knee strike against and opponentstanding upright. The knee strike can be a devastating secondaryattack to the face following an initial attack that causes the opponent tobend at the waist.3. TARGET AREAS OF THE BODY(5 MIN)During close combat, the parts of the opponent's body that are readilyaccessible will vary with each situation and throughout a confrontation. Thegoal is to attack those areas that are readily accessible. These areas aredivided into five major groups: head, neck, torso, groin, and extremities.a. Head. The vulnerable regions of the head are the eyes, temple, nose,ears, and jaw. Massive damage to the skull can kill an opponent.(1) Eyes. The eyes are excellent targets because they are soft tissuenot protected by bone or muscle. Any attack to this region may causethe opponent to protect the area with his hands. Secondary attacks toother target areas can then be successfully executed while theopponent's hands are occupied.(2) Temple. The temple is one of the most fragile areas of the skull.Powerful strikes to the temple can cause permanent damage anddeath.(3) Nose. The nose is very sensitive and easily broken. An attack tothis area can cause involuntary watering and closing of the eyes,rendering the opponent vulnerable to secondary attacks. Unless thestrikes to the nose are powerfully delivered, attacks to the nose maynot distract the opponent because, through training, individuals canbecome accustomed to the effects of attacks to the nose.4
Ma-1.02(4) Ears. Attacks to the ear may cause the eardrum to rupture, but aswith the nose region, this may not stop or even distract the opponentunless the strikes are delivered powerfully.(5) Jaw. The jaw region, when struck forcefully, can causeunconsciousness. Strikes to the jaw can cause painful injuries to teethand surrounding tissues (e.g., lips, tongue), but the risk of self injury isgreat unless the strikes are delivered with a hard object such as ahelmet, rifle butt, or heel of the boot.b. Neck.(1) Front of Neck. The front of the neck or throat area is a soft tissuearea that is not covered by natural protection. Damage to this regioncan cause the trachea to swell and close the airway, which can lead todeath.(2) Back of Neck. The back of the neck or cervical region contains thespinal cord, the nervous system link to the brain. The weight of thehead and the lack of large muscle mass in the neck area combine toallow damage to the spinal column when the head is twisted violently.Attacks to this region can readily cause pain and immobilization of theopponent.c. Torso.(1) Clavicle. The clavicle or collar bone can be easily fractured, causingimmobilization of the opponent's arm.(2) Solar Plexus. Attacks to the solar plexus or center of the chest canimmobilize the opponent by knocking the breath out of him.(3) Ribs. Damage to the ribs can cause immobilization of the opponentand may cause internal trauma.(4) Kidneys. Powerful attacks to the kidneys can cause immobilization,permanent damage, and death.d. Groin. The groin area is another major soft tissue area not covered bynatural protection. Any damage to this area can cause the individual toinvoluntarily provide protection to the injured area, usually with the handsor legs. The scrotum is the main target since even a near miss will causesevere pain, contraction of the lower abdominal muscles, deterioration ofthe opponent's stance, and possible internal trauma.5
Ma-1.02e. Extremities. Rarely will an attack to the opponent's extremities (armsand legs) cause death, but they are important target areas in closecombat. Damage to a joint can cause immobilization of the opponent.4. BASIC WARRIOR STANCE(10 MIN)a. Purpose. The basic warrior stance provides the foundation for allmovement and techniques in close combat situations. Marines must beable to assume the basic warrior stance instinctively.b. Technique. To train the basic warrior stance, have the student:(1) Feet Apart.(a) Place your feet shoulder width apart.(b) Keeping your head and eyes on your opponent, take a half stepforward with your left foot, and pivot on your heels so your hips andshoulders are at approximately a 45-degree angle to the right.(c) Distribute your body weight evenly on both legs. Bend yourknees slightly.[1] Find a position that allows you to maintain your balance.[2] You may have to re-adjust your feet to maintain yourbalance.(2) Hands Up.(a) Curl your fingers naturally into the palm of your hand. Positionthe thumb across the index and middle fingers.[1] Do not clench your fists.[2] Not clenching the fists will reduces muscular tension in theforearms and increases speed and reaction time.(b) Bring your hands up to your face at chin level, with the palmsfacing each other.[1] Hold your fists up high enough to allow you to protect yourhead.6
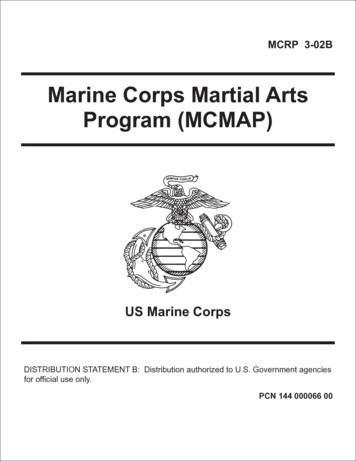
Ma-1.02[2] The fists should not block your field of view, allowing forcontinuous eye contact of your opponent.(3) Elbows In. Tuck your elbows in close to your body to protect yourbody.(4) Chin Down. Tuck your chin down to take advantage of the naturalprotection provided by your shoulders.5. ANGLES OF APPROACH AND MOVEMENT(12 MIN)a. Purpose of Movement. You should move to control the confrontationand to retain a tactical advantage. Consider yourself in a 360-degreecircle, you move in 45-degree incraments towards (8) different angles. Inaddition, movement is necessary to:(1) Movement around the opponent makes accessible different targetareas of your opponent's body.(2) Movement enables you to use different weapons of your body anddifferent close combat techniques that can only be performed onspecific target areas.(3) Movement can increase power and maximize momentum.b. Angles of Approach. Consider a 360-degree circle around anopponent. You can move anywhere in this circle to gain a tacticaladvantage and make accessible different target areas of your opponent'sbody.(1) The worst place to be in a confrontation is directly in front of anopponent. The opponent can rely on his forward momentum and linearpower to take a tactical advantage.(2) When facing an opponent, movement is made in 45-degree toeither side of the opponent. Moving at a 45-degree angle is the bestway to both avoid an opponent's strike and to put yourself in the bestposition to attack an opponent.7
Ma-1.02Xopponentc. Techniques for Movement. Since most close combat movements areinitiated from the basic warrior stance, you must know how to move in alldirections while maintaining your stance. During any movement, the legsor feet should not be crossed. Once a movement is completed, you shouldresume the basic warrior stance. This will help to protect yourself and toput you in the proper position for launching an attack against youropponent.(1) Forward. To move forward from the basic warrior stance:(a) When moving forward:[1] Move the left foot forward approximately 12 to 15inches.[2] As soon as the left foot is in place, quickly bring theright foot behind the left foot to return to the basicwarrior stance.(2) Forward Left/ Right. To move forward left/ right from the basicwarrior stance.8
Ma-1.02(a) When moving to the forward left:[1] Move the left foot forward at a 45-degree anglefrom your body, approximately 12 to 15 inches, keepingyour toe pointed toward the opponent.[2] As soon as the left foot is in place, quickly bring theright foot behind the left foot to return to the basicwarrior stance.(b) When moving to the forward right:[1] Move the right foot forward at a 45-degree anglefrom your body, approximately 12 to 15 inches.[2] As soon as the right foot is in place, quickly bring theleft foot, toe pointing toward the opponent, in front of theright foot to return to the basic warrior stance.(3) Left/ Right: To move left/ right from the basic warrior stance.(a) When moving side to side/left or right:[1] Move the left foot to the left approximately 12 to 15inches.[2] As soon as the left foot is in place, quickly bring theright foot behind the left foot to return to the basicwarrior stance.[3] To move to the right execute steps in reverse(4) Backward. To move to the rear from the basic warrior stance,execute the forward movement in reverse:(a) When moving backward:[1] Move the right foot backward approximately 12-15inches.[2] As soon as the right foot is in place, quickly bring theleft foot in front of the right foot to return to the basicwarrior stance.9
Ma-1.02(5) Backward Left/ Right: To move back left/ right from the basicwarrior stance, execute the forward movement in reverse:(a) When moving to the left:[1] Move the left foot backward at a 45-degree anglefrom yourbody, approximately 12 to 15 inches, keeping your toepointed toward the opponent.[2] As soon as the left foot is in place, quickly bring theright foot Behind the left foot to return to the basicwarrior stance.(b) When moving to the right:[1] Move the right foot backward at a 45-degree anglefrom yourbody, approximately 12 to 15 inches.[2] As soon as the right foot is in place, quickly bring theleft foot, toe pointing toward the opponent, in front of theright foot to return to the basic warrior stance.6. Stretching(5 MIN)a. Begin your stretching session with a slow warm-up by doing thedynamic stretches that are a part of the Daily 16 exercise routine. Thelength and repititions will begin low and be increased as proficiency andfitness is gained.b. Upon completing the warm-up phase begin with the following martialarts stretches. All martial arts stretches are static stretches and areexecuted as echo count exercises. Echo count exercises are done for aspecific count, i.e., 10 to 30 seconds. The unit leader counts each secondand the recruits echo (repeat) the count.c. Safety. The following safety considerations apply when doing martialarts stretching.(1) Since all martial arts stretches are static stretches avoid bouncingmovements. The stretch is initiated and held during the entire countand then slowly release the stretch.10
Ma-1.02(2) Emphasis is placed on remaining relaxed while stretching in orderto gain the maximum benefit from the stretch.(3) Ensure that recruits do not stretch beyond a painful range ofmotion. They should be reminded that they will gradually increasetheir range of motion by regular and proper stretching.(4) The unit leader should control the speed of the stretches. Thecount should be executed between 45 to 60 beats per minute.d. The following exercises are done in sequence starting with the neckand working down the body. By regularly following this sequence you willdevelop habit and muscle memory retention of the skills. The sequencecontinues from standing and then moves to stretches done on theground.e. Neck Flexion/ Lateral Flexion and Extension. Stand with feetshoulder width apart, back straight and hands on hips. Flex the neckforward bringing the chin toward the chest. Extend the head back. Tilt thehead to the left side, bringing the left ear toward the left shoulder. Repeatto the right side. To be done properly and avoid injury the neck is held ineach position for a count of 10. Repeat each direction twice.11
Ma-1.02f. Tricep Stretch. Standing, bend the left elbow and bring the left armup and back placing the left hand between the shoulder blades. Gentlypull the left elbow with the right hand behind the head. The stretchshould be felt over the back of the upper arm. Repeat to the other side.g. Standing Shoulder Stretch (partner assisted). Begin by standingwith feet shoulder width apart, back straight and hands extended to therear. Arms are straight, palms are up, elbows pointing outboard, andarms are spread shoulder width apart. Your partner will grasp your armsat the wrist and under your command slowely raise your arms. Maintainan upright position with your head up. You control the distance of thestretch by telling your partner when you have reached the limit of thestretch. Hold the stretch for the length of the echo count. Begin with a10 count and progress to a count of 30 with time.h. Standing Chest Stretch (partner assisted). This exercise is donein a similar manner to the standing shoulder stretch except the hand areclasped with the palms up and the elbows are also pointing up. Your12
Ma-1.02partner will pull the arms up toward the head with you controlling thedistance of the stretch. The stretch should be felt in the front of the chestand shoulders.i. Hip Rolls. Flex the trunk in a circular motion starting to the right andmaking a complete circle. This exercise differs from trunk twisters in thatthe motion is fluid and the head remains stationary directly over thecenter of the body. Repeat for five to ten repetitions. Change directionand rotate to the left side. Repeat for five to ten repetitions.j. Knee Rotations. Stand with your legs together, feet and kneestouching and a slight bend at the knees. Bend at the waist placing yourpalms on your knees with your head up. Begin by rotating your knees in acircular motion to the right. Execute slowly for 5 to 10 repetitions andthen repeat to the left.13
Ma-1.02k. Standing Thigh Stretch. Stand with the feet wider than shoulderwidth apart getting a full stretch in the groin. Face to the left, pointingthe left toe to the left and the right toe pointing in the original directionwith the inside of the right foot on the deck. Keep the right leg straightand the left knee bent. Place your palms on your left knee and stretchforward. Hold the stretch for a minimum of a 10 count, echo count.Repeat to the other side.l. Bridging. Begin in a forward leaning rest position with the feet andpalms shoulder width apart, flat on the deck and the top of the headresting on the deck. Roll back with the nose touching the deck, hold for a10 count, roll forward as far on the rear of the head as possible and holdfor another 10 count. Next roll the head to the left side touching the leftear to the deck, hold for 10 counts and repeat to the right. As proficiencyand fitness is increased add several sets of each repitition.14
Ma-1.02m. Prone Abdominal Stretch. Lay on the stomach with the handsplaced near the shoulders as if in the down position of a push-up. Slowlyraise the upper body up, keeping the hips on the deck. The stretch shouldbe felt over the abdomen. While executing hold the count with the headto the front and turned to the left and then right. This will also stretch theneck and lower back. Hold each position for a 10 count.n. Prone Shoulder Stretch. This execise is done with each sidestretching along three directions. Begin by assuming a position on yourhands and knees, knees wider than shoulder width apart. Place the leftarm straight out to the side with the shoulder touching the deck. Turn thehead to the right and hold this position for a 10 count. Next place the armto the front palm down, head to the right and stretch by attempting totouch the left shoulder to the deck and hold for 10 count. Finally, placethe left arm under the torso pointing to the right with the palm on thedeck. Turn the head to the left and stretch by pushing your right shoulderdown toward the deck holding for a 10 count. Repeat all three positionsfor the right shoulder.15
Ma-1.02o. Quadricep Stretch. Lying in the prone position right arm extendedstraight out, head forward. Bend the left leg at the knee, grasp the leftinstep with the left hand and pull the foot towards the buttocks. Do nothyperextend the low back. The stretch should be felt over the front of theleft thigh. Hold for a 10 count and then repeat to the other side.16
Ma-1.02p. Seated Lower Back Stretch. Sit on the deck with the right legextended straight and the left leg crossed over the right leg by bendingthe left knee and placing the left foot on the deck next to the right knee.Turn the upper torso to the left pushing the left knee to the right with theright elbow. The stretch should be felt over the low back and the left hip.Hold for a 10 count then repeat to the other side.q. Modifed Hurdler Stretch (partner assisted). This exercise is donein three directions. Assume a seated splits position. Place one hand oneach foot and bend over at the waist. The partner will assist by placinghis hands on your back and applying downward pressure under yourcontrol. Hold for a 10 count. Bend to the left and place both hands on theleft foot and assisted by your partner stretch forward. Hold for a 10 countthen repeat to the right.17
Ma-1.02r. Groin Stretch (partner assisted). Sit with the both knees bent andthe bottoms of the feet together. Grasp the feet and gently push theknees with the elbows toward the deck. A partner will assist by placing hischest on your back and his hands on your knees. He will push down underyour control. Hold for a 10 count. The stretch should be felt over theinside of both thighs.18
Ma-1.02s. Ankle Rotation. Sit on the ground with the legs extended to thefront, heels on the deck and the toe pointed up. Bend the left leg with theback of the calf resting on the right thigh. Holding on to the knee with theleft hand use the right hand on the left toe to rotate the foot in a circularmotion clockwise for a 10 count. Reverse the direction for another 10count and then repeat with the right ankle.7. Body Hardening(5 MIN)a. At the tan belt level we will concentrate on specificareas of the body to toughen through body hardening. This will includethose areas that will be used most frequently during tan belt training.These include the radial, ulnas and peroneal nerves, the palms of handsand the abdominal muscles.b. Safety(1) Ensure recruits begin slowly at first and increasespeed with proficiency.(2) Ensure recruits never execute body hardening techniques at fullforce so as to reduce the risk of injury.(3) When recruits are executing peroneal nerve strikes ensure that theknee joint is not struck. The target area is the meaty portion on theoutside of the thigh.(4) When executing body hardening strikes to the abdomen ensurethat blows are stuck in the center of the stomach above the navel and19
Ma-1.02below the xiphoid process (end of the sternum). No blows should landbelow the navel, on the sternum, ribs, or the hip bone.c. Body hardening techniques are executed as two count, echo countexercises. Echo count exercises are done for a specific count, i.e., 10 to30 repititions. The unit leader counts each count and the recruits echothe count in cadence.d. Grippers. Grippers are designed to strengthen the gripping musclesof the hand. They are executed in four positions. Each begins with thepalms open and fingers extended as wide as possible. On the first countclenth the fist tightly together and hold for one count, then extend thefingers. Execute for 10 counts and as fitness increases add repetions toeach of the four positions. The positions are above the head, to the side,to the front and across the chest.20
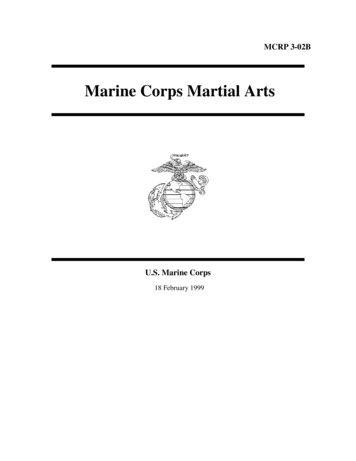
Ma-1.02When executing across the chest grippers, start with the hands at the sideand the fingers extended. Bring the hand up and across the body andclench the fist at the top of the movement, lower the arm and unclench atthe bottom. Again squeeze the fist tight for a 1 count before releasinggrip and lowering the arms. Execute by alternating hands and do each for10 counts.e. Radial Nerve Strike (side to side). Assume the basic warrior stanceacross from your partner, one pace apart with the arms at the side andthe fists clenched. Rotating from side to side at the hips strike the insideof the forearms along the radial nerve (thumb side) against each other.Begin at a slow speed and power and increase as proficiency andtoughness develop. Some soreness will be experienced initially. Begin bedoing 10 repetitions to each arm.21
Ma-1.02f. Ulnas Nerve Strike (side to side). Assume the basic warrior stanceacross from your partner, one pace apart with the fists clenched. Rotatingfrom side to side at the hips strike the inside of the forearms along theulnas nerve (little finger side) against each other. Begin at a slow speedand power and increase as proficiency and toughness develop. Somesoreness will be experienced initially. Begin by alternating with 10repetitions to each arm.22
Ma-1.02g. Radial Nerve Strike (low to high). Assume the basic warrior stanceacross from your partner, one pace apart with the arms at the side andthe fist clenched. Rotating from the hips and starting with the right handstrike the inside of the forearms along the radial nerve (thumb side)against each other. The movement of the arm starts with an arc acrossthe front of your body, as the fist comes along the opposite side, keep theupper arm in place, bend at the elbow, continue the arc in an upwardmovement back towards the right, keeping the open portion of the fisttowards your body until the forearms strike. Begin at a slow speed andpower and increase as proficiency and toughness develop. Some23
Ma-1.02soreness will be experienced initially. Begin by alternating with 10repetitions to each arm.h. Ulnas Nerve Strike (High to low sweep). Assume the basic warriorstance across from your partner, one pace apart with the arms crossedover the chest and the fist clenched. Rotating from the hips and startingwith the right hand strike the outside of the forearms along the ulnasnerve (little finger side) against each other. The movement of the armstarts with a downward arc across the front of your body, avoiding lockingout the elbow at the end of the movement, continue the arc back acrossto the right, keeping the open portion of the fist towards your body untilthe forearms strike. Begin at a slow speed and power and increase as24
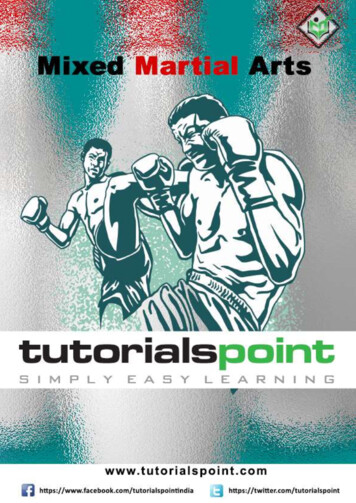
Ma-1.02proficiency and toughness develop. Some soreness will be experiencedinitially. Begin by alternating with 10 repetitions to each arm.j. Abdominal Strike (standing). Assume the basic warrior stanceacross from your partner, one pace apart. Rotating from the hips andstarting with the right hand strike your partners stomach with a straightpunch, alternating hands. The stomach should be struck centered abovethe navel and below the xiphoid with the first two knuckles of the fist.Avoid striking the ribs, sternum, below the navel, and the hip bone whichcan cause injury to either partner. Each Marine will strike once with eachhand followed by the second Marine and continue to alternate blows in thismanner until the total number of repetitions is completed. Avoid lockingout the elbow at the end of the movement. Begin at a slow speed andpower and increase as proficiency and toughness develop. Some sorenesswill be experienced initially. Begin by alternating with 10 repetitions tofrom each arm.25
Ma-1.02k. Peroneal Nerve Strike. Assume the basic warrior stance across fromyour partner, one pace apart. Rotating from the hips and starting with theright foot, raise the foot in a partial round-house kick and with the instepor lower shin strike your opponent on the outside of the thigh. Care mustbe taken to avoid striking the knee and only hit the meaty portion of thethigh. Avoid locking out the knee at the end of the movement. Alternatestrikes to the same side by each partner. After completing the requiredrepetitions change legs. Begin at a slow speed and power and increase asproficiency and toughness develop. Some soreness will be experiencedinitially. Begin by alternating with 10 repititions to each arm.26
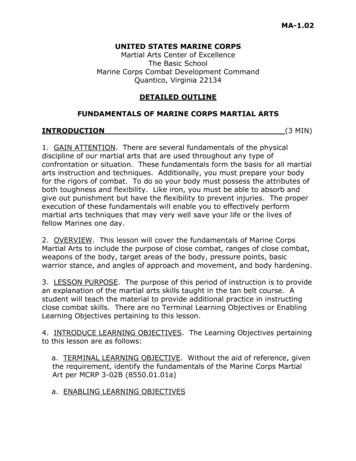
Ma-1.02l. Abdominal Strike (sit-up strikes). Partners will assume a sit-uppositions with the feet interlocked. On the first count they sit-up and eachstrikes the others stomach with the right hand followed by a left handstrike. They then return to the down position which completes onerepetition. The strikes should be centered between the navel and xiphoid.Avoid striking the ribs, below the navel or sternum and do nothyperextend the arm while punching. Begin at a slow speed and powerand increase as proficiency and toughness develop. Some soreness will beexperienced initially. Begin by alternating with 10 repititions to each arm.27
Ma-1.02Besides the body hardening benefits of this drill, it also develops timimgand coordination.(1 MIN)SUMMARYThe fundamentals of the Marine Corps Martial Art form the basis for all closecombat techniques. This les
martial arts techniques that may very well save your life or the lives of fellow Marines one day. 2. OVERVIEW. This lesson will cover the fundamentals of Marine Corps Martial Arts to include the purpose of close combat, ranges of close combat, weapons of the body, target areas of the body, pressure points, basic