Transcription
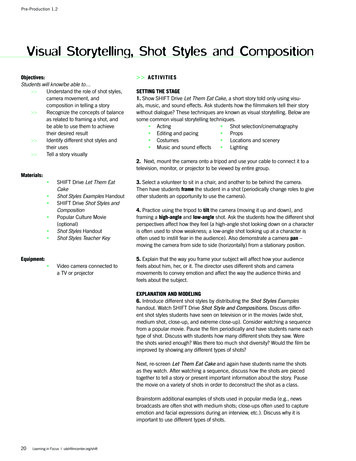
Pre-Production 1.2Visual Storytelling, Shot Styles and CompositionObjectives:Students will know/be able to Understand the role of shot styles,camera movement, andcomposition in telling a story Recognize the concepts of balanceas related to framing a shot, andbe able to use them to achievetheir desired result Identify different shot styles andtheir uses Tell a story visually Tell a story visually ACTIVITIESSETTING THE STAGE1. Show SHIFT Drive Let Them Eat Cake, a short story told only using visuals, music, and sound effects. Ask students how the filmmakers tell their storywithout dialogue? These techniques are known as visual storytelling. Below aresome common visual storytelling techniques. Acting Shot selection/cinematography Editing and pacing Props Costumes Locations and scenery Music and sound effects Lighting2. Next, mount the camera onto a tripod and use your cable to connect it to atelevision, monitor, or projector to be viewed by entire group.Materials: SHIFT Drive Let Them EatCake Shot Styles Examples Handout SHIFT Drive Shot Styles andComposition Popular Culture Movie(optional) Shot Styles Handout Shot Styles Teacher KeyEquipment: Video camera connected toa TV or projector3. Select a volunteer to sit in a chair, and another to be behind the camera.Then have students frame the student in a shot (periodically change roles to giveother students an opportunity to use the camera).4. Practice using the tripod to tilt the camera (moving it up and down), andframing a high-angle and low-angle shot. Ask the students how the different shotperspectives affect how they feel (a high-angle shot looking down on a characteris often used to show weakness; a low-angle shot looking up at a character isoften used to instill fear in the audience). Also demonstrate a camera pan –moving the camera from side to side (horizontally) from a stationary position.5. Explain that the way you frame your subject will affect how your audiencefeels about him, her, or it. The director uses different shots and cameramovements to convey emotion and affect the way the audience thinks andfeels about the subject.EXPLANATION AND MODELING6. Introduce different shot styles by distributing the Shot Styles Exampleshandout. Watch SHIFT Drive Shot Style and Compositions. Discuss different shot styles students have seen on television or in the movies (wide shot,medium shot, close-up, and extreme close-up). Consider watching a sequencefrom a popular movie. Pause the film periodically and have students name eachtype of shot. Discuss with students how many different shots they saw. Werethe shots varied enough? Was there too much shot diversity? Would the film beimproved by showing any different types of shots?Next, re-screen Let Them Eat Cake and again have students name the shotsas they watch. After watching a sequence, discuss how the shots are piecedtogether to tell a story or present important information about the story. Pausethe movie on a variety of shots in order to deconstruct the shot as a class.Brainstorm additional examples of shots used in popular media (e.g., newsbroadcasts are often shot with medium shots; close-ups often used to captureemotion and facial expressions during an interview, etc.). Discuss why it isimportant to use different types of shots.20Learning in Focus utahfilmcenter.org/shift
Pre-production 1.2Visual Storytelling, Shot Styles and Composition7. Present rules of composition. Use the whiteboard to diagram basics suchas dividing the frame into thirds to explain the rule of thirds. Rule of thirds: Divide the frame into nine equal parts with two vertical andtwo horizontal lines. Ideally you want to frame your subject at the fourintersections of two of the lines, rather than right in the middle of the frame. Leading looks: Frame the shot providing space for a person to looktoward, or for an object to travel or lean toward. This space should followthe direction of the subject’s eyes, and it prevents the subject from lookingcramped.PRACTICE - GUIDED TO INDEPENDENT8. Lastly, distribute blank Shot Styles handout to let students practice theirknowledge. As students are completing this exercise, have them beginthinking about which shots they will use to tell their nine sentence stories.Assessment: Student discussions Completion of Shot Styles handoutStandards: NCTE: 1, 2 ISTE-S: 2, 5, 6 CCSS:Grade 4: SL1, SL2Grade 5: RL7, SL1, SL2Grade 6: W5, SL1, SL2Grade 7: W5, SL1, SL1cd, SL2Grade 8: W5, SL1, SL1cd, SL2 NMAS:Grade 4: MA: Cr 3.1.4a,b, MA: Pr5.1.4cGrade 5: MA: Cr 3.1.5a,b, MA: Pr5.1.5cGrade 6: MA: Cr 3.1.6a,b, MA: Pr5.1.6cGrade 7: MA: Cr 3.1.7a, MA: Pr5.1.7cGrade 8: MA: Cr 3.1.8a, MA: Pr5.1.8cTips and Tricks Wide shots are often used atthe beginning of a scene as anestablishing shot, or to tell the audience thesetting and show what the subject is doing. TV monitors display images differentlythan computer monitors and often cropimages around the edges. Keep this in mindwhen framing a shot so that somethingimportant will not be cut off when viewed ontelevision. Utah Film Center21
Pre-production 1.2aEXAMPLES2218Learningin Focus Digitalutahfilmcenter.org/shiftiDEA – InteractiveEducation Academy
Pre-production 1.2bSHOT STYLESMatch the shot style withthe correct photograph.Establishing ShotWide Shot (Long Shot)Medium ShotClose-UpExtreme Close-UpLow AngleHigh AngleDutch AngleOver the ShoulderTwo-Shot Utah Film Center23
Pre-production 1.2c!"# %! &'(!)* ,-*.%/*0Establishing ShotHigh AngleDutch AngleTwo ShotOver the Shoulder24Learning in Focus utahfilmcenter.org/shiftLow AngleWide Shot (long shot)Close-UpMedium ShotExtreme Close-Up
Pre-production 1.3Cinematography and Storyboarding ACT I VI T I E SSETTING THE STAGE1. Introduce the lesson by letting the students know that they’re beginning theprocess of translating their nine sentence stories ideas to the screen. Distribute the students’ paper project folders that now contain their completed NineSentence Story handout and divide the students back into their original groupsof three or four.2. Review different shot styles and how they might be used to tell a story. Onceagain, as a class, view the SHIFT Drive Shot Styles and Composition anddistribute the Motivation for Shots handout to each student. In addition tofurther discussing when a certain shot might be appropriate, also review therule of thirds and leading looks and talk about the different camera movementand camera angle options.3. Watch SHIFT Drive Storyboarding. Share the Nine Sentence StoryboardSample handout and let students know that this will become their visual representation, or their visual organizer, of their nine sentence movies. Explain tostudents that to prepare for a shoot, storyboards help them think visually.Note: Before students begin storyboarding, it is important to discuss thedifferent elements included on the Storyboard Handout. The “shot action”is not included on the Sample Storyboard Handouts, but can refer to the“action” taking place in the shot (e.g. running, walking) or the action ofthe camera (e.g tilt, pan or tracking). Ask students what they would haveincluded for the “shot action” on the Sample Storyboard.Objectives:Students will know/be able to Further understand visualstorytelling, composition, shotstyles, and camera movement Recognize the importance ofstoryboards to plan shots andprepare for productionMaterials: Equipment: SHIFT Drive ShotStyles and CompositionMotivation forShots HandoutSHIFT DriveStoryboardingNine Sentence StoryboardSamples HandoutStoryboard HandoutSHIFT Drive NineSentence Movie SamplesMedia PlayerProjectorRemind students of the finished project parameters and that they should aimto have only nine storyboard frames (ideally one storyboard per sentence), thusnine camera shots, to tell their stories. 30 to 60 seconds (excluding titles or end credits)No dialogue (this is strictly a visual story)Music and sound effects encouragedConsider props, costumes, locations, scenery, acting and lightingUse a variety of shot styles and diverse shot compositionEXPLANATION AND MODELING4. Next, again show the actual Nine Sentence Movie Samples located on theSHIFT Drive. Discuss how well the Nine Sentence Storyboard Sample handout(Example #2) got translated to the screen.What was represented well? Whatturned out differently? What music type would students have included on theNine Sentence Storyboard Sample handout: happy, scary, sad, etc.?Optional: Another exciting way to present the storyboard concept is to share apopular Hollywood film and watch how a professional storyboarder’s vision istranslated to the big screen. A good example of this is on the Extras portion ofthe Monsters Inc. DVD.PRACTICE - GUIDED TO INDEPENDENT5. Distribute nine Storyboard handouts to each group and instruct the Utah Film Center25
Pre-production 1.3Cinematography and StoryboardingTips and Tricks Storyboards do need to bedetailed, but not perfectly illustrated. Stickfigures are fine, as long as they help thefilmmakers visualize the different shot types.students to use their new knowledge about shot styles and composition to beginstoryboarding their nine sentence stories. Emphasize to the students that thestoryboards should be completed sequentially. Every portion of thestoryboard template should be completed. If a segment of the storyboard doesnot apply for a particular shot, have students add N/A - not applicable.Storyboards should be thorough visual road maps that any director orcinematographer could pick up to direct the shoot.Tell the students that they should discuss their strategy and establish theirvision before the storyboards are completed. In addition to thinking about howeach shot will be composed within each storyboard frame, have students alsothink about the action that is happening in each shot (e.g., actor walks towardcamera, or actor walks from left to right). Once they’re prepared, have the groupselect their storyboard artist or have each team member try their hand atillustrating a portion of the project.6. Have groups exchange their storyboards and require the groups to presenttheir peers’ stories. If the storyboards are unclear or sloppily completed, thisobviously will be a very difficult task and will require the group to revise theirstoryboards.7. As a final step, have the students turn in their storyboards for final teacherapproval and grading before they’re allowed to start the shooting (production)process.Assessment: Group discussion Completed Storyboard handoutsStandards: NCTE: 4, 5, 11, 12 ISTE-S: 4 CCSS:Grade 4: W3a, W4, W5, SL1, SL1cdGrade 5: W3a, W4, W5, SL1, SL1cdGrade 6: W3ab, W4, W5, SL1, SL1cdGrade 7: W3ab, W4, W5, SL1, SL1cdGrade 8: W3ab, W4, W5, SL1, SL1cd NMAS:Grade 4: MA: Pr5.1.4cGrade 5: MA: Pr5.1.5cGrade 6: MA: Pr5.1.6cGrade 7: MA: Pr5.1.7cGrade 8: MA: Pr5.1.8c26Learning in Focus utahfilmcenter.org/shift
Pre-production 1.3aMotivation for ShotsH WIDE (WS): This shot is used when the filmmakers want the audience tounderstand the surroundings. We can get a sense of where the characters areand where they are located. Most scenes will open with a wide shot that gives usthis knowledge. This is known as an establishing shot.H MEDIUM (MS): The audience sees less of the surrounding area, but can seemore detail, such as a character’s face. However, the shot is still far enough outthat a portion of the character’s body can be seen, allowing the audience to seeany necessary hand gestures.H CLOSE-UP (CU): A close-up gives the audience much more detail as we cannow get a good sense of character emotion. A close-up allows us to be closer tothe character, and possibly relate to him or her more.Tips and Tricks Keep in mind that the sizeof the object in the frame hasa direct relation to its importance in thescene. Only focus closely on an objectthat holds great relevance to your film. Good filmmakers will use a variety ofshots to tell their story. Try using eachtype of shot at least once in a scene. Thiswill help your film’s pacing, add excitement to the scene, and keep the audience engaged.H EXTREME CLOSE-UP (XCU): This shot gives us extreme detail of a person oran object. We sacrifice all outside perspective, but we are given an intimateunderstanding of the subject.CAMERA MOVEMENTS:H PAN: Moving the camera from side to side (horizontally) from a stationarypositionH TRACK: Physically moving the camera horizontally as if it is sliding on trackH TILT: Moving the camera up and down (vertically) from a stationary positionH ZOOM IN OR OUT: Moving in or out on an object from a wide shot to a closeup or vice versaCAMERA ANGLES:H HIGH ANGLE: Shot looking down at something or someone to create a senseof vulnerability or inferiority for the subjectH LOW ANGLE: Shot in which the subject is above the camera, usually toconvey a sense of the subject’s importanceH DUTCH: Shot in which the camera is tilted to the side so that the horizon isnot parallel to the bottom of the frame Utah Film Center27
Pre-production 1.3b28Learning in Focus utahfilmcenter.org/shift
Visual Storytelling, Shot Styles and Composition ACTIVITIES. SETTING THE STAGE 1. Show SHIFT Drive . Let Them Eat Cake, a short story told only using visu-als, music, and sound effects. Ask students how the filmmakers tell their story without dialogue? These techniques are known as visual storytelling