Transcription
Lesson 1Lesson ObjectivesAfter studying this lesson, you will be able to:determine which edition would be right for your company manage basic QuickBooks company files open and restore company files work with the QuickBooks window find Help in QuickBooks update a company file backup and close a company fileation OnlyLesson 1: IntroducingQuickBooksvaluWhat’s New in QuickBooks 2012Intuit Canada introduces a new version of QuickBooks annually, with either new or improved features. This is alist of the new features to be found in QuickBooks 2012.New Calendar view shows invoices, billing and other important tasks. The improved “to-do” list capturesmore relevant information and displays it all in a calendar format. Customer Snapshot provides a consolidated view of the business, and shows at a glance a customer’spurchase history, average days to pay and any outstanding balance. Batch invoicing allows invoicing of multiple customers using the same service at once. Simply create theinvoice once and select the customers to send it to. Collection Centre enables a company to manage receivables. This option quickly identifies overdue andalmost due invoices, and allows email notices from Outlook, Yahoo, Gmail, or Hotmail in a few steps. Improved QuickBooks Search. Enter a keyword, and this option will display all the related reports, invoices,contacts, and transaction details. Sending invoices and estimates from the business Yahoo, Gmail or Hotmail Account. The new Webmailintegration allows emailing from QuickBooks without setting up Outlook. Batched Timesheets for multiple employees or vendors. Create and use the same timesheet foremployees or vendors who worked the same hours. Sort balance sheets by class, location or profit centre. Not available in Pro or Easy Start. New Setup Wizard – includes coaching tips to help navigate through the first tasks in minutes.ForE 1712-1 v1.00 CCI Learning Solutions Inc.1
Lesson 1Introducing QuickBooksGeneral QuickBooks KnowledgeQuickBooks VersionsAs stated above, Intuit creates a new version annually, and each new version provides additional features thatare new for that version. Within each version, several editions are available; in QuickBooks 2012 there is alsoan online edition that, for a monthly fee, allows access to company QuickBooks files via the Internet.QuickBooks EditionslyQuickBooks provides several editions, all of which perform the basic tasks required for small-businessbookkeeping. It is wise to evaluate just what you need QuickBooks to do for your business before you decidewhich edition to purchase. The following is a list of the editions available in QuickBooks 2012: Premier Edition (General Business) Professional Services Edition Accountant Edition Retail Edition Contractor Edition QuickBooks Pro Manufacturing & Wholesale Edition QuickBooks Easy Start Nonprofit EditionionQuickBooks Online EditionOn2.5The online edition looks very similar to the traditional desktop editions but has some unique features:Automatic online backups Users in multiple or remote locations can access a single file. QuickBooks can be accessed from any computer with Internet access, as well as from some smartphones.at This manual has been created using QuickBooks Premier 2012. Please note that if you are using a differentedition your screen may look slightly different from those displayed in this book.valuTo determine which edition you are using follow these steps:Click File from the menu bar.2.Select Toggle to Another Edition from the drop-down menu.3.View the list of editions available – the one currently in use will be indicated.ForE1.21712-1 v1.00 CCI Learning Solutions Inc.
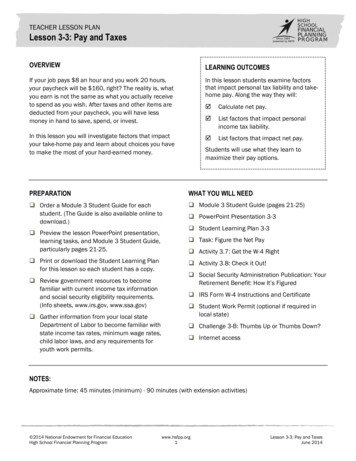
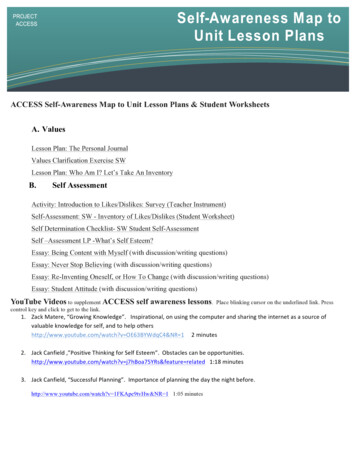
Getting StartedLesson 1Managing QuickBooks FilesUnderstanding some basic file management tasks will allow you to work more effectively in the QuickBooksenvironment. This section will show you how to start the program, open and restore files, and understand thebasic types of files.Starting QuickBookslyThere is always more than one way to do things on a computer, and starting QuickBooks is no exception. Askyour instructor the preferred method of starting QuickBooks in the computer lab where you are working. Theremay be a shortcut on the desktop, or you may have to go through the All Programs menu which can beaccessed by the Start button.OnQuickBooks FilesionQuickBooks data can be stored in three different types of files: company files, backup files and portablecompany files. A company file is the type in which you will work with your business (extension .qbw). A backupfile (extension .qbb) is used to store a copy of your file and can be used to restore the file if the main companyfile is corrupted. A portable company file (extension .qbm) is much smaller than either of the other two, and canbe used to send your information by email. The company file can be stored anywhere on your computer, but itis recommended that you also store a backup or portable file on either an external hard drive, or flash drivekept in a safe place. With the QuickBooks online edition, the file can be stored online.atWhile these three types are the ones most frequently worked with, there are two other support type files inQuickBooks. A network data file (extension .nd) contains important configuration data. A transaction log file(extension .tlg) can help recover any data entered after the last backup operation that was performed.valuThese two types of files do not store company data, but provide important support for the other three types. It isimportant to understand their roles, and NOT to delete them as they may affect the integrity of your companydata.Opening and Restoring QuickBooks FilesThe command to open or restore a company file is accessed from the File menu. This command will display thefollowing window, which allows you to choose which type of file to open.ForE2.2To Open a company file proceed as follows:1.Choose File, Open or Restore Company from the menu bar.2.Choose Open a company file, click Next.3.Navigate to the file location, select the desired file, click Open.OR1.Choose File, Open Previous Company.2.Select the desired file from the drop-down list by clicking on it.1712-1 v1.00 CCI Learning Solutions Inc.3
Lesson 1Introducing QuickBooksTo Restore a company file proceed as follows:1.Choose File, Open or Restore Company from the menu bar.2.Choose Restore a backup copy, click Next.3.Choose Local backup, click Next.4.Navigate to the file location, click Next.5.Locate the backup file you wish to restore, and then click Open.6.Click Next, choose the location to save the restored file, and then click Save.lyLearn the SkillNote A similar procedurewould be followed torestore a portable file.1.OnIn this exercise you will start QuickBooks, and then restore a QuickBooks backup file.Click the Start button, select All Programs, click QuickBooks, and thenQuickBooks Premier 2012.ionA window will appear that displays the version of QuickBooks you are starting andopens the window.Note You can also openQuickBooks from adesktop icon.Choose File from the menu bar, and then Open or Restore Company.3.Select Restore a backup copy.4.Click Next.5.Select Local backup and click Next.6.Navigate to the file storage location selected when you downloaded the student files for this book.rEvaluat2.7.Select the Sample Pro Hockey School backup file, and then click Open.8.Read the information in the Open or Restore Company window, Click Next.9.Choose the location to restore the file, as directed by your instructor.Fo10. Change the file name to Your Name Pro Hockey School (e.g. Gerry’s Pro Hockey School).11. Click Save.12. Click OK in both the QuickBooks information windows.4Note It may take a few moments for the file to open.When it does, it will open with the Sample ProHockey School company file fully operational.1712-1 v1.00 CCI Learning Solutions Inc.
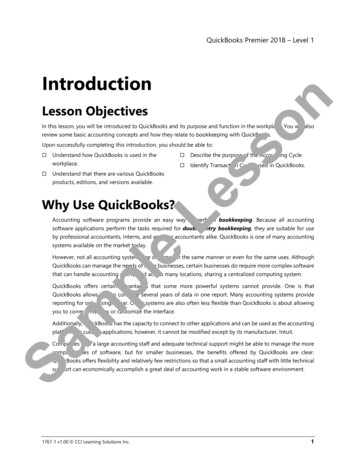
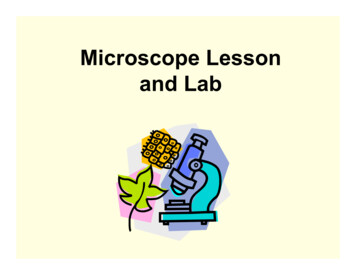
Getting StartedLesson 1The QuickBooks Window2.1This is the screen displayed when QuickBooks opens a company file.The Title bar displays the company name, and the version/edition of QuickBooks that you are using.Buttons on the menu bar will display drop-down menus when clicked on.rEvaluationOnlyThe icon bar contains icons for fast access to activities, centres and listsFoControl IconLocated in the top left corner, this displays the Control Menu box to select suchoptions as Restore, Move, Size, Maximize, Minimize, and Close. These are standardWindows options available on most Control Menus.Title BarLocated at the top of a window, the title bar displays the name of the currently activecompany data file, e.g., Sample Pro Hockey School., followed by the name of theselected application (QuickBooks Premier Edition).Minimize,Maximize/Restoreor Close ButtonsLocated in the top right corner of a window, these buttons control a window’s displaysize. Use the(Minimize) button to minimize the QuickBooks window to thetaskbar,(Maximize) to full screen,(Restore Down) to the original windowsize, or(Close) the program completely.Menu BarLocated below the title bar, this bar provides access to the main menu commands (i.e.,File, Edit, View, etc.) which, when displayed, contain different sets of commands toactivate features or options.1712-1 v1.00 CCI Learning Solutions Inc.5
Lesson 1Introducing QuickBooksLocated below the menu bar, these buttons are used as a shortcut icon to the relativewindow. For instance, clicking on the Customer Centre icon will open the CustomerCentre window. Place the mouse pointer over the icon to display the icon’s function.Home PageThis window displays sections for the various company areas such as Vendors,Customers, etc., each of which contain icons for features used in each area.Vendors SectionContains icons for transactions such as: Purchase Orders, Enter Bills & Vendor Credits,Receive Inventory, Enter Bills Against Inventory, Pay Bills, Manage Sales Tax.CustomersSectionContains icons for transactions such as: Sales Orders, Estimates, Create Invoices,Enter Daily Sales, Receive Payments, Statements, Refunds & Credits.EmployeesSectionContains icons for: Payroll Centre, Enter Time, Pay Employees, Pay Liabilities, ProcessPayroll Forms.Company SectionContains icons for: Chart of Accounts, Items & Services, Inventory Activities (whichincludes Build Assemblies & Adjust Quantity/Value on Hand), and Calendar.Banking SectionContains icons for: Record Deposits, Write Cheques, Print Cheques, Reconcileaccounts, Cheque Register, and Enter Credit Card Charges.Getting StartedThis section contains icons for the “Quick Start Centre”, and “Setup and Training”, aswell as quick access to Account Balances, Do More with QuickBooks, and Reminders &Alerts.ationOnlyIcon BarvaluNote If you have arranged for online access to your QuickBooks data, the QuickBooks Connect icon will be displayed in theCompany section.Using the QuickBooks MenusThe QuickBooks menus not only display the menu choice, but additionally provide a keyboard shortcut besidemany of the menu commands. An ellipsis ( ) at the end of a menu option indicates a dialog box will appearwhen you select this command.rETo access a menu item:1.a.Click on the menu item in the menu bar.b.Click to select the desired command from the sub menu.Using keyboard controlsFo2.Using the mouse:a.Pressorb.Useorc.Useto make the selection from the submenu.d.PressNote Any menu item in black on themenu bar means that particularitem is active; a menu item in greyindicates the feature is unavailableat this time.to activate keyboard controls.to move the cursor to desired menu.If a menu is displayed and you no longer need it, use one of the following methods to close the menu:6 Click in a blank area away from the menu. Pressto close the menu, and then pressonce more to deselect the menu bar.1712-1 v1.00 CCI Learning Solutions Inc.
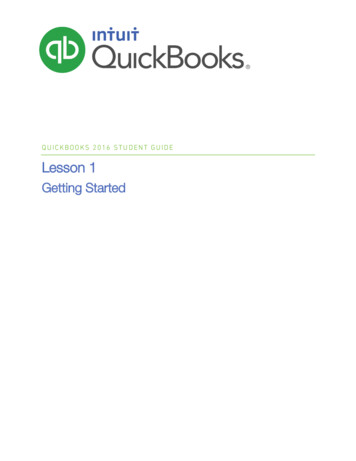
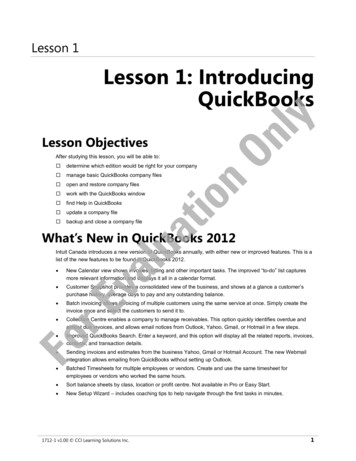
Getting StartedLesson 1Using the QuickBooks Icon BarlyThe Icon bar contains buttons you can access using the mouse. These buttons provide shortcuts for accessingmany QuickBooks features. When you place the mouse cursor over a button in the Icon bar, it will changecolour and a ScreenTip appears to identify the purpose of the button. Many of the menu items appear asbuttons on the Icon bar to enable you to use QuickBooks more quickly and efficiently. To choose a button onthe Icon bar, click it with the left mouse button. The icons displayed in the Icon bar will depend on the type ofcompany currently being used and may vary from the sample displayed below.OnLearn the SkillIn this exercise you will open and close windows from the Icon bar.Click the Customers icon to open the Customer Centre.2.Click Matthew Downs to review the customer information provided.3.Close the Customer Centre window.4.Repeat the first three steps for Vendors, selecting the file for Blitz Marketing.5.Ensure both windows are closed.ion1.atUnderstanding the WorkflowForEvaluThe Home Page contains workflow diagrams in the Vendors, Customers and Employees sections that aredepicted by the arrows between icons. Pointing your mouse over an icon will result in a description of what taskthe icon will access. Clicking on an icon will cause QuickBooks to display the required dialog box for the task.A dialog box is a window that appears when QuickBooks offers additional options or requires more informationfrom you before carrying out a command. You can use either the mouse or keyboard to access the commandsavailable in a dialog box.1712-1 v1.00 CCI Learning Solutions Inc.7
Lesson 1Introducing QuickBooksIt is important to follow the workflow as depicted on the home page to avoid trouble. For instance: If you use Write Cheque to pay a bill that has been entered as a payable you will overstate expenses, andwill not clear the transaction originally entered using Enter Bills. If you make a deposit rather than “Receive a Payment” for an invoiced amount, you will overstate incomeand will not clear the original entry.Following the workflow illustrated on the Home page can also help you avoid Sales Tax
QuickBooks Lesson Objectives After studying this lesson, you will be able to: determine which edition would be right for your company manage basic QuickBooks company files open and restore company files work with the QuickBooks window find Help in QuickBooks update a company file backup and close a company file What’s New in QuickBooks 2012 Intuit Canada introduces a new version of .