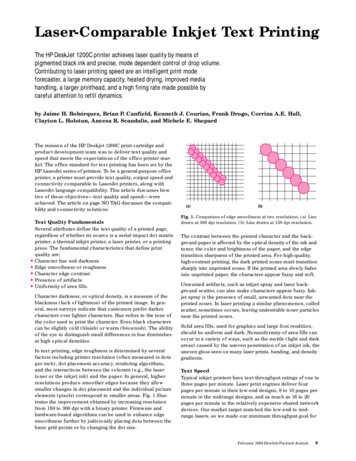
Transcription
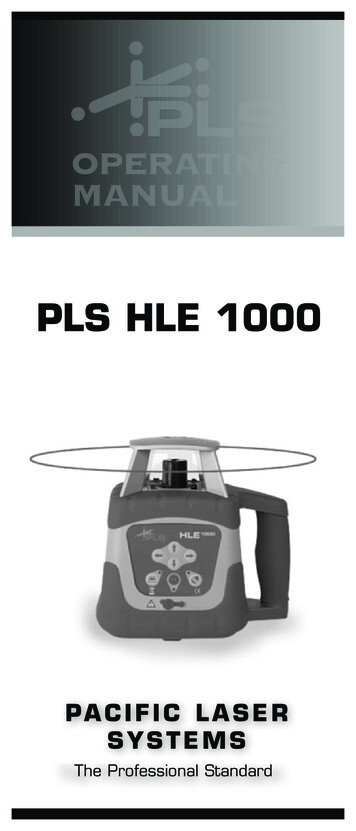
OPERATINGMANUALPLS HLE 1000PACIFIC LASERSYSTEMSThe Professional Standard
TABLE OF CONTENTSIntroduction.Page 1Safety Information.Page 2Batteries.Page 3Keypad.Page 4Functions.Page 5Applications.Page 6,7Remote Control.Page 7Checking Calibration.Page 7Specifications.Page 8Warranty.Page 9PLS HLD Detector.Page 10,11
INTRODUCTIONThe PLS HLE 1000 is a self-leveling laserused for exterior horizontal layout. Therechargeable NIMH battery pack containsmicro-controlled charging technology. The HLE1000 may also be used with alkaline batteries.CAUTION: DO NOT ATTEMPT TO CHARGESTANDARD ALKALINE BATTERIES ORWARRANTY WILL BE VOIDED.The HLE 1000 may be controlled by the PLSRC 1000 remote control.The instrument is water resistant and may beused in light rain, if necessary. Unit may notbe submerged in water.ROTATION HEADEXIT WINDOWSKEYBOARDRE-CHARGING PLUGHANDLE1
SAFETY INSTRUCTIONSSafety instructionsLaser SafetyThe PLS HLE 1000 is a class IIl laser accordingto 21CFR1040. Follow the instructions on thewarning labels which are shown in the followingillustrations:D A N G E RLASER RADIATIONDO NOT STARE INTO BEAM OR VIEWDIRECTLY WITH OPTICAL INSTRUMENTSMAX OUTPUT POWER 1MWWAVELENGTH 635-670NMCLASS III A LASER PRODUCTPLS HLE 1000 LASER POWER:635 NM 5MW LASER CLASS IIIPLS HLE 1000Laser Power:635 nm 5mWLaser Class lllDo not remove the attached warning labels.The manufacturer and its dealers are notliable for any defects and the consequencesfrom this removal.! Attention ! The internal laser sourcescomply with laser class III.Do not disassemble the instrument. Incase of inappropriate repairs, laser radiationmay arise in excess amounts of the markedlabels and liability may be incurred if thereis damage. In cases of inappropriateprocessing, malfunctions are possiblewithout external visible damage.DO NOT ATTEMPT TO CHARGESTANDARD ALKALINE BATTERIES.Attention: This instrument contains NIMHrechargeable batteries. Batteries must berecycled or disposed of properly.WEEE-Reg.: DE238740312
BATTERIESThe PLS HLE 1000 uses rechargeableNIMH batteries.For on-board chargeable battery, insertthe battery re-charger receptacle plug inthe charging panel outlet of the batterycover back.Insert converter's AC receptacle plug in an ACoutlet and insert the converter's DC receptacleplug in the charging panel's DC outlet.When the charging lamp is on, chargingis in process.When the charging lamp is green, chargingis completed.NOTE: The charging process takes approximately 7 hours to complete for rechargeablebatteries.AC/DC converter's suitable power range:50-60Hz; voltage 85V-265V.If it is necessary to replace the NIMH battery,the battery chamber may be removed by turning the lock washer on the battery chamber.Purchase replacement battery chamber froman authorizedPLS dealer.Use PLS HLE 1000with caution in humidor wet weather conditions. Do not put thelaser back into thecase unless it isthoroughly dry.Condensation maycorrode the batteryconnections and/orcause distortion ofbeams in lighthouse.3
KEYPAD OPERATIONFUNCTIONS AND INDICATORS6) X AXISSLOPEADJUSTINGKEY7) Y AXISSLOPEADJUSTINGKEY4) MANUALINDICATOR5) MANUALKEY1) POWERSWITCHON/OFF8) TILTORADS2) POWERLIGHT3) LOWPOWER(BLINK)1) Power switch: turn on or off unit.2) Power light: red light, power on.3) Low Battery lndicator: LED blinks,the battery should be charged or replaced.4) Manual Indicator: green LED on inmanual mode.5) Manual/automatic key: to change from automatic to manual leveling.6) Adjustment key in X slope direction: when theinstrument is in the manual mode, press to adjustslope of X direction.7) Adjustment key in Y slope direction: when theinstrument is in the manual mode, press to adjustslope of Y direction.8) Tilt or ADS (automatic drift system) blinks slowly when active, blinks quickly to warn user of achange in alignment from original set up.4
FUNCTIONSPower switchPress 1(See keypad chart) The unit is self-leveling and power light is lit. Press the key again and theunit will turn off.Rotation ModeAfter laser has automatically leveled, the laser beamstops blinking. The laser will rotate at 1000 r.p.m. If thegradient exceeds 5º, the manual indicator will blink.NOTE: If the unit does not level within 5 minutes,it will shut off.Setting SlopeThe PLS HLE 1000 can set slope on dual axes.Press the 5.The manual indicator is on.Setting slope of X direction: Aim X1 ofthe instrument in the direction necessaryto set slope. Press 6.The laser beam moves upwards or downwards.Setting slope of Y direction.Aim Y1 of the instrument in the direction X2necessary to set slope.Y2Press 7.Y1X1The laser beam moves upwards or downwards.Automatic Drift SystemPress 8. Press the TILT key, the power indicator blinksslowly. After the instrument has leveled automaticallyfor about 3 seconds, the ADS function is activated.Thepower indicator will blink quickly, and automatic levelingfunction shuts off when the instrument is disturbed byexternal circumstances. At the same time, the lasermodule will stop scanning and start blinking.5
APPLICATIONSHeightTransfer(Leveling).Turn the instrument on. Theleveling LEDis flashing andthe instrumentis self leveling.If theLED lightscontinuously the rotary headstarts and the laser beam will be turned on. Attach thePLS HLD 1000 Detector at this reference point on a rodand move this height to zero. Now the respective differencein levels to the reference height can be measured on theground. It is useful to use a flexible rod to measure positiveand negative values simply.Laying out Slope Using the PLS HLE 1000Fasten the PLS HLE 1000 to a tripod and plumb up over thebenchmark or hub. Make certain that the PLS HLE 1000 ispositioned on the tripod so that the X axis points toward whereyou need slope. Auto-level the PLS HLE 1000 by depressingthe #5 button. Once the laser is level and rotating at 1000rpm, attach the detector to the grade rod. Take the grade rodwith the detector attached to the end of the needed distance(end of pipe, footing or form board). Find level on the detectorby a solid tone or by the solid line on the LCD. Next, depressthe top center button on the remote (RC 1000) to engage themanual mode on the PLS HLE 1000. Then lower the detectorby the correct distance based on the.needed slope. Some examples are listedbelow. Depressing the right red button lowers the laser towards the detector. Holddown the right-pointing arrow key until thedetector beeps that you are within range.Now fine-tune the laser adjustment bygoing up using the left-arrow key or downusing the right-arrow key until the laser islocked on with a solid tone or by the solidline on the LCD.Examples-1% Slope @100'Lower the detectoron the grade rod12" from level-3% Slope @100'Lower the detectoron the grade rod36" from level-1% Slope @50'Lower the detectoron the grade rod 6"from level-3% Slope @50'Lower the detectoron the grade rod18" from level-1% Slope @25'Lower the detectoron the grade rod 3"from level-3% Slope @25'Lower the detectoron the grade rod 9"from level.For a positive slope layout, reverse the above examples.6
APPLICATIONSCaution ! The automatic leveling isswitched off in manual mode. If theinstrument gets bumped or moved itwill not turn off. In the semi-manualmode the tilt control is active onlyin X direction. We recommendusing a second detector to controlthe sloped plane.REMOTE CONTROLThe PLS HLE 1000 may be used with the PLS RC 1000 infraredremote control. Point the remote in the direction of the PLS HLE1000 for remote operation. Remote distance is 70 feet. There are5 keys on the panel of the remote unit. The remote panel matchesthe keypad of the PLS HLE 1000. Pressing any key will make theindicator lamp blink once indicating remote signal is being sent.CHECKING CALIBRATIONThe PLS HLE 1000 should be checked, like all measuring instruments,before use. Set the PLS HLE 1000 on a stable surface. Turn the laseron and let it level. Mount the PLS HLD 1000 Detector at a fixeddistance, e.g. at 90 feet, and move it onto the laser plane. Now turnthe instrument around to each 90 point and let the instrument level.In each case, measure the difference to the first height. If the deviationis smaller than 3/32 inch, the instrument is within the specification. Inthe case of larger deviations the instrument has to be calibrated.7
ROTARY SPECIFICATIONSPLS HLE 1000:Accuracy: /- 3/32 inch @100 feet2.4mm @ 30metersLeveling range: 5ºOperation range:Radius /- 1000 feetw/detector304 metersRotation speed:1000 rpmLight source:laser diode,wavelength 635nm, 5mWOperating Temp:4º F (-15C) to122º F (50º C)Storage Temp:-22º F(-30º C) to140º F (60º C)Laser Class:lllPower supply:4 x C Size orNIMH BatteriesOperating time:approximately 20 hoursCharging time:maximum 7 hours(NIHM ONLY)Protection grade:IP65 (Water- resistant),not submersibleSize / Weight:8 inch x 7 inch x 6 inch200mm X 177mm X 152mm4.7 lbs (unit only)2.1 kgPLS RC 1000 Remote Control:Operating distance70 feetCharger LDG 2 2:Input:100-240V AC / 47-63HzOutput:12V / 1.25ADo not attempt to charge Alkaline Batteries.Design and specifications are subject tochange without prior notice.8
WARRANTYIn the event of a claim please contact yourPLS dealer or PLS. Attempts at repair ordetectable improper treatment will void anywarranty claim. Please use the originaltransport case for shipment.This product is warranted by PLS PacificLaser Systems to the original purchaser tobe free from defects in material and workmanship under normal use for a period ofone year from the date of purchase. Duringthe warranty period and upon proof of purchase, the product will be repaired orreplaced (with the same or similar model atour option) without charge for either parts orlabor through PLS. The purchaser shallbear all shipping, packing and insurancecosts. Upon completion of the repair orreplacement, the unit will be returned to thecustomer, freight prepaid. The warranty willnot apply to this product if it has beenabused or altered. Without limiting the foregoing, battery leakage, dents or gouges tothe plastic housing, broken optic windows,damage to the switch/LED membrane arepresumed to result from misuse or abuse.Tampering with or removal of the caution orcertifications labels voids this warranty.Neither this warranty nor any other warranty,express or implied, including implied warranties of merchantability, shall extendbeyond the warranty period. No responsibility is assumed for any incidental or consequential damages. This warranty gives youspecific legal rights, and you may have otherrights which vary from state to state.9
PLS HLD 1000 DETECTOR1. SPECIFICATIONSAvailable Distance: From rotary PLS HLE 1000 (2.0 ft.) 1mm ( 0.04in)Accuracy: Precise detecting: 2mm ( 0.08in)Rough detecting:Detecting Indication: Bi-surface LCD, buzzerPower: DC9V alkaline batteryAutomatic Power-off Time: Approx. 20 minutesWorking Temperature: -20 Co to 50Co (-4o F to 122o F)Dimensions: 135 (L) X 65 (W) X 24.5 (H)mm6" x 2- 3/4" x 1"Weight: 0.15kg (0.44lbs) (with battery)2. LCDPrecise DetectingReference PositionDisplay:Higher thanreference(fastfrequencybeep)In referenceline (longbeep)Lower thanreference(slowfrequencybeep)Poor Power:Buzzer On:Buzzer Off:10Rough DetectingReference PositionDisplay:
3. PANELLCD (Bothon FrontShell &Back Shell)Buzzer ON/OFFOnce power on,default ofbuzzer is on)44mm1 3/4 InchesMarkLaser ReceptorDetectingModeBuzzerPowerSwitch11
PLSNOTES
PACIFIC LASERSYSTEMSThe Professional StandardPAC I F I C L A S E R S Y S T E M S2 5 5 0 K E R N E R B LV D .S A N R A FA E L , C A 9 4 9 01W W W. P L S L A S E R . C O M1 8 0 0 6 01 4 5 0 0
After laser has automatically leveled, the laser beam stops blinking.The laser will rotate at 1000 r.p.m. If the gradient exceeds 5º, the manual indicator will blink. NOTE: If the unit does not level within 5 minutes, it will sh