Transcription
NCR POS Printer DriverInstallation Guide
OverviewThe Windows Printer Driver for Windows 10,7 and XP Pro supports only USB Printer Classinterface. USB Printer Class interface is a true USB interface and not a Virtual Serial Port overUSB as used with the legacy driver. Some printers support this new interface through USB Typeprinter configuration option, other printers (Release I Printers) require a new version of firmware tosupport this USB interface. USB Printer Class interface is chosen by setting the “USB Type”configuration to “PRTR”.This document details the four essential phases required to use this driver:Phase 1: Installation Preparation – go over prerequisites and install the driverPhase 2: Upgrading Firmware – set up the flash utility & flash the firmware to Release I printersPhase 3: Configuring Printer - change the USB Type setting in the printer to PRTRPhase 4: Installing the Hardware – connecting the printer and using the driverNOTE: Always check the NCR Web Site for the latest versions of printer drivers, flash utilities,and documentation. For the Release I printers, the latest firmware is included with the NCRPOS Printer Driver.For Software:http://www5.ncr.com/support/support drivers patches.asp?Class External/Printers\displayFor Documentation :https://www.info.ncr.com/POSGen
Installation PrerequisitesFor LAN printers, instructions are in Appendix A.HW REQUIREMENTS:-Firmware Upgrade: USB Cable (PIDs below) used for firmware upgrade with Windows 10/7/XPDriver1432-C083-0010: Standard USB Cable, 1M1432-C083-0040: Standard USB Cable, 4M1432-C088-0010: 24V Powered USB Cable,1M1432-C404-0040: 24V Powered USB Cable, 4M(These are the latest released products; previous NCR cables will also work)-Printer: Release 1, Series II, or Kiosk (check website below to verify which type of printer you areusing). Make sure printer is flashed with latest firmware. If not, latest firmware is available inbelow web link.http://www5.ncr.com/support/support drivers patches.asp?Class External\Printers\displayOpen above link and download latest firmware for targeted printer model. Flash tool and printer flashinstructions are available in same page where latest firmware is available.SW REQUIREMENTS:-Download NCR POS Printer Driver Version 6.0.x or 6.1.x onto target system from websitebelow-- Download Version 6.0.x for 32-bit-- Download Version 6.1.x for 64-bit-- The downloads should include an EXE and a MSI, both are needed-Printer Class Firmware gets copied to target system by the driver installer--Default location is C:\Program Files\NCR\NCR POS Printer Driver\Firmware-Install Flash Utility.exe on target system using website below--Use this utility to upgrade the target printer to Printer Class firmware.--See Installation instructions in Phase 2, found later in this document-Install USB Digi I/O Network Drivers on target system using website below.The required software tools/drivers can be found by clicking here Or manually get therefollowing,www.ncr.com - Support - Drivers and Patches - Retail Support Files - NCR RealPOSand SelfServ Peripherals - Printers - Windows 10/7/XP Printer Drivers USB (USB PrinterClass Only) / LAN
Phase 1 –Installation PreparationIn this phase, you will get the target system ready to be used during the installation.STEP1.2.INSTRUCTIONSBefore beginning, ensure that you have the required cables and have downloaded allsoftware indicated in the Prerequisites section to your target system.Ensure that you understand the following installation decisions: What type of cable will be used to upgrade the firmware? What type cable will be used for runtime with the Windows Printer driver? 3.USB CableUSB CableWindows 10/7: On target system, make sure the .exe and .msi are in the same directoryand right click the NCR POS Printer Driver ( 32 or 64 -bit).exe and choose Run asAdministrator.Windows XP: On target system, double-click the NCR POS printer Driver (32bit).msi4.Follow the standard install prompts by hitting Next button until you have finishedand then click CloseNote: Drivers for all NCR printers will be installed behind the scenes.With Release 1 and Kiosk printers, move on to thePhase 2. With Series II printers, move to Phase 3.
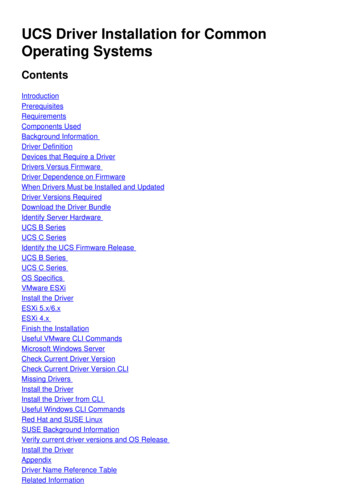
Phase 2 – Upgrading FirmwareThe current Release I printers with standard firmware does not support the USB Printer Classinterface. By default, it only supports "ION (Epic)", which requires the Edgeport Virtual Serialdriver. Due to lack of available memory, a new version of firmware was created. This new firmwareadds the “USB Type” setting with the following values:- NonION (NHPI)- NonION (PRTR)NOTE: This firmware does not support ION (EPIC); to use this interface the original firmware and adifferent driver must be used.WARNING: Before flashing a printer, make sure that you have the correct firmware for thatprinter. Flashing a printer with the wrong firmware will most likely render the printer nonfunctional, and it will have to be replaced. SERIES II FIRMWARE IS NOT COMPATIBLE WITHRELEASE 1 PRINTERS and vice versa!This section contains instructions to upgrade to Printer Class firmware for your printer.Caution: Make sure the printer is connected to the terminal!!For Series II printers or LAN connections – SKIP THIS SECTION!STEP1.2.INSTRUCTIONSDownload latest Flash Utility.exe from the website as described in the prerequisite sectionRunning TSE Flash.exe will open the programCaution: Make sure printer is connected to the terminal!!Print a diagnostic form to reference for the printer’s current configuration!(Close printer lid while pressing the feed button)3.Using the Flash Utility, select the printer you are flashing from the drop down box
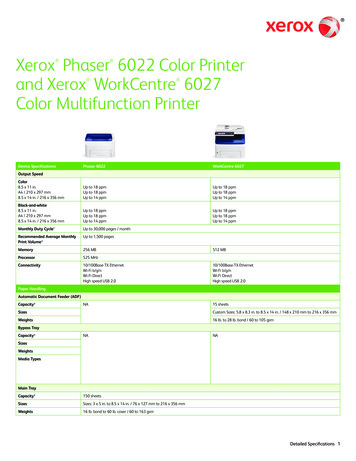
4.Be sure to click "Select Model".
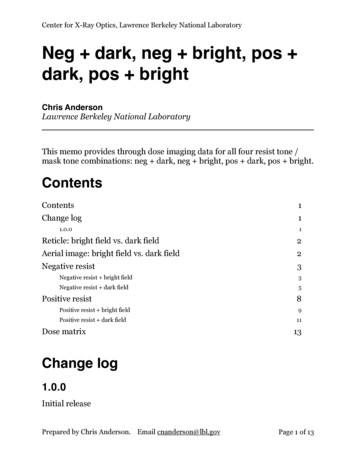
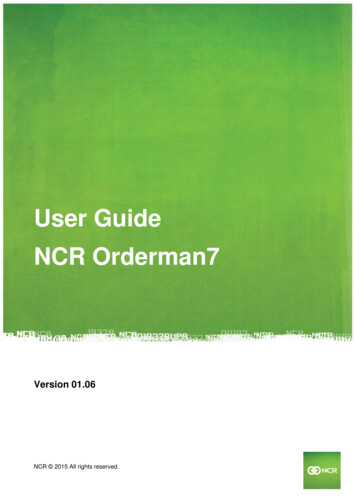
5.Then select the Download Type that you are flashing (Flash Main before IPL if youare doing both). Select the correct Interface type, if printer is in ION (Epic) modethen select COM port which is populated by edge port driver. Flash utility showspopulated COM port on right side with green icon or Search for “EdgeportConfiguration Utility” and launch that tool. It lists generated COM port number forprinter.If printer is in NHPI mode, then select CPMI as interface type.6.Now click Browse.
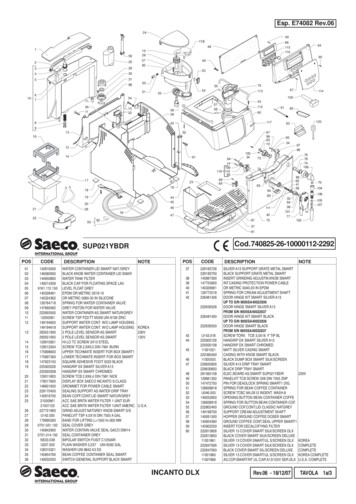
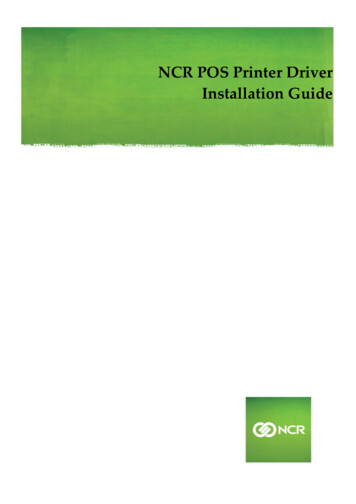
7.If you used the default path when installing the Windows Printer Driver (in Phase 1),go to C:\Program Files\NCR\NCR POS Printer Driver\Firmware, if not, go to thepath you specified.Go into the folder that matches your printer, click on the file and click Open.Note: For each printer there will be a folder that contains the IPL (initial program load),and MFW (main firmware) for the printer. Example: MainFW 7168 is in directory 71688.Click on Flash Device.Do you need to flash multiple FW types (IPL and MAIN for example)? Yes? Then repeat steps 5-8. No? Then move to Phase 3 to configure Printer!This is the End of the Firmware Upgrade!
Phase 3 – Configuring PrinterThis section contains instructions to configure your printer for USB Printer Class.STEP1.INSTRUCTIONSCheck the printer’s Diagnostic Form (close printer door while holding feed button) forwhich dip switch to turn ON for Configuration mode.Note: You can skip this step for NRC 7199 Receipt Printer. NCR 7199 Receipt Printer doesn’t havedip switch. See NCR 7199 User Guide for configuring printer using feed button.2.3.4.5.Power cycle the printer while holding the Feed Button.A Diagnostic Form will print out as well as a list for the configuration options. To selectan option firmly press the feed button quickly the number of times that is shown, andthen add a long 2 sec press of the feed button to continue.Use the feed button to choose "Set Communication Interface"On the diagnostic form that prints out check that "Interface Type" is:"RS232/USB" or"USB" If it’s not, “Set Interface Type?” select Yes using the feed button Now select either “RS232/USB “or “USB”6.Choose No until you get to "Set the USB InterfaceType?"Then, select Yes. Select "PRTR".7.Save new parameters.8.9.Select Exit. Make sure the new Diagnostic Form the printer matches the newconfigurations. Interface Type: RS232/USB OR USB USB Type: PRTRFlip Dip Switches OFF and unplug printer’s power cabl e . Not applicable to NCR 7199Receipt Printer.Switch to a USB Cable and power the printer!10.Move on to Phase 4 to check that the printer can work properly with the Windows 10/7/XPDriver.This is the End of the Printer Configuration!
Phase 4 – Installing the HardwareTo check if printer is properly set-up follow the steps below based on your respective OS.Windows 10STEP1.2.INSTRUCTIONSSearch Windows for devices, and then click “Devices and Printers” in the list of results.Is your printer listed?Yes? Step 3 Note: If you have a printer with a slip, it will not show up as a separate icon,right click the printer icon to check that you can select either the Receipt or the Slip.3.No? Step 4 (or recheck you did the steps properly; this should not be necessary)Right click the printer icon. Click Printer Properties and print a Test Page. You are done!4.Click on “Add a printer” button.
5.Click “The printer I want isn't listed”6.Select “Add a local printer or network printer with manual settings”, and then click Next.7.Select “Use an existing port”, and then click Next.8.Select “NCR Corporation” from Manufacture list and Select targeted NCR printer modelfrom Printers list if present, and then click Next.OrSelect “Have Disk ”, and point to the C:\Program Files\NCR\NCR POS Printer Directory,assuming you used the default directory. Select the oemprint.inf file and click Open. Choose theprinter Model from the list of NCR printers, and then click Next.
9.Select “Use the driver that is currently installed(recommended)”, and then click Next.10.Don’t change the Printer name and then click Next.11.Choose printer sharing option based on the requirement, and then click Next.
12.Optionally, you can give a test print using “Print a test page” button.Optionally, you can set installed printer as default by checking “Set as the default printer”option.Click Finish button.You may need to repeat steps 4-12 if your printer has both a Receipt and a Slip station.13.Right click the printer icon Click Printer Properties and print a Test Page. You are doneThis is the End of Installation!
Windows 7STEP1.2.INSTRUCTIONSStart - Devices and PrintersIs your printer listed?Yes? Step 3 Note: If you have a printer with a slip, it will not show up as a separate icon,right click the printer icon to check that you can select either the Receipt or the Slip.3.No? Step 4 (or recheck you did the steps properly, this should not be necessary)Right click the printer icon. Click Printer Properties and print a Test Page. You are done!4.Click on ADD PRINTER.5.Select HAVE DISK, and point to the C:\Program Files\NCR\NCR POS PrinterDirectory, assuming you used the default directory.6.Choose the printer Model from the list of NCR printers.You may need to repeat steps 4-6 if your printer has both a Receipt and a Slip station.7.Right click the printer icon Click Properties and print a Test Page. You are doneThis is the End of Installation!
Windows XP / POS Ready 2009STEPINSTRUCTIONSWhen you plug in the printer a New Hardware Wizard will pop up. While the printershould work now, follow these steps if it does not.1.Select “No, not this time” and then hit Next.2.Select “Install from list or specific location (Advanced), and then click Next.
3.4.5.Select “Don’t search. I will choose the driver to install” and then hit Next.Select Printers as the Hardware Type and Click Next.Select NCR Corporation, the respective Printer, and then click Have Disk.
6.7.Click Browse and navigate to the path circled below and click Open. Then click OK.When you get this warning, click Yes to proceed.Note: These drivers are not signed with Windows so this warning always occurs,however, your hardware will in fact install properly.8.Click Finish! Printer is now ready to use!This is the End of Installation!
Appendix A – LAN PrinterThe LAN printer can be set to Get IP Address either Manual (static) or DHCP(dynamic).For Manual, flip both dip switches OFF and power cycle the printer. Appendix B configures the computer for manual IP addresses.For DHCP, flip both dip switches ON and power cycle the printer.Windows 10STEPINSTRUCTIONSPrint the Diagnostic Form (close printer door while pressing the feed button) andcheck that the Get IP Address setting is correctly set to your preference to either Manualor DHCP1.Search Windows for devices, and then click “Devices and Printers” in the list of results.2.Click on “Add a printer” button.
3.Click “The printer I want isn't listed”4.Select “Add a printer using a TCP/IP address or host name”, and then click Next.
5.6.In Hostname or IP address field, enter printer’s IP address (found on diagnostic form).Then click Next.Note: For DHCP IP, address is listed under Allocated Address by DHCP not TCP/IPsetting.Leave the defaults for this step, and just click Next.
7.Select “NCR Corporation” from Manufacture list and Select targeted NCR printer modelfrom Printers list, and just click NextOrSelect “Have Disk ”, and point to the C:\Program Files\NCR\NCR POS Printer Directory,assuming you used the default directory. Select the oemprint.inf file and click Open. Choosethe printer Model from the list of NCR printers, and then click Next.8.Select “Use the driver that is currently installed(recommended)”, and then click Next.9.Don’t change the Printer name and then click Next.
10.Choose printer sharing option based on the requirement, and then click Next.11.Optionally, you can give a test print using “Print a test page” button.Optionally, you can set installed printer as default by checking “Set as the default printer”option.Click Finish button.12.Right click the printer icon Click Properties and print a Test Page. You are doneThis is the End of Installation!
Windows 7/XPThese instructions are for both Windows XP and 7, small variations will occur, where noted.STEPINSTRUCTIONSPrint the Diagnostic Form (close printer door while pressing the feed button) and check that theGet IP Address setting is correctly set to your preference to either Manual or DHCP1.2.From the Printers and Faxes Window, click Add Printer.The Add Printer Wizard pops up, click Next.
3.Choose “Local printer attached to this computer”Uncheck “Automatically detect and install my Plug and Play printer” and hit Next4.Select “Create a new port”, then select “Standard TCP/IP Port” from the drop-downmenu Then click Next5.Win XP only: A new window will pop-up to create a TCP/IP Port, click Next.
6.7.8.Enter printer’s IP address (found on diagnostic form). Then click Next.Note: For DHCP IP, address is listed under Allocated Address by DHCP not TCP/IP settingLeave the defaults for this step, and just click Next.Win XP only: Click Finish.
9.9.10.Select NCR Corporation, the respective Printer, and then click Have Disk.Click Browse and navigate to the path circled below,Select the oemprint.inf file and click Open. Then click OK and then Next.Choose the printer you are installing and click Next.
11.12.13.Leave the default “Keep existing driver” selection and hit NextCheck that the Printer name is correct for your printer, and decide if you want thisprinter to be default. Then click Next.Win 7 only: Decide if you want to share printer and hit Next.
14.15.16.Click Next to attempt to print a test page.Click Finish! Printer is now ready to use!This window will pop-up and a test page should print. Then Click OK.This is the End of Installation!
Appendix B – Setting Computer to Manual IPSTEP1.INSTRUCTIONSWin XP: Click Start - Control Panel - Network and Internet Connections - NetworkConnectionsWin 7: Click Start - Control Panel - Network and Internet - Network and Sharing Center2.Win10: Search Windows for control, and then click “Control Panel” in the list of results Network and Internet - Network and Sharing CenterWin XP: Right Click on Local Area Connections, and click PropertiesWin 7/10: Click on Local Area Connection
3.Win XP: Select Internet Protocol (IV4 if there is a choice) and click PropertiesWin 7/10: Click Properties. Then Select Internet Protocol Version 4 and click.
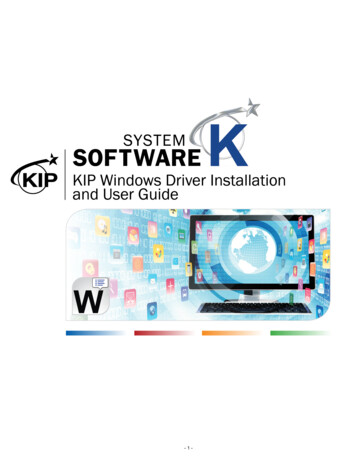
4.5.For Win XP, Win 7 and Win 10:Click “Use the following IP Address” and enter an address in the same range as theprinter’s IP address.Click OK, then Close out of all network related windows. You are all set!The computer is now configured with a static I P !Appendix C – How to enable printer driver’s diagnosticlogs.WARNING: Printer Driver logging need to be enabled only when replicating a problem. It should bedisabled after taking required logs otherwise it will eventually fill the hard drive, and crash thesystem.Steps to enable diagnostic logs for version 6.0.3(32bit)/6.1.2(64 bit) and later versions.1. Open Windows Registry Editor.2. In Registry editor, Navigate to HKEY LOCAL MACHINE SOFTWARE NCR NCR POSPrinter Driver
3. On right side of window, modify “EnableLog” registry key value to 1.4. Create POSPTR.log file in C:\ drive.5. Try to replicate the problem for one or two times.6. Take backup of log files present in “C:\Program Files\NCR\NCR POS Printer Driver\Logs\”folder and C:\POSPTR.log.
7. Send the backed up log files to customer support team.8. Disable logging by modifying “EnableLog” registry key value to 0 and delete POSPTR.log filefrom C:\ drive.WARNING: “EnableLog” registry key value should be set to 0 and POSPTR.log file should bedeleted from C:\ drive once diagnostic logs are taken otherwise it will eventually fill the hard drive,and crash the system.Steps to enable diagnostic logs for version 6.0.2(32bit)/6.1.1(64 bit) and earlierversions.1. Create POSPTR.log file in C:\ drive.2. Try to replicate the problem for one or two times.3. Take a copy POSPTR.log file and send it to the customer support team.4. Delete POSPTR.log file from C:\ drive once a copy of log file is taken.WARNING: POSPTR.log file should be deleted from C:\ drive once diagnostic logs are takenotherwise it will eventually fill the hard drive, and crash the system.
-Download NCR POS Printer Driver Version 6.0.x or 6.1.x onto target system from website below -- Download Version 6.0.x for 32-bit -- Download Version 6.1.x for 64-bit -- The downloads should include an EXE and a MSI,