Transcription
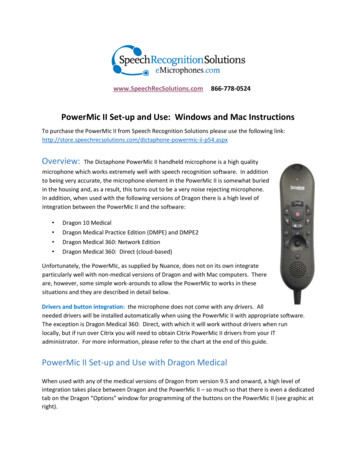
www.SpeechRecSolutions.com866-778-0524PowerMic II Set-up and Use: Windows and Mac InstructionsTo purchase the PowerMIc II from Speech Recognition Solutions please use the following e-powermic-ii-p54.aspxOverview:The Dictaphone PowerMic II handheld microphone is a high qualitymicrophone which works extremely well with speech recognition software. In additionto being very accurate, the microphone element in the PowerMic II is somewhat buriedin the housing and, as a result, this turns out to be a very noise rejecting microphone.In addition, when used with the following versions of Dragon there is a high level ofintegration between the PowerMic II and the software: Dragon 10 MedicalDragon Medical Practice Edition (DMPE) and DMPE2Dragon Medical 360: Network Edition Dragon Medical 360: Direct (cloud-based)Unfortunately, the PowerMIc, as supplied by Nuance, does not on its own integrateparticularly well with non-medical versions of Dragon and with Mac computers. Thereare, however, some simple work-arounds to allow the PowerMic to works in thesesituations and they are described in detail below.Drivers and button integration: the microphone does not come with any drivers. Allneeded drivers will be installed automatically when using the PowerMic II with appropriate software.The exception is Dragon Medical 360: Direct, with which it will work without drivers when runlocally, but if run over Citrix you will need to obtain Citrix PowerMic II drivers from your ITadministrator. For more information, please refer to the chart at the end of this guide.PowerMic II Set-up and Use with Dragon MedicalWhen used with any of the medical versions of Dragon from version 9.5 and onward, a high level ofintegration takes place between Dragon and the PowerMic II – so much so that there is even a dedicatedtab on the Dragon “Options” window for programming of the buttons on the PowerMic II (see graphic atright).
Key Point: When using the PowerMic II with any medical versions of Dragon it is necessary toformally select the PowerMic II as the sound source for auser profile in order to have the added tab on the optionsmenu for advanced programming of the buttons on thePowerMic II. If you don’t see the tab on your medicalversion of Dragon, it means the PowerMic wasn’t properlyadded.Adding the PowerMic II to Dragon MedicalSelecting the PowerMic II as the sound source can be doneusing one of two methods:1. Preferred Method: From within an existing user,change the dictation source by going to Profile Adddictation source to current user profile. You will bepresented with a window from which you can choose“PowerMic II Microphone” as your new source. Youcan thereafter choose whether to perform training or not. Selecting a “short” training is idealbut not absolutely necessary.[Note: in older versions of Dragon Medical a new source is added using a slightly differentmethod. Navigate to Profile Open User Profile and then selecting Source New on the rightof the Open User screen. From there select the PowerMic II as the sound source and followsubsequent instructions.]2. Alternative Method: Create a new user (Profile Manage User Profiles New) and select the“PowerMic II Microphone” as the dictation source. Train the new user as usual. This methodtakes a lot more time and creates a profile without the commands and personalizedvocabulary in your old profile.Programming PowerMic Buttons (Dragon medical versions only)Assigning functions in appropriate medical versions ofDragon is the same as programming keyboard hotkeys.Program buttons in Dragon 10 Medical as follows:1.Open the PowerMic II tab in the options menuby clicking on Tools Options PowerMic IItab. You will see the Options tab shownabove.
2.On your PowerMic II microphone, push on the button you want to program. You will noticethat the corresponding button on the PowerMic II picture will turn green and the associateddrop down menu to the right will be highlighted3.From the drop down menu, select the function you want to assign to the selected button.4.If you want to program a button to cause a command to be initiated, go the “User Commands”selection on the drop-down. This will then reveal the last 5 commands you used and any ofthese can be selected. If necessary, therefore, in advance of programming a button, be sure touse any commands you plan to assign to aPowerMic II button.5.If you plan to program a button to advancesequentially through variable fields in adocument, make the appropriate selectionfrom the navigation category of the drop-downmenu (see image at right).PowerMic Set-up with Non-Medical Versions of DragonAs mentioned above, full programmability of the buttons on PowerMic II isallowed only with the medical versions of Dragon. For all other versions, themicrophone and speaker will work, as will the pointer stick and left and rightclick buttons. But nothing more.Fortunately, there is an option to allow programming of the PowerMic II fornon-medical versions of Dragon and for other Windows applications – the useof Octopus USB Controller (OUC). Octopus USB Controller is a third-partysoftware utility that allows you to assign functionality to the buttons or levers on any USB HumanInterface Device, including the PowerMIc II. Among the functions you can program are the following: Insert boilerplate text (text of your choosing)Initiate any of a series of Windows activities, such as moving forward and backward throughopen applications, opening the Task Manager, and other common Windows functions/activitiesOpen any application, document, web-page, or folderEmulate any key or key-combinationFor Dragon users, initiate any Dragon Hotkey or command (including user created commands)Combine an unlimited number of the above functions into a single "script" initiated with a singlebutton, key or lever push
A fully functioning version of OUC is available for free download and can be used 5 times beforepurchasing an activation code. For more information on Octopus USB controller, please visit theproduct page on our site -controller-p164.aspxNOTE: DRAGON MEDICAL AND WINDOWS USERS NEED NOT READ ANYTHING BELOW ***************************************PowerMic II Set-up and Use for Mac UsersMac LimitationsAlthough Dragon Dictate shares the same speech engine as its Windows-based cousin (DragonNaturallySpeaking) and provides high levels of accuracy when dictating, it lacks some of the functionalityseen in the Windows version. As relates to the PowerMIc II, limitations include:1. The inability to program any of the keys on the PowerMic II microphone to control themicrophone with Dragon Dictate2. The inability to use any microphone (PowerMic II and others) in a “push-to-talk” manner.3. The lack of drivers and functionality to allow programming of additional functions to thePowerMic II buttonsPrerequisites for the Mac UserThankfully, there is a simple way to get around these limitations, although it requires purchase of two(relatively inexpensive) third-party applications. One application allows programming of PowerMic keysin a Mac environment (including emulation of keystrokes.) The other allows keystrokes to control thedefault Mac microphone in a push-to-talk manner. Here’s what you need:1. USB Overdrive: this is a software utility that detectsthe buttons on most USB devices, including thePowerMic and allows you to program a variety offunctions to a button depression. This application is “shareware” and can be used for free,but you will be forced to live through a short count-down every time you launch it. Wesuggest you buy it for 20 and support the programmer. It can be seen and downloaded fromwww.usboverdrive.com . Once downloaded and installed, USB Overdrive will show up as asystem utility and is accessed through the Finder at Applications Utilities. If the only thingyou want is to control Dragon Dictate with a PowerMic in a push-on/push-off method, USBOverdrive is all you need. You will see that USB overdrive allows programming of lots offunctions to the keys on a PowerMic.
2. Push to Talk: this is a very inexpensive ( .99) application that is availablefrom the Mac App Store and which will allow you to assign any keycombination to control the assigned system default microphone in a pushto talk method. To be clear, Push to Talk does not interact with Dragon orany other program but, rather, controls the default microphone at thesystem level, activating it while a key or key combination is depressed and inactivating it whenthe key or key-combination is released. If the default microphone is the PowerMic, then it canbe controlled in a push to talk method.Find “Push to Talk” by searching on the Mac App Store. Once installed, Push to Talk is seen as asmall microphone icon on the top of your screen. It provides a visual indication of whether yourmicrophone is active or not and by clicking on the icon you can open its simple menu. You’llneed push to talk if you want to control the Dragon Dictate microphone in a push-to-talkmanner.Overview of the Setup for a Mac:We recommend a strategy using the general flow shown in the figure above and programming USBOverdrive and Push to Talk as follows:1. Program one key on the PowerMic to issue the key combination needed by Dragon Dictate tocontrol the microphone in an on/off method (press once to turn on and again to turn off) – welike to assign this to the transcribe key, but any key will work.2. Program one key on the PowerMic to issue the key or key combination used by “push to talk” tooperate the default microphone input (PowerMic II) in a push-to-talk manner.Practically speaking you will use the first button to turn on the microphone, and then use the secondbutton to actually activate the microphone input in a push-to-talk method.
Detailed Set-up Instructions:1. Download/Install USB Overdrive2. Download/Install Push to Talk3. In order to have Push to Talk control thePowerMic II it is necessary to select thePowerMic as your default microphone fromthe Mac sound control panel (see image atright).4. Open the Push to Talk Preferences menu asshown below (if it isn’t obvious, theapplication is viewable and accessed from the small microphone icon at the top of your screen)5. On the Microphone control drop-down be sure “Hold down hotkey to activate mic” is selected.6. Assign your desired hotkey by clicking in the clear area nearthe bottom of the Preferences window and select your keycombination (shown above is the combination ofCtrl Shift P.)7. Open USB overdrive and program the button on your micto the key to you want to assign push-to-talk behavior (thesame key or key-combination assigned to the Press to Talk application.) Shown below the“button 3” on a PowerMic II (the central record button) is assigned the same key combinationassigned by the Press to Talk application to control the microphone.8. If you want to be slick, use USB Overdrive to programone button to correspond with the keycombinationassigned in Push to Talk, and another button toemulate the key combination set in the Dragon Dictatepreferences menu to cycle the microphone on and off.In this scenario, you can use one button (the“transcribe” button) to turn on the microphone inDragon Dictate, and then another button (the “Record”button”) to control the microphone in the operatingsystem in a push-to-talk method.Key Point: the “Push to talk” application actually controlswhether the microphone is providing input to Dragon Dictate (or any application) on your Mac. Even ifDragon Dictate shows the microphone as green and “On” the signal won’t be getting through to Dragonuntil you have activated the key combination (either on the keyboard or via the PowerMic through USBOverdrive) required by Push to Talk. To use the two effectively, you will need to turn on the DragonDictate microphone with one key and then actually control the microphone input using another key viaPush to Talk.Caveats:
1. This exact set-up can also work with other USB microphones. Unfortunately the Philipsmicrophones do not work with a Mac except in the context of the Philips Control Application. Ifyou program the record button on a Philips mic to emulate a key combination, rather thandirectly control the Dragon Dictate microphone, you can use this button in a push-to-talkmethod as described above.2. If you are using the cloud-based speech recognition program built into your Mac, this samesystem (Press to Talk, with of without USB Overdrive) will work just as easily. Simply apply thesame key or key-combination to activate speech recognition in both the speech recognitionsoftware and in Push to Talk.Overview of PowerMic II Software CompatibilitySoftwareUse ofEnvironment MicrophoneUse ofSpeakerUse ofTrack-PointStickUse of leftand rightmousebuttonsBasicAdvancedProgramming Programmingof accessory of accessorybuttons (1)buttons (2)Audioprograms inWindowsXP, 7 & 8YesYesYesNoNoNoAudioprograms onIntel MacYesYesYesNoNoNoDragonMedical 10,DMPE, &DMPE2YesYesYesYesYesYesDragonDirect (3)YesYesYesYesYesYes(1) “Basic Programming” of the 10 accessory buttons means that standard functions which can be assigned to keys on the pckeyboard can also be assigned to any of the 10 programmable buttons on the PowerMic II using the “hotkeys” tab on theNaturallySpeaking Options window.(2) Advanced Programming of the 10 accessory buttons means that a tab specific to the PowerMic II will be present in theDragon Options window and that keys can be assigned to affect a number of higher level functions within dragon,including initiation of commands.(3) When the local version of Dragon direct is run, Dragon direct will allow programming of 3 buttons at this time (Nuance isgradually rolling out more button programming). When using the Citrix based version of Dragon Direct, it is necessary toinstall dedicated Citrix drivers to allow functionality of the PowerMic on the Citrix-based application.
The exception is Dragon Medical 360: Direct, with which it will work without drivers when run locally, but if run over Citrix you will need to obtain Citrix PowerMic II drivers from your IT administrator. For more information, please refer to the chart at the end of this guide. PowerM