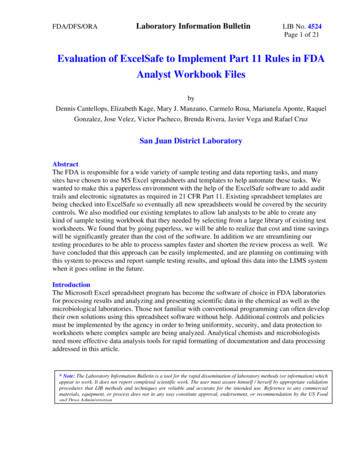
Transcription
How to implement an SSO solution on Synology NAS with Microsoft Azure ADDomain ServicesSynology provides a single-sign-on (SSO) solution to integrate all your web applications and services. Once users signin to any one of your web applications and services with their credentials, they can access any other ones withoutsigning in again.Aside from the benefits mentioned above, with your existing subscription to Microsoft Azure , you can also join yourSynology NAS as an SSO client to Microsoft Azure Active Directory Domain Services. This exempts you from the needto deploy and manage domain controllers on premises.This tutorial will guide you through how to join your Synology NAS to Azure AD Domain Services, and how to enableAzure SSO service.Contents1.Before you start2.Enable Microsoft Azure AD Domain Services3.Join Synology NAS to Azure AD Domain4.Enable Azure SSO service on Synology NAS1. Before you startBefore you proceed with the setup, please make sure you have already had an adequate environment as describedbelow. The operating system of your Synology NAS has been updated to DiskStation Manager (DSM) 6.2 or above. An IPSec VPN tunnel has been set up between Microsoft Azure virtual network and the network where yourSynology NAS is located. We recommend setting up your local network with a Synology Router. For detailedsteps, please refer to this tutorial.Note: The domain join function is not available on Synology Embedded DataStation and Network Video Recorderproducts. Visit Microsoft Azure AD Domain Services website to learn more on their pricing details.2. Enable Microsoft Azure AD Domain Services1.Log in to your Microsoft Azure account.
2.Click New Security Identity Azure AD Domain Services.
3.Configure the basic settings.
4.In the Network step, select the Virtual network and Subnet for your Azure AD Domain services.Note: For the configuration of Azure Virtual Network, you may refer to the tutorial on how to set upSite-to-Site VPN between Synology Router and Microsoft Azure.5.In the Administrator group step, specify the members who are given the privileges to manage the domain.
6.Check the summary of your setup, and click OK to enable Azure AD Domain Services.7.Once the deployment of your newly created Azure AD Domain is complete, find the domain's IP addresses on thevirtual network, which will later be used in the configuration on Synology NAS.8.You may need to update DNS server and set up password synchronization on Azure Portal. For detailed steps,please follow the instructions on Azure Portal.3. Join Synology NAS to Azure AD Domain1.Sign in as administrator to DSM on the Synology NAS that you wish to join to Azure AD Domain.
2.Go to Control Panel Domain/LDAP Domain, and configure the following settings:a.Tick the Join domain checkbox.b.Domain: Here, we enter SYNOLOGY.COM.c.DNS Server: Enter the Azure AD domain's IP address. If you have more than one address, simplyseparate them with comma.d.3.Click Apply.Enter the credentials of Azure AD domain's administrator, and click Next.
4.Read the notes, and click OK to start joining.5.When the domain join is complete, click Finish.
6.You can now view the users and groups managed on Azure Active Directory.4. Enable Azure SSO service on Synology NAS1.On Azure Portal, go to Azure Active Directory App registrations, and click New application registration.
2.3.Configure the following settings, and then click Create: Name: Enter the application's name. Application type: Select Web app / API. Sign-on URL: Enter the URL of your application's login page.You will see the just now created application in the list, click on it to get essential information.
4.Copy the Application ID. Then, click Settings Keys.Note: You may skip to steps 7 and 8 to paste the copied value first.5.Follow the steps below to generate the application's key:.Set up the key's DESCRIPTION and duration of validity (EXPIRES).a.Click Save.b.The key will show at the VALUE column. You must copy it right away before leaving this page.Note: You may skip to steps 7 and 8 to paste the copied value first.
6.Go to Azure Active Directory Properties to copy the Directory ID.7.Go to DSM Control Panel Domain/LDAP SSO Client, and do the following steps:.Tick Enable OpenID Connect SSO service.a.Select azure in the Profile drop-down list.b.Click Edit.
8.Paste the copied values of Application ID, Keys, and Directory ID, as well as enter the Redirect URI of yourapplication's login page.9.Remeber to click Apply when the configuration is complete.10. Valid users managed by your Azure Active Directory can now sign in to your Synology NAS hosting webapplication with their original credentials. To sign in with SSO, select Azure SSO Authentication from the drop-
down list.11. Users will see a pop-up window requiring their account and password.
12. Users will then see a confirmation. Just click Accept to sign in.
Join Synology NAS to Azure AD Domain 4. Enable Azure SSO service on Synology NAS 1. Before you start Before you proceed with the setup, please make sure you have already had an adequate environment as described below. The operating system of your Synology NAS ha
