Transcription
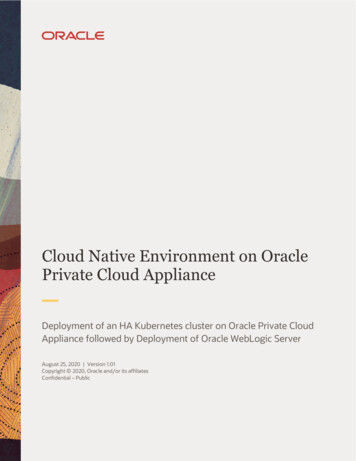
Cloud Native Environment on OraclePrivate Cloud ApplianceDeployment of an HA Kubernetes cluster on Oracle Private CloudAppliance followed by Deployment of Oracle WebLogic ServerAugust 25, 2020 Version 1.01Copyright 2020, Oracle and/or its affiliatesConfidential – Public
PURPOSE STATEMENTThis document provides an overview of features and enhancements included in Oracle Private Cloud Appliance and OraclePrivate Cloud at Customer release 2.4.3. It is intended solely to help you assess the business benefits of upgrading to 2.4.3and to plan your I.T. projects around modernization of applications by adopting the Cloud Native deployment model.DISCLAIMERThis document in any form, software or printed matter, contains proprietary information that is the exclusive property ofOracle. Your access to and use of this confidential material is subject to the terms and conditions of your Oracle softwarelicense and service agreement, which has been executed and with which you agree to comply. This document andinformation contained herein may not be disclosed, copied, reproduced or distributed to anyone outside Oracle withoutprior written consent of Oracle. This document is not part of your license agreement nor can it be incorporated into anycontractual agreement with Oracle or its subsidiaries or affiliates.This document is for informational purposes only and is intended solely to assist you in planning for the implementationand upgrade of the product features described. It is not a commitment to deliver any material, code, or functionality, andshould not be relied upon in making purchasing decisions. The development, release, and timing of any features orfunctionality described in this document remains at the sole discretion of Oracle.Due to the nature of the product architecture, it may not be possible to safely include all features described in this documentwithout risking significant destabilization of the code.2TECHNICAL BRIEF Cloud Native Environment on Oracle Private Cloud Appliance/Private Cloud at Customer Version 1.01Copyright 2020, Oracle and/or its affiliates Confidential – Public
TABLE OF CONTENTSPurpose Statement2Disclaimer2Introduction4Integrated production-ready cloud native environment4Kubernetes cluster Lifecycle operations5Displaying Kubernetes Clusters5Creating a Kubernetes Cluster6Scaling a Kubernetes Cluster14Deleting a Kubernetes Cluster15Deploy Oracle WebLogic Server on Kubernetes cluster16Prerequisites16Deploy Oracle WebLogic Server Kubernetes Operator16Deploy Traefik Load Balancer19Deploy a WebLogic Server Domain20Scale the WebLogic Server Domain23Conclusion24Resources243TECHNICAL BRIEF Cloud Native Environment on Oracle Private Cloud Appliance/Private Cloud at Customer Version 1.01Copyright 2020, Oracle and/or its affiliates Confidential – Public
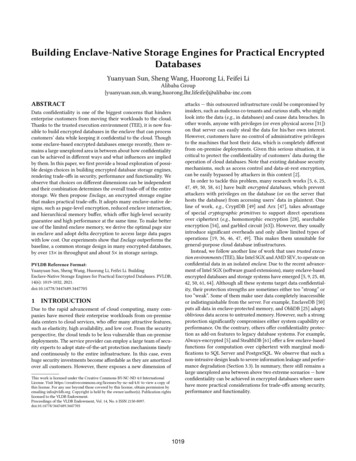
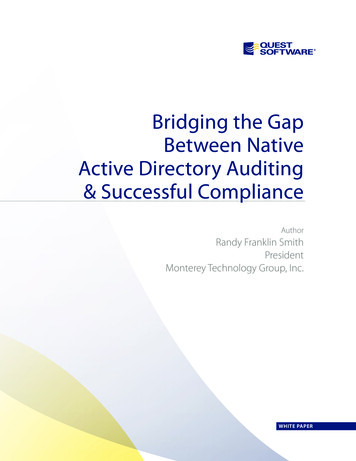
INTRODUCTIONOracle Private Cloud Appliance and Oracle Private Cloud at Customer are an on-premises cloud native convergedinfrastructure that allows customers to efficiently consolidate business critical middleware and application workloads. OraclePrivate Cloud Appliance is cost effective, easy to manage, and delivers better performance than disparate build-yourown solutions. Oracle Private Cloud Appliance together with Oracle Exadata provides a powerful, single-vendor, applicationand database platforms for today’s data driven enterprise.Oracle Private Cloud Appliance runs enterprise workloads alongside cloud-native applications to support a variety ofapplication requirements. Its built-in secure Multi tenancy, zero downtime upgradability, capacity on demand and singlepane of glass management make it the ideal infrastructure for rapid deployment of mission critical workloads. Oracle PrivateCloud Appliance together with Oracle Cloud Infrastructure provides customers with a complete solution tosecurely maintain workloads on both private and public clouds.INTEGRATED PRODUCTION-READY CLOUD NATIVE ENVIRONMENTOracle Private Cloud Appliance and Oracle Private Cloud at Customer come fully-integrated with a production-ready OracleLinux Cloud Native Environment that simplifies and automates the lifecycle of Kubernetes workloads. Oracle Linux CloudNative Environment is a curated set of open source Cloud Native Computing Foundation (CNCF) projects that can be easilydeployed, have been tested for interoperability, and for which enterprise-grade support is offered. With the Oracle LinuxCloud Native Environment, Oracle provides the features for customers to develop microservices-based applications that canbe deployed in environments that support open standards and specifications.Oracle Private Cloud Appliance and Oracle Private Cloud at Customer offer you the most optimized platform to consolidateyour enterprise mission-critical workloads and your modern cloud-native containerized workloads. It provides you thesimplest path to modernize your workloads and helps you accelerate the digital transformation to meet your changingbusiness needs.Oracle Private Cloud Appliance allows you to easily manage creation, deletion and scaling of Highly Available Kubernetesclusters with a few clicks in Enterprise Manager Self Service Portal or using the pca-admin CLI. The integrated Kubernetesdashboard offers a single pane GUI management for clusters.Every Kubernetes cluster created this way is Highly Available (HA) as it has: 3 Kubernetes Master Nodes Variable number of Kubernetes Worker NodesImage Caption 1. Architecture Overview of HA Kubernetes clusters on Oracle Private Cloud Appliance/Private Cloud at Customer4TECHNICAL BRIEF Cloud Native Environment on Oracle Private Cloud Appliance/Private Cloud at Customer Version 1.01Copyright 2020, Oracle and/or its affiliates Confidential – Public
KUBERNETES CLUSTER LIFECYCLE OPERATIONSImage Caption 2. Kubernetes cluster operations workflow on Oracle Private Cloud Appliance/Private Cloud at CustomerWith Oracle Private Cloud Appliance Release 2.4.3, Kubernetes lifecycle operations (creation/deletion/scaling) have beenintegrated into pca-admin CLI as well as Enterprise Manager Self Service portal for easy GUI based management. On OraclePrivate Cloud at Customer, Kubernetes clusters can be created/deleted and scaled by Customer User in Oracle EnterpriseManager Self Service portal.The primary states of a Kubernetes clusters are shown in Image 2: CONFIGURED – the Kubernetes cluster configuration exists and it is either valid or invalid SUBMITTED – The job has been queued for execution in Oracle VM BUILDING – The Kubernetes cluster is being created with sub-states specifying what is being built - Network,Master VMs, Load Balancer, Control Plane, Worker VMs RECOVERING – The Kubernetes cluster is being Stopped and Master/Worker VMs are being removed STOPPING – Stopping nodes in a node pool of Kubernetes cluster AVAILABLE – The Kubernetes cluster is ready to use ERROR – The Kubernetes cluster needs to be stopped and possibly needs manual interventionDisplaying Kubernetes ClustersTo access the pca-admin CLI, login to the Master Management node of Oracle Private Cloud Appliance using the virtual IP.stayal ssh root@10.147.36.xxroot@10.147.36.xx's password:Last login: Sun Jul 12 20:27:17 2020[root@ovcamn06r1 ]# pca-adminWelcome to PCA! Release: 2.4.3To display a list of all Kubernetes clusters that exist on Oracle Private Cloud Appliance, use list kube-cluster commandin pca-admin.PCA list kube-clusterCluster-------Tenant Group------------State-----foo4011-cluster Rack1 ServerPoolCONFIGUREDintern-clusterAVAILABLE5Rack1 ServerPoolSub State--------VALIDNoneLoad Balancer Vrrp kers-------None3363410.147.37.203TECHNICAL BRIEF Cloud Native Environment on Oracle Private Cloud Appliance/Private Cloud at Customer Version 1.01Copyright 2020, Oracle and/or its affiliates Confidential – Public
sonit-2Rack1 Rack1 ServerPoolAVAILABLEVALID10.147.37.20236zebraRack1 ServerPoolCONFIGURED VALID10.147.37.151732---------------5 rows displayedStatus: SuccessCreating a Kubernetes ClusterCreating a HA Kubernetes cluster on Oracle Private Cloud Appliance requires the following steps: Create a Kubernetes cluster ‘definition’ Create the Kubernetes cluster resources including Master and Worker VMs, networks and Load BalancerIn this section, we will see the creation of a Kubernetes cluster that is attached to a DHCP network. For a complete list ofcommands to create a cluster with static network addresses, refer to the PCA 2.4.3 official product documentation.Create Cluster ConfigurationThe first step is to create a cluster configuration for the Kubernetes cluster using create kube-cluster command.PCA create kube-cluster name of cluster Tenant Group external network load balancer ip Repository for VM disks name of virtual appliance PCA create kube-cluster sonit-3-cluster Rack1 ServerPool vm public 313 10.147.37.166 Rack1Repository pca-virtual-applianceKubernetes cluster configuration (sonit-3-cluster) createdStatus: SuccessAfter this step, a configuration file is created for the specified Kubernetes cluster. This configuration can be viewed by usingshow kube-cluster command.PCA show kube-cluster name of cluster PCA show kube-cluster ----Clustersonit-3-clusterTenant GroupRack1 ServerPoolStateAVAILABLESub StateNoneOps RequiredNoneLoad Balancer10.147.37.166Vrrp ID4External Networkvm public 313Cluster Network Type dhcpGatewayNoneNetmaskNoneName ServersNoneSearch ca-virtual-applianceMasters3Workers2Cluster Start Time2020-06-15 22:58:03.333948Cluster Stop TimeNoneJob IDNone6TECHNICAL BRIEF Cloud Native Environment on Oracle Private Cloud Appliance/Private Cloud at Customer Version 1.01Copyright 2020, Oracle and/or its affiliates Confidential – Public
Error CodeNoneError Status: SuccessThis cluster configuration contains details like name of cluster, virtual IP of Load Balancer, number of worker and masternodes, repository for virtual disks. You can modify this cluster configuration to change the defaults by using set commands.At this point, no resources have been actually created in Oracle VM.Modify Cluster ConfigurationTo set the number of worker nodes in the Kubernetes cluster, use set kube-worker-pool command.PCA set kube-worker-pool sonit-3-cluster 3Kubernetes cluster configuration (sonit-3-cluster) updatedStatus: SuccessIn addition, you can update the shape of master/worker VMs, network properties. Once, you are satisfied with the details ofthe cluster, you can commit the configuration to create cluster resources in Oracle VM using start kube-clustercommand.Start the Kubernetes ClusterOnce the cluster configuration is finalized, the cluster resources can be committed as Oracle VM jobs to create Master andworker nodes, networking between cluster nodes and load balancers. This can be done using start kube-cluster.PCA start kube-cluster name of cluster PCA start kube-cluster sonit-3-clusterCluster sonit-3-cluster submitted to job subsystem for starting. Job ID is 38xxxxx.Status: SuccessAt this point, list kube-cluster can be used to see the exact component being built at the moment.PCA list kube-clusterCluster-------Tenant Group------------State-----Sub State---------intern-clusterRack1 ServerPoolAVAILABLENone10.147.37.2036sonit-2Rack1 32Rack1 ServerPoolzebraRack1 uster Rack1 ServerPoolsonit-3-cluster Rack1 ServerPoolVALIDLoad Balancer Vrrp ---5 rows displayedStatus: SuccessYou can login to Oracle VM GUI on Oracle Private Cloud Appliance to see that various jobs have been submitted and are inprogress in response to the start kube-cluster command.7TECHNICAL BRIEF Cloud Native Environment on Oracle Private Cloud Appliance/Private Cloud at Customer Version 1.01Copyright 2020, Oracle and/or its affiliates Confidential – Public
After a while, approximately 3 minutes for every node in the Kubernetes cluster, the cluster will be built and available. In thiscase, we are building 6 cluster nodes (3 master VMs and 3 worker VMs) and it takes about 20 minutes to complete.Note: The cluster execution time depends on the type of repository that you are using to create virtual disks for your VMs.The cluster creation time will be longer if the repository used is NFSPCA list kube-clusterCluster-------Tenant Group------------State-----Sub State---------intern-clusterRack1 ServerPoolAVAILABLENone10.147.37.2036sonit-2Rack1 ster Rack1 VAILABLEVALID10.147.37.20236732Rack1 REDzebra10.147.37.221Masters-------foo4011-cluster Rack1 ServerPoolRack1 ServerPoolVALIDLoad Balancer Vrrp ---5 rows displayedStatus: SuccessYou can see the cluster nodes by logging into Oracle VM GUIImage Caption 3. Kubernetes cluster ‘sonit-3-cluster’ nodes can be seen in Oracle VM GUI on Oracle Private Cloud Appliance8TECHNICAL BRIEF Cloud Native Environment on Oracle Private Cloud Appliance/Private Cloud at Customer Version 1.01Copyright 2020, Oracle and/or its affiliates Confidential – Public
Manage the Cluster from your local machineThe Kubernetes command-line tool, kubectl, allows you to run commands against Kubernetes clusters. You can use kubectlto deploy applications, inspect and manage cluster resources, and view logs.You can manage your Kubernetes cluster deployed on Oracle Private Cloud Appliance from your local desktop or laptop.This requires you to install kubectl on your local machine. Depending on your local machine, follow the steps in Kubernetesdocumentation to install kubectl: ectl/Installing kubectl locally allows you to manage all your Kubernetes clusters from a single central machine, thereby removingthe need to be on the master management node of Oracle Private Cloud Appliance. This simplifies operations forKubernetes cluster management.In this exercise, we can see the steps to install kubectl-1.17.4 on macOS:stayal curl -LO elease/v1.17.4/bin/darwin/amd64/kubectl% Total% Received % Xferd Average SpeedTimeTimeTime CurrentDload UploadTotalSpentLeft Speed100 47.2M 100 47.2M00 2049k0 0:00:23 0:00:23 --:--:-- 1617kStayal chmod x ./kubectlstayal sudo mv ./kubectl /usr/local/bin/kubectlstayal kubectl version --clientClient Version: version.Info{Major:"1", Minor:"17", 77120c120a22b3a990b5ea", GitTreeState:"clean", BuildDate:"2020-0312T21:03:42Z", GoVersion:"go1.13.8", Compiler:"gc", Platform:"darwin/amd64"}Once you have kubectl deployed locally, you can copy the configuration file of the Kubernetes cluster (accessible using theLoad Balancer IP of the Kubernetes cluster) that you want to manage locally. This will allow you to run kubectl commandsagainst the Kubernetes cluster from your local machine.stayal scp root@10.147.37.166: /.kube/config /config-sonit-3-clusterroot@10.147.37.20's password:config100% 5448199.5KB/s00:00stayal export KUBECONFIG /config-sonit-3-clusterOnce the Kubernetes configuration is exported as shown above, you can run kubectl commands to manage ‘sonit-3-cluster’stayal kubectl get -w-2ReadyROLESmastermastermaster none none none AGE27d27d27d27d27d27dVERSIONv1.17.4 1.0.1.el7v1.17.4 1.0.1.el7v1.17.4 1.0.1.el7v1.17.4 1.0.1.el7v1.17.4 1.0.1.el7v1.17.4 1.0.1.el7All the pods that have been deployed in the ‘kube-system’ namespace as a result of creation of my cluster ‘sonit-3-cluster’can be viewed as follows:9TECHNICAL BRIEF Cloud Native Environment on Oracle Private Cloud Appliance/Private Cloud at Customer Version 1.01Copyright 2020, Oracle and/or its affiliates Confidential – Public
stayal kubectl get pods -n d28d28d28dDisplay the Kubernetes Dashboard for monitoringDashboard is a web-based Kubernetes user interface. You can use Dashboard to deploy containerized applications to aKubernetes cluster, troubleshoot your containerized application, and manage the cluster resources. You can use Dashboardto get an overview of applications running on your cluster, as well as for creating or modifying individual Kubernetesresources (such as Deployments, Jobs).For every Kubernetes cluster that is deployed using the automation built into Oracle Private Cloud Appliance Release 2.4.3, aKubernetes dashboard is deployed by default. This pod can be seen running in the ‘kubernetes-dashboard’ namespace.stayal kubectl get pods -n board-74f8fcbc74-886971/1RunningRESTARTS0AGE28dTo actually display and login to the web-based dashboard, we will need to create a new user using Service Accountmechanism of Kubernetes, grant this user cluster-admin permissions and login to Dashboard using bearer token tied to thisuser. To do this, we use the following file ‘dashboard.yaml’stayal cat dashboard.ymlapiVersion: v1kind: ServiceAccountmetadata:name: admin-usernamespace: kube-system--apiVersion: rbac.authorization.k8s.io/v1kind: ClusterRoleBindingmetadata:name: admin-userroleRef:apiGroup: rbac.authorization.k8s.iokind: ClusterRolename: cluster-admin10TECHNICAL BRIEF Cloud Native Environment on Oracle Private Cloud Appliance/Private Cloud at Customer Version 1.01Copyright 2020, Oracle and/or its affiliates Confidential – Public
subjects:- kind: ServiceAccountname: admin-usernamespace: kube-systemThe tasks in this ‘dashboard.yaml’ file can be executed by simply doing kubectl apply commandstayal kubectl apply -f dashboard.ymlserviceaccount/admin-user o/admin-user createdAt this point, we need a token for admin-user to log in to the dashboard.stayal kubectl -n kube-system describe secret (kubectl -n kube-system get secret grep admin-user awk '{print ser-token-b25l2kube-system none kubernetes.io/service-account.name: admin-userkubernetes.io/service-account.uid: service-account-tokenData ca.crt:1025 bytesnamespace: 11 Q.eyJpc3MiOi
Aug 25, 2020 · Oracle Private Cloud Appliance and Oracle Private Cloud at Customer come fully-integrated with a production-ready Oracle Linux Cloud Native Environment that simplifies and automates the lifecycle of Kubernetes workloads. Oracle Linux Cloud Native Environment is a curated set of open source Cloud
