Transcription
Kaseya Network MonitoringHands-on Exercise
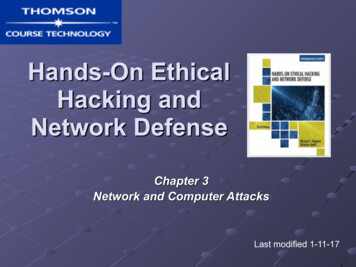
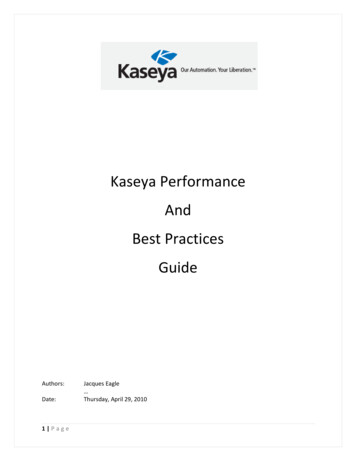
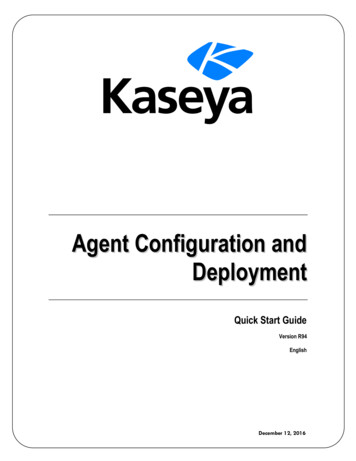
Chapter 15 – KNM Hands-On Exercises1Sadjadi et al.Background StoryYou have been hired as the lead IT Administrator at the Florida International University (FIU) to managethe computers at the School of Computing and Information Sciences (SCIS), the Machine Room (MR), theGreen Library (GL), and the College of Engineering and Computing (CEC). As shown in Fig. 6.38, SCIS, MR,GL, and CEC are physically located in four buildings. SCIS maintains about 200 desktop workstations in itsinstructional lab, MR maintains about 5 servers, GL maintains about 50 open access guest desktops, andCEC maintains about 500 PCs and laptops. The exact number and configurations of computers are not welldocumented. Typically, the servers run Windows 2003 and the desktop workstations, PCs, and laptops all runWindows XP. Active Directory is implemented in one of the servers, named dc, and is assigned to all computers in SCIS and GL, but not to those in CEC. As the lead IT Administrator of the organization you are responsible for ensuring that all systems run efficiently with minimal disruption of computing services to the usersKNM– Hands-On ExercisesFig.15.1:A logicaldiagram ofFIU’s networkYou have decided to employ a Kaseya server to help you manage all computers at SCIS, MR, GL, andCEC. Your Kaseya server is now installed and is fully operational. In addition, you have successfully deployed agents on some of the machines under your management.Proactive and preventive system maintenance is only possible with accurate and easily accessible information regarding the key aspects of the states of all the computers and peripherals within the network.Knowing that disk space utilization on a computer has reached a predefined threshold can trigger a fewsimple automated steps to prevent disastrous situations; for example, by reducing the disk utilization rateand ordering a larger storage disk drive.To facilitate the much desired preventive maintenance, the required information must be collected from allmanaged systems, categorized as to the severity of the issues and be presented to the user in an easy tounderstand manner. Note that too much information is equivalent to no in-formation. Therefore, you need tobe very selective on what data is required to be collected.Commodity operating systems have facilities to collect the needed data on an ongoing basis, for example,using counters and log files. The data stored in such counters and log files, unfortunately, do not lend
Chapter 15 – KNM Hands-On ExercisesSadjadi et al.2themselves to proactive system maintenance in that in typical scenarios such data is not accessed and/orprocessed unless after a problem is manifested and one needs to find the root cause of the problem.Currently, in your environment, you have not put in place a way to monitor hardware and software performance on all computers simultaneously. This prevents your IT technician from having an accurate way ofknowing if all computers are at optimal performance. . You have therefore decided to use a monitoringpro- gram, which doesn’t require you to physically be present at multiple computers to monitor their status.The Kaseya Monitoring module facilitates proactive maintenance by providing you with easily observablealarms, tickets, and emails to inform you that, for example, a counter on a managed computer has reacheda predefined threshold or as another example, a service on a managed server has stopped working. Byutilizing the Monitoring module, based on indicators that you define and choose, you can monitor thehealth of all managed machines and SNMP devices in real time and proactively respond to potential issues,for example, by running some scripts automatically, even before they become major problems.Your dedicated virtual environment includes the computers and network devices depicted in Figure 6.38 andfurther described below: NAT Router: 192.168.0.1 & 192.168.1.1 & 192.168.2.1 & 192.168.3.1 SCIS: ws1.scis.fiu.edu - 192.168.0.100 MR: dc.scis.fiu.edu - 192.168.0.10 & 192.168.1.10 & 192.168.3.10 GL: guest1.gl.fiu.edu - 192.168.1.100 CEC: pc1.cec.fiu.edu - 192.168.2.100 & laptop1: laptop1.cec.fiu.edu - 192.168.2.200Note: This virtual environment includes only a limited number of representative servers and workstationsphysically housed in the four buildings.ExerciseIn this exercise, we use Kaseya Network Monitoring (KNM) to show how you can keep yourself organized andinformed of the status of your managed machines in multiple networks. Monitoring Hard Drive space, CPU andRAM usage is crucial on servers due to the importance of keeping downtime to a minimal. After setting up KNMyou will be able to monitor machines without the need of installing agents.KNM – Hands-On ExercisesTechnical Information
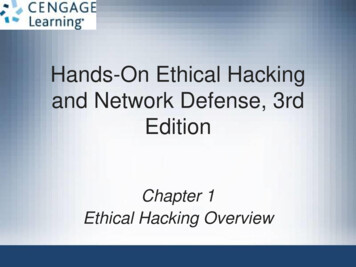
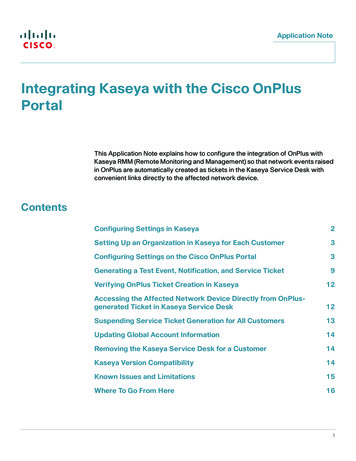
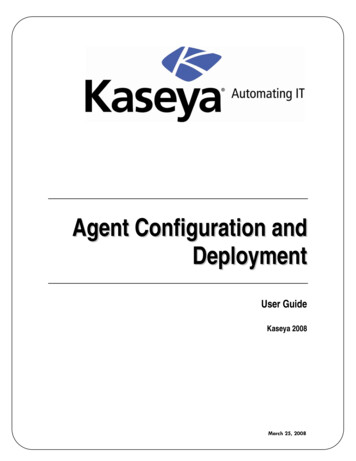
3Chapter 15 – KNM Hands-On ExercisesSadjadi et al.Part 1-Install and configure Kaseya Network Monitoring (KNM) on DC.1.Double-click on knmsetup.exe.2.Click on Run.1. Double-click on knmsetup.exe2. Click on RunKNM– Hands-On ExercisesNote: You may be prompted to update the Visual C 2005 runtime files on your machine. Afterinstalling these you do NOT need to restart your machine.3.Click Next.3. Click Next.
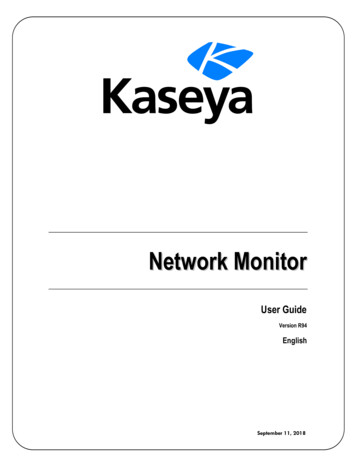
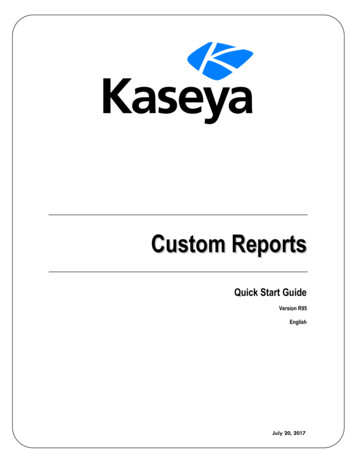
4.Select I agree to the terms of this license agreement.5.Click Next.Sadjadi et al.4. Select I agree to the terms of this licenseagreement.5. Click Next.6.Select Standard.7.Click Next.6. Select Standard7. Click Next.4KNM – Hands-On ExercisesChapter 15 – KNM Hands-On Exercises
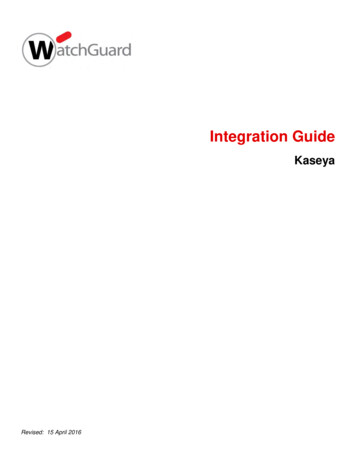
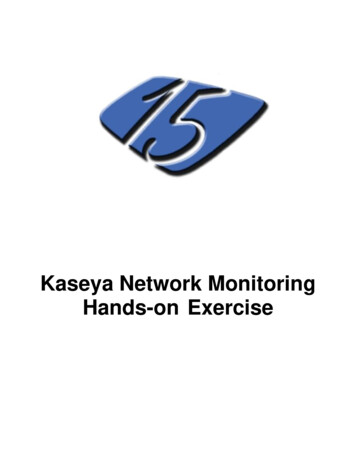
Chapter 15 – KNM Hands-On Exercises58.Sadjadi et al.Keep defaults and click Next.KNM– Hands-On Exercises8. Keep defaults and click Next.9.Type USERNAME in Username box.10. Type PASSWORD in Password box.11. Click Next.9. Type USERNAME in Username box.10. Type PASSWORD in Password box.11. Click Next.
Chapter 15 – KNM Hands-On ExercisesSadjadi et al.612. Keep defaults and click Next.13. Keep defaults and click Next.13. Keep defaults and click Next.KNM – Hands-On Exercises12. Keep defaults and click Next.
7Chapter 15 – KNM Hands-On ExercisesSadjadi et al.14. Click Next to proceed with the installation.KNM– Hands-On Exercises14. Click Next.15. When installation completes, click Finish.15. Click Finish.
Chapter 15 – KNM Hands-On ExercisesSadjadi et al.816. Type in USERNAME in the Username field.17. Type in PASSWORD in the Password field.18. Type your email in the Email field.19. Click Next16. Type in USERNAME in the Username field.17. Type in PASSWORD in the Password field.19. Click Next.20. Keep defaults and click Next.20. Keep defaults and click Next.KNM – Hands-On Exercises18. Type your email in the Email field.
9Chapter 15 – KNM Hands-On ExercisesSadjadi et al.21. On Mail settings page keep defaults and click Next.22. On SMS device configuration page keep defaults and click Next.23. On Mail settings page keep defaults and click Next.24. Keep defaults and click Next.KNM– Hands-On Exercises24. Keep defaults and click Next.25. Login using the username and password you created previously.15. Login using the username and password you createdpreviously
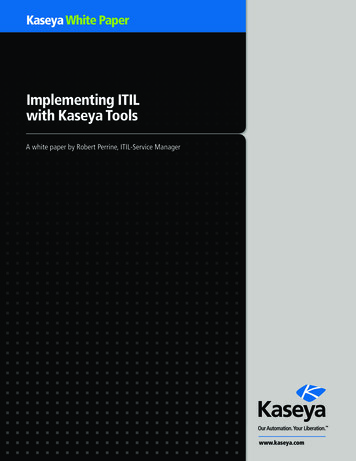
Chapter 15 – KNM Hands-On ExercisesSadjadi et al.10Part 2- Create a logon account1.Click Settings.2.Click Logon accounts.1. Click Settings.3.Click New.3. Click New4.Enter USERNAME in the Username box.5.Enter PASSWORD in the Password and Verify password boxes.6.Select Administrators in the Operator Group drop box.7.Click Save4. Enter USERNAME in the Username box.5. Enter PASSWORD in the Passwordand Verify password boxes.6. Select Administrators in the Operator Group drop box.7. Click SaveKNM – Hands-On Exercises2. Click Logon accounts.
Chapter 15 – KNM Hands-On Exercises11Sadjadi et al.Part 3- Create a new network.1.Click Networks.2.Click New network.1. Click Networks.2. Click New network.KNM– Hands-On Exercises3.Type CEC in the Name text box.4.Type CEC Building in the Description text box.5.Click Save.3. Type CEC in the Name text box.4. Type CEC Building in the Description text box.5. Click Save.6.Repeat steps 1 - 5 for SCIS.
Chapter 15 – KNM Hands-On ExercisesSadjadi et al.12Part 4- Use Network Discovery to add objects1. Click Tools.2. Click Network discovery.3. Click Start new.1. Click Tools.2. Click Network Discovery4. Type 192.168.2 in the Subnet text box.5. Type 0 in the Range start text box.6. Type 255 in the Range end text box.7. Select USERNAME from the Windows account drop down8. Click Start.4. Type 192.168.2 in the Subnet text box.5. Type 0 in the Range start text box.6. Type 255 in the Range end text box.7. Select USERNAME from the Windows account drop down.8. Click Start.KNM – Hands-On Exercises3. Click Start new.
Chapter 15 – KNM Hands-On Exercises13Sadjadi et al.Note: Network discovery may take several minutes to complete. Please wait for the scan tocomplete before continuing.9.Select PC1 (192.168.2.100) and Laptop1 (192.168.2.200) .10. Click Add object.10. Click Add Object.KNM– Hands-On Exercises9. Select PC1 (192.168.2.100) and Laptop1 (192.168.2.200).11. Leave everything as default and verify that CEC is selected in the Network drop down.12. Click Save.11. Verify CEC is selected12. Click Save.
Chapter 15 – KNM Hands-On ExercisesSadjadi et al.14Note: You may clear any remaining machines on the list before continuing by selecting theircheck boxes and clicking clear.Part 5- Add an object manually1. Click Objects.2. Click New object.1. Click Objects.2. Click New object.3. Click Empty object.4. Type ws1 in the Name text box.5. Type 192.168.0.100 in the Address text box.6. Select SCIS in the Network drop down.7. Select Windows, then Windows XP in the System type drop downs.8. Select USERNAME in the Default account drop down.9. Click Save.KNM – Hands-On Exercises3. Click Empty object.
Chapter 15 – KNM Hands-On Exercises15Sadjadi et al.4. Type ws1 in the Name text box.5. Type 192.168.0.100 in the Address text box.6. Select SCIS in the Network drop down.7. Select Windows, then Windows XP in the System type drop downs.KNM– Hands-On Exercises8. Select USERNAME in the Default account drop down.9. Click Save.Part 6- Add a monitor to an object1.Click Objects.2.Click Lists.1. Click Objects.2. Click List.
Chapter 15 – KNM Hands-On ExercisesSadjadi et al.163. Click the ws1 link.3. Click the ws1 link.4. Click New monitor.5. Click Ping under Network services.5. Click Ping under Network services.KNM – Hands-On Exercises4. Click New monitor.
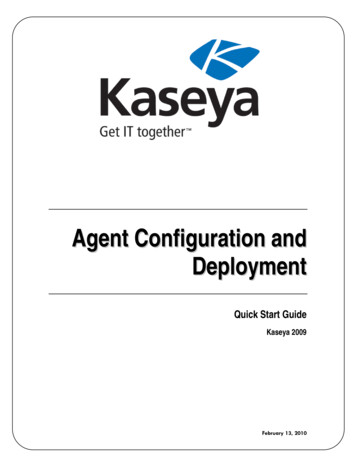
17Chapter 15 – KNM Hands-On Exercises6.Set Test interval to 10.7.Set Chart resolution to 1 hour.8.Click Save.6. Set Test interval to 10KNM– Hands-On Exercises7. Set Chart resolution to 1 hour.8. Click Save.Sadjadi et al.
KNM – s-ses 3 Chapter 15 – KNM Hands-On Exercises Sadjadi et al. Part 1-Install and configure Kaseya Network Monitoring (KNM) on DC. 1. Double-click on knmsetup.exe. 2. Click on Run. 3. Click Next. 1. Double-click on knmsetup.exe 2. Click on Run Note: You may be prompted to update the Visual C 2005 runtime files on your machine.After