Transcription
Juris User GuideVersion 2.7 2015 LexisNexis.All rights reserved.
LexisNexis Juris User GuideRelease: 2.7Copyright and TrademarkLexisNexis, Lexis, and the Knowledge Burst logo are registered trademarks of Reed ElsevierProperties Inc., used under license. Juris is a registered trademark of LexisNexis. Other productsand services may be trademarks or registered trademarks of their respective companies. 2015 LexisNexis. All rights reserved.Revision Date 5/11/2015 9:33 AMLexisNexis1801 Varsity DriveCentennial CampusRaleigh, NC 27606North America: 800.387.9785Outside North America: 919.467.1221Fax: ctice-management/jurisHow to use this guideThis guide provides the steps to achieve basic, commonly performed tasks. For additional details,including interface elements and advanced tasks, see the Juris product help. 2015 LexisNexis.All rights reserved.2 of 162
LexisNexis Juris User GuideRelease: 2.7Login and password assistanceSign into JurisTo sign into Juris:1. Click the Windows Start button.2. Select All Programs Juris Juris to open the login window.3. Click the Company arrow and select the company database in which you want to work.NoteThe 'Company' box is only visible if your firm has multiple databases to which Juris isconnected. If you do not see the Company box, skip step 3.4. In the User ID box, type the name you use to sign into Juris.5. In the Password box, type your Juris password.6. Click Sign In.The Juris main window opens.NoteIf Juris does not allow you to sign in, contact your system manager or administrator. 2015 LexisNexis.All rights reserved.3 of 162
LexisNexis Juris User GuideRelease: 2.7Sign out of JurisTo sign out of Juris do one of the following:nSelect Form Exit from the menu.nClick the Close button in the top right-hand corner of the window. 2015 LexisNexis.All rights reserved.4 of 162
LexisNexis Juris User GuideRelease: 2.7Change your passwordThe Change Password feature lets you change your Juris login password. The password can be upto 6 characters in length and is case-sensitive.NoteYou must have access to the password function in Juris, to change your password. If you do not,contact your system manager or administrator.To change your password:1. Start Juris and log in, to open the main Juris window.2. Double-click Setup and Manager, to expand the folder.3. Double-click Change Password.The Setup and Manage\Change Password window opens. 2015 LexisNexis.All rights reserved.5 of 162
LexisNexis Juris User GuideRelease: 2.7If Mobile Web Access is turned off at the Firm level (Firm Options), follow these steps.a. In the Enter your OLD password box, type your current password.b. In the Enter your NEW password box, type the new password you want to use.c. In the Retype NEW password for verification box, re-type the new password again. 2015 LexisNexis.All rights reserved.6 of 162
LexisNexis Juris User GuideRelease: 2.7If Mobile Web Access is turned on at the Firm level (Firm Options), follow these stepsPerform steps a through c in the Juris & Juris Suite password area of the window.a. In the Current password box, type your current password.b. In the New password box, type the new password you want to use.c. In the Confirm new password box, re-type the new password again.4. Click the Save button to save your change. 2015 LexisNexis.All rights reserved.7 of 162
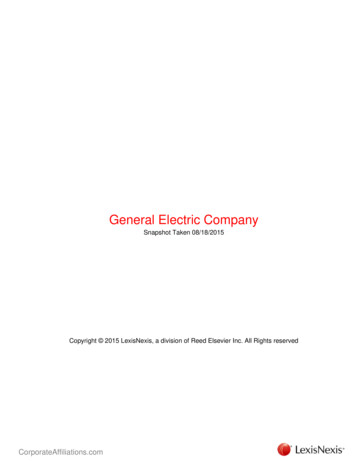
LexisNexis Juris User GuideRelease: 2.7Set up accounting Fees and SchedulesFee schedules are used to establish specific fees that differ from the standard fees charged by afirm.Create a Fee ScheduleTo create a Fee Schedule:1. Select Tables Fee Schedules.2. Open a new Fee Schedule form by using any of the following options:nClick the New icon on the toolbar.nSelect Form New from the menu.nUse the keystroke shortcut Ctrl N. 2015 LexisNexis.All rights reserved.8 of 162
LexisNexis Juris User GuideRelease: 2.73. In the Fee Schedule text box, type a 1-4 character code.4. In the Description text box, type a 1-99 character description.5. Spell check the form using any of the following options:nClick the Spell Check icon on the toolbar.nSelect Form Spelling from the menu.nUse the keystroke shortcut F7.6. Save the schedule using any of the following options:nClick the Save icon on the toolbar.nSelect Form Save from the menu.nUse the keystroke shortcut Ctrl S.7. Once the Fee Schedule is saved, the Timekeepers, Personnel Types and Task Codes iconsbecome enabled. 2015 LexisNexis.All rights reserved.9 of 162
LexisNexis Juris User GuideRelease: 2.7The Fee Schedule might be set up to use Timekeepers, Personnel Types or Task Codes.8. Click on the appropriate title below for steps, if the fee schedule has been setup with any ofthe following.Timekeepers1. Click the Timekeepers icon to open the timekeeper details.2. In the ID column, type the Timekeeper's ID.3. In the Rate column, type the rate for the Timekeeper.4. Click the Save icon on the toolbar to save your additions.Personnel Types1. Click the Personnel Types icon to open the Personnel Types details. 2015 LexisNexis.All rights reserved.10 of 162
LexisNexis Juris User GuideRelease: 2.72. Enter a Personnel Type Code into the schedule in either of the following ways:nUse the Lookup icon on the toolbar to select a Personnel Type from a list ofavailable Personnel Types.nIn the Code Column, type the Personnel Type code.3. In the Rate column, type a rate to be used for this particular code.4. Click the Save icon on the toolbar to save your additions.Task Codes1. Click the Task Codes icon to open the Task Code details.2. Enter a Task Code into the schedule in either of the following ways:nClick the Lookup icon on the toolbar to select a Task Code from the list of availableTask Codes.nIn the Code column, type the Task Codes code.3. In the Rate column, type a rate for this particular code.4. Click the Save icon on the toolbar to save your addition. 2015 LexisNexis.All rights reserved.11 of 162
LexisNexis Juris User GuideRelease: 2.7Create a Financial Statement LayoutTo create a financial statement layout:1. Select Tables Fin.Stmt. Layout.2. Open a new Financial Statement Layout form by using any of the following options:nClick the New icon on the toolbar.nSelect Form New from the menu.nUse the keystroke shortcut Ctrl N. 2015 LexisNexis.All rights reserved.12 of 162
LexisNexis Juris User GuideRelease: 2.73. In the Layout Code text box, type a 1-4 character code.This code can be digits, letters, or a combination of both.4. In the Layout Description text box, type a 1-99 character description.5. Click the Statement Type arrow and select an option for the type of layout. Options are:nBalance SheetnProfit and Loss StatementnCash Flow StatementnSupporting Schedule (Profit & Loss Format)nSupporting Schedule (Balance Sheet Format)6. Use the spreadsheet to define the information to be included on the statement.nACCOUNT - Allows the selection and formatting of Accounts.nTEXT - Allows selection and formatting of Text Codes.nLITERAL - Allows entry and formatting of free text (i.e., literals).nLF (Line Feed) - Forces a blank line in a statement.nFF (Form Feed) - Forces a new page in statement. 2015 LexisNexis.All rights reserved.13 of 162
LexisNexis Juris User GuideRelease: 2.7nBSNI - Calculates Balance Sheet Net Income or Loss.nPAT - Print Accumulated Totals. Used in conjunction with Account when account valuesare ‘accumulated’ for later printing using this property.nSUB1 - SUB9 - Allows creation of sub-total breaks 1-9.nCLR1 - CLR9 - Allows clearing of sub-total breaks 1-9.nLEGEND - Prints predefined Legend depending on Statement Type being defined. Used tounderline numeric (number) columns. Typically used with statement sub-totals andgrand totals.nUNDRLN - Allows creation of underlines in blank column/rows.nSR/ER - Start Ratio/End Ratio: Used with Profit and Loss Statement Types only.7. Spell Check using any of the following options:nClick the Spell Check icon on the toolbar.nSelect Form Spelling from the menu.nUse the keystroke shortcut F7.8. Save the layout using any of the following options:nClick the Save icon on the toolbar.nSelect Form Save from the menu.nUse the keystroke shortcut Ctrl S.NoteThe layout can only be printed via the Reports Queue. 2015 LexisNexis.All rights reserved.14 of 162
LexisNexis Juris User GuideRelease: 2.7Set up client informationFee schedules are used to establish specific fees that differ from the standard fees charged by afirm.Create a Client1. Select Tables Client.2. Open the Client form by using any of the following options:nClick the New icon.nSelect Form New from the menu.nUse the keystroke shortcut Ctrl N. 2015 LexisNexis.All rights reserved.15 of 162
LexisNexis Juris User GuideRelease: 2.7NoteYou can click on a tab or use the arrow button located at the bottom of the form to move ina sequential order.3. Enter a Client Code.4. Fill out the items on the Code tab:nEnter 1-99 character Client Nickname.nEnter 1-99 character Reporting Name. Defaults from Client Nickname but may beedited.nEnter 1-99 character Source of Business.nEnter 1-20 character Phone/Fax Numbers.nEnter 1-99 character Contact.nEnter or accept Date Opened. Default will be current System Date. 2015 LexisNexis.All rights reserved.16 of 162
LexisNexis Juris User GuideRelease: 2.7nEnter or select valid Office Code.nEnter or select valid Billing Timekeeper .nEnter or select valid Practice Class Code.nSelect whether the Client is an Individual (if unselected, will assume Client is anorganization).nEnter or select valid Originating Timekeeper(s) and percentage(s). At least oneOriginating Timekeeper is required. Number of Timekeepers allowed is 1-5 asdetermined in Firm Options.5. Fill out the items on the Billing tab: 2015 LexisNexis.All rights reserved.17 of 162
LexisNexis Juris User GuideRelease: 2.7TipView Billing Agreements and Billing Frequencies for detailed information and setupconfigurations.nEnter or select Fee Schedule Code. The Fee Schedule assigned to the Client willdetermine the timekeeper rates used.nEnter or select TaskCode and Xref Code (cross reference code), if applicable.nEnter or select ExpenseScheduleCode. The expense schedule assigned to the Clientwill determine the amounts charged for expenses.nEnter or select Expense Code Xref Code, if applicable.nEnter or select Bill Format Code and Prebill Format Code to be used for billing forthis client.nEnter or select Billing Agreement Code.nIf Flat Fee Billing Agreement, check box if Flat Fee Amount Includes Expenses.Any action to be made on the billing agreement after posting a Flat Fee Bill isdetermined in Firm Options.nIf the Retainer Type is Billing Agreement, enter or select Retainer Type.nEnter or select Billing Frequency for Expenses/Fees. Any action to be made on thebilling frequency after posting a Flat Fee Bill is determined in Firm Options.nIf Billing Frequency is (Q)uarterly, (S)emiannually or (A)nnually, enterBillingMonth.nIf Billing Frequency(C)ycle, enter Cycle 1-999.nEnter Billing Thresholds for Expenses/Fees. Threshold defaults will be established inFirm Options. Threshold billing is activated when Prebills are printed By Frequency.When posted fee or expenses reach or exceed thresholds, the prebill will be generatedeven if it falls outside established Billing Frequencies for that item. If the prebill printsonly because the Fee Threshold was met, then only fees will print. If it prints becausethe Expense Threshold was met, then only expenses will print.nUsing the Bill Attachments drop-down list, specify if existing attachments will beincluded when printing bills for this client. The following options are available:nPrint attached expense files when printing bills. All expense attachments areincluded when printing bills, if present.nDo not print attached expense files when printing bills. No expenseattachments are ever printed with bills. 2015 LexisNexis.All rights reserved.18 of 162
LexisNexis Juris User GuidenRelease: 2.7Print attached expense files when printing bills for expenses over . Allowsyou to specify a dollar amount (in the text box to the right of the option). When a bill isover this amount, any expense attachments are included when printing bills.TipYou can specify this setting's default option, which is always used for new clients, at thefirm level of Juris. For more information, see Specify the Default Expense AttachmentOption.6. Optional: Fill out the items on the INT/DISC tab.nEnter Interest Percent (0.0000-100.0000%), if applicable.nEnter Interest Days 1-365, which is the number of days in the grace period beforeinterest will begin to accrue on past due balances.nEnter or select Discount Option and Percent (0.0000-100.0000%), if applicable. 2015 LexisNexis.All rights reserved.19 of 162
LexisNexis Juris User GuidenRelease: 2.7Enter or select Surcharge Option and Percent (0.0000-100.0000%), if applicable.NoteDefaults and ability to change Interest, Surcharge and Discount are determined bysettings in Firm Options.nCheck Tax Exemption options, if applicable.nCheck box to Enable Budgeting, if applicable.nIf Enable Budgeting is selected, check box to Require Phase Numbers on allTransactions, if applicable.nCheck box to Require Task Codes on all Time Entries, if applicable.nCheck box to Require Activity Codes on all Time Entries, if applicable.nCheck box to Require Task Codes on all Expenses, if applicable.7. (Optional) Fill out the items on the Allocations tab. 2015 LexisNexis.All rights reserved.20 of 162
LexisNexis Juris User GuideRelease: 2.7nSelect an ID.nEnter a percentage. Each new line will automatically populate the percentage field witha value that adds up to 100 percent.8. (Optional) Fill out the items on the Additional Info tab. 2015 LexisNexis.All rights reserved.21 of 162
LexisNexis Juris User GuideRelease: 2.7nSelect a filed in the left column.nClick the ellipses button to bring up the Text Codes for selection.nProgress through each of the applicable fields, each time using the ellipses button toselect a Text Code.9. (Optional) Fill out the items on the Collections tab. 2015 LexisNexis.All rights reserved.22 of 162
LexisNexis Juris User GuideRelease: 2.7nSelect Collection Terms.nSelect Collection Status.nEnter Additional Status if appropriate.10. Spell Check the form using any of the following options:nClick the Spell Check icon.nSelect Form Spelling from the toolbar.nUse the keystroke shortcut F7.11. Save the Client using any of the following options:nClick the Save icon.nSelect Form Save from the toolbar.nUse the keystroke shortcut Ctrl S. 2015 LexisNexis.All rights reserved.23 of 162
LexisNexis Juris User GuideRelease: 2.712. The Billing Address, Consolidation and Matters options will become available after theClient is saved.13. Select the Billing Address option to enter a Billing Address. Select the Consolidationoption to create a Consolidation, if applicable. Select the Matters option to create a Matterfor the client. 2015 LexisNexis.All rights reserved.24 of 162
LexisNexis Juris User GuideRelease: 2.7Create a MatterTo create a Matter:1. Select Tables Clients.2. Open a Client record. 2015 LexisNexis.All rights reserved.25 of 162
LexisNexis Juris User GuideRelease: 2.73. Double click on the Matters folder icon.4. Open the Matter form by using any of the following options:nClick the New icon.nSelect Form New from the menu.nUse the keystroke shortcut Ctrl N.5. Enter a Matter Code. 2015 LexisNexis.All rights reserved.26 of 162
LexisNexis Juris User GuideRelease: 2.76. Many of the default values supplied on the following tabs are pulled from the selectionsmade on the related Client form. These defaults may be changed to any valid value asapplicable to the individual Matter.7. Fill out the items on the Code tab.nEnter 1-99 character Matter Nickname.nEnter 1-99 alphanumeric Reporting Name. Default from Matter Nickname but maybe edited.nEnter 1-99 character Source of Business.nEnter 1-20 character Phone/Fax Numbers.nEnter 1-99 character Contact.nEnter or accept Date Opened. Default will be current System Date.nStatus and Lock options can be used to limit the ability of users to enter new transactionsfor the Matter.nEnter or select valid Office Code.nEnter or select valid Practice Class Code. 2015 LexisNexis.All rights reserved.27 of 162
LexisNexis Juris User GuidenRelease: 2.7Select whether the Matter is an Individual (if unselected, will assume Matter is anorganization).nEnter or select valid Originating Timekeeper(s) and percentage(s). At least oneOriginating Timekeeper is required. Number of Timekeepers allowed is 1-5 asdetermined in Firm Options.8. Fill out the items on the Description tab.The Matter Description or Matter Remarks fields each allow a large amount of text, andthese fields may be placed in the bill's design. To enter a carriage return in either field, useCtrl Enter. To enter a tab use Ctrl Tab.9. Fill out the items on the Address tab. 2015 LexisNexis.All rights reserved.28 of 162
LexisNexis Juris User GuideRelease: 2.7NoteIf the Matter is NOT to be Consolidated, then a billing timekeeper, prebill format, billformat assignments, and billing address information must be entered here. If the Matter ISCONSOLIDATED, then the Consolidation must be selected here. (The must be establishedbefore the Matter can be added to the Consolidation.) See Consolidation for moreinformation.10. Fill out the items on the Billing tab. 2015 LexisNexis.All rights reserved.29 of 162
LexisNexis Juris User GuidenRelease: 2.7Enter or select Fee Schedule Code. The fee schedule assigned to the Matter willdetermine the Timekeeper rates used.CautionIf the selected Fee Schedule does NOT match the selected Client Fee Schedule, amismatch warning box will appear. Click the OK button and make the appropriatechanges so that a match occurs.nEnter or select Task Code Xref Code, if applicable.nEnter or select Expense Schedule Code. The expense schedule assigned to the Matterwill determine the amounts charged for expenses.nEnter or select Expense Code Xref Code, if applicable. 2015 LexisNexis.All rights reserved.30 of 162
LexisNexis Juris User GuidenRelease: 2.7Select a Quick Action code in order to automatically assign an action code to the prebillupon selection. See Edit Prebills for details.nEnter or select Billing Agreement Code.nIf Flat Fee Billing Agreement, check box if FlatFee Amount Includes Expenses.Any action to be made on the billing agreement after posting a Flat Fee Bill is determinedin Firm Options.nIf Retainer Billing Agreement, enter or select Retainer Type.nEnter or select Billing Frequency for Expenses/Fees. Any action to be made on thebilling frequency after posting a Flat Fee Bill is determined in Firm Options.nIf Billing Frequency (Q)uarterly, (S)emiannually or (A)nnually, enter Billing Month.nIf Billing Frequency (C)ycle, enter Cycle 1-999.nEnter Billing Thresholds for Expenses/Fees. Threshold defaults will be established inFirm Options. Threshold billing is activated when Prebills are printed By Frequency.When posted fee or expenses reach or exceed thresholds, the prebill will be generatedeven if it falls outside established Billing Frequencies for that item. If the prebill printsonly because the Fee Threshold was met, then only fees will print. If it prints becausethe Expense Threshold was met, then only expenses will print.nUsing the Bill Attachments drop-down list, specify if existing attachments will beincluded when printing bills. The following options are available:nPrint attached expense files when printing bills. All expense attachments areincluded when printing bills, if present.nDo not print attached expense files when printing bills. No expenseattachments are ever printed with bills.nPrint attached expense files when pr
Select All Programs Juris Juris to open the login window. 3. Click the Company arrow and select the company database in which you want to work. . Set up accounting Fees and Schedules Fee schedules are used to establish specific fees that differ from the standard fees charged by a