Transcription
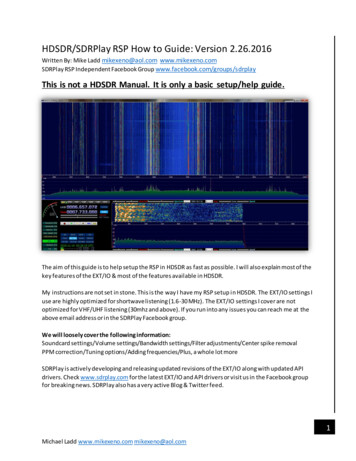
HDSDR/SDRPlay RSP How to Guide: Version 2.26.2016Written By: Mike Ladd mikexeno@aol.com www.mikexeno.comSDRPlay RSP Independent Facebook Group www.facebook.com/groups/sdrplayThis is not a HDSDR Manual. It is only a basic setup/help guide.The aim of this guide is to help setup the RSP in HDSDR as fast as possible. I will also explain most of thekey features of the EXT/IO & most of the features available in HDSDR.My instructions are not set in stone. This is the way I have my RSP setup in HDSDR. The EXT/IO settings Iuse are highly optimized for shortwave listening (1.6-30 MHz). The EXT/IO settings I cover are notoptimized for VHF/UHF listening (30mhz and above). If you run into any issues you can reach me at theabove email address or in the SDRPlay Facebook group.We will loosely cover the following information:Soundcard settings/Volume settings/Bandwidth settings/Filter adjustments/Center spike removalPPM correction/Tuning options/Adding frequencies/Plus, a whole lot moreSDRPlay is actively developing and releasing updated revisions of the EXT/IO along with updated APIdrivers. Check www.sdrplay.com for the latest EXT/IO and API drivers or visit us in the Facebook groupfor breaking news. SDRPlay also has a very active Blog & Twitter feed.1Michael Ladd www.mikexeno.com mikexeno@aol.com
What is a SDR receiver:A SDR is a radio communication receiver where components thathave been typically are implemented in hardware (e.g. mixers,filters, amplifiers, modulator/demodulator, detectors, etc.) areinstead implemented by software run on your desktop, laptop andeven your tablet. The software we are using to drive the RSP isHDSDR. All the knobs and dials of a traditional radio are now showand controlled on the screenWhat is the SDRPlay RSP:The RSP is a USB powered 12bit full coverage SDR that can processa maximum of 8mhz of bandwidth. Personally I feel it’s the bestSDR you can buy for 160.00. Keep in mind that any SDR or tabletop shortwave radio is only as good as the antenna you attach to it.If the RSP SDR is your first SDR then I urge you to join us in theSDRPlay Facebook group.Mike Ladd?I love everything and anything SDR related. I have been in thishobby of SWLing for about 20 years. I moved to SDR'S fromtraditional radios when the RF Space SDR-IQ was released in 2007.My shack has seen a huge number of radios come and go. Fastforward to today and my SDR of choice is the RSP.The SDRPlay Facebook Group:I can't remember the exact date I joined the group but aftertalking to Paul Jones (admin and founder of the SDRPlayFacebook group) we became really good friends since we bothshare many common interests. One thing is for sure.We bothlove the RSP and we both enjoy helping everyone in the group.Paul and myself are in constant contact with the SDRPlayteam. We both try to push the RSP as far as possible from theend-user’s perspective.Why HDSDR:Actually I use all the major front end software that controls SDRS but HDSDR is extremely powerful andvery efficient. Personally I think it is the best app to use for running your RSP. The other front ends can’tmatch the speed and efficiency of HDSDR. The aim of this whole guide is to share my knowledge andsave you from making the same mistakes I did. HDSDR has a lot of tricks up its sleeve. Also this is my firstattempt at writing any type of how-to document. I apologies in advance for any errors.2Michael Ladd www.mikexeno.com mikexeno@aol.com
RSP Specs:Frequency Range:Continuous coverage 100kHz – 2GHzADC Characteristics:Sample frequency 2MSPS – 10.66MSPS12 bit native ADC10.4 ENOB60dB SNR67dB SFDRIF Modes:Zero IF, All IF bandwidths Low IF, IF bandwidths @ 1.536MHZIF Bandwidths:200kHz 300kHz 600kHz 1.536MHz 5.0 MHz 6.0 MHz 7.0 MHz 8.0 MHzAutomatically configured bank of front end filtersLow Pass:12MHzBand Pass:12–30MHZ 30–60MMHZ 60–120MHZ 120–250MHZ 250–420MHZ 420–1000MHZHigh Pass:1000MHZTypical Noise Figures:12.5dB @ 3MHz12.0dB @ 10MHz11.5dB @ 20MHz12.0dB @ 40MHz4.5dB @ 100MHz4.5dB @ 200MHz5.0dB @ 360MHz3.5dB @ 600MHz3.5dB @ 1300MHz4.0dB @ 1800MHz3Michael Ladd www.mikexeno.com mikexeno@aol.com
To get the RSP up and running with HDSDR. It is a 4 step process.1: Update your computer via Windows Update2: Download and install the API v1.8.1 (Current but could change)3: Download and install HDSDR v2.70 (Current but could change)4: Download and install the EXT/IO v3.8.3 (Current but could change)The very first thing you want to do before you unpack the RSP is run windows update and make sure all“Critical” updates have been downloaded and installed. If your machine has pending u pdates to install,then please do it before making any physical connection with the RSP.Now that all the updates are downloaded and applied it is extremely important that you reboot yourmachine. Now that we got that out of the way let's download the latest 3 files we will need. The API,EXT/IO & finally HDSDR.Download the API & EXT/IO from sdrplay.com, Select platforms and then windows. On the right side ofthe page you will want to select the following drivers to download. *Current EXTIO* and then *C urrentAPI Installer*The EXT/IO: The ExtIO library (ExtIO SDRplay.dll) was developed to support the Winrad ExtIO standardwhich allows the software to work with different hardware systems. You can think of any ExtIO as atranslator/middleman so when you tell HDSDR to select upper sideband (USB), the library translates therequest into the appropriate command to make the hardware select USB. If you want to change the gainof the RSP the Ext/IO allows the you to tell the software to issue the command to the RSP and the gainwill be raise. In addition to translating the general operation of the receiver, The ExtIO also provides aradio configuration panel. As a result, any SDR software that is ExtIO compatible will be able to use theSDRPlay hardware.4Michael Ladd www.mikexeno.com mikexeno@aol.com
USB Cables: Not all USB cables are created equal. I would stronglysuggest you buy a high quality name brand Male A/Male B USB cablewith ferrite chokes on both ends. You want to try and keep the cableas short as possible but as far away from the computer as you canget it. I would not use anything more than 10ft.Tripp Lite makes a great cable that cost under 10.00. Amazonalways has this cable in stock and you can purchase it via the linkbelow. http://www.amazon.com/dp/B003MQ29B2Antennas: Having the proper antenna will reallymake the difference if you are going to hear localshortwave stations (100 to 500 miles away) or pickup stations that are well over 15,000 miles away. Icannot suggest which one to buy. It would beanother e-book in itself.I would suggest you do a Google search for “random wire antenna” or copy and paste the link below. Nomatter what antenna you choose the RSP uses a SMA female port so please make sure your antennacoaxial uses a SMA-Male at the end of it. https://www.google.com/#q random wire antennaYOU CAN NOW CONNECTED THE RSP TO YOUR MACHINE VIA THE USB CABLE.Let's finish up with the API installer. Some people would say to double click the file to install it but Iwould suggest you right click it and select Run as administrator. After the API installer is complete youshould now run windows update again and apply any critical updates the updater finds. If nothing isfound, then reboot the machine. If critical updates are available, then download them and reboot themachine.This might seem like a major P.I.T.A. but this is the best way and the common way I setup all new userson the Facebook group. I have had zero issues or complaints with my style of installation andconfiguration. Taking the long steps now helps to prevent any possible headaches down the line. Nowthat the API is installed and the RSP is connected let’s Download the EXT/IO.5Michael Ladd www.mikexeno.com mikexeno@aol.com
Downloading HDSDR:Go to http://www.hdsdr.de and scrolldown to the bottom of the web page.You will find a button that says“Download”. After the download iscomplete you will need to locate theHDSDR installer in your downloaddirectory which is usually(C:\Users\*YOUR USERNAME*\Downloads).After locating the installer, you wantto right click (not the default left click)on the HDSDR installer.exe and selectRun as administrator. After the setupis complete you can now install theEXT/IO from SDRPlay.To install the EXT/IO Driver. Double click on the file SDRplay EXTIO Installer v3.7 it will then ask youthe location of HDSDR. Hit browse and tell the installer to look in the following default locations.Windows 32bit: C:\Program Files\HDSDR Windows 64bit: C:\Program Files (x86)\HDSDRAfter the three main steps have been completed (API, HDSDR & EXTIO) I would recommend rebootingthe machine one last time. Soon as your machine completes the reboot then we are ready to startlistening to some signals.You can now launch HDSDR. We will now setup and tune HDSDR to run perfectly with the RSP. The mainsetup process is broken down into 7 parts. Each step will be on a single page.6Michael Ladd www.mikexeno.com mikexeno@aol.com
Step-1 Set your RX input and RX outputThis setting tells HDSDR how to use your audio input's and output's. If you are using VAC (Virtual AudioCable) then select your VAC cables accordingly.7Michael Ladd www.mikexeno.com mikexeno@aol.com
Step-2 Remove the waterfall time stamp1: Options2: Visualization3: Waterfall Time stamp4: Select RF: OffThis setting tells HDSDR that you do not want a time stamp show on the main waterfall. For generalshortwave listening I find this to be a distraction.8Michael Ladd www.mikexeno.com mikexeno@aol.com
Step-3 Set the main volume output and AGC1: Move the volume slider toalmost the mid-way point.2: Right click on Volume tolock it in place (turns red).3: Hit the AGC button until itreads ACG Med.This setting tells HDSDR how you want to process the automatic gain for audio in the bandpass. I preferMedium or Slow for most shortwave broadcast listening. If you’re going to do any decoding in the HFbands, Select FAST or OFF.9Michael Ladd www.mikexeno.com mikexeno@aol.com
Step-4 Set the clock to UTC and have HDSDR auto start1: Select Options.2: Misc. Options.3: Check auto start.4: Show Time in UTC.This setting tells HDSDR to start the RSP as soon as you launch HDSDR and will also covert the time onthe main screen (lower left) from standard time to universal time.10Michael Ladd www.mikexeno.com mikexeno@aol.com
Step-5 Set tuning within the band and not LO1: Options.2: Mouse Wheel.3: Select Mode: Tune.This setting tells HDSDR to tune within the current frequency range selected and operating the RSP inthis mode is much smoother via the mouse wheel or click and dragging.HOW TO VIDEOhttps://www.youtube.com/watch?v beqoGobfWjk11Michael Ladd www.mikexeno.com mikexeno@aol.com
Step-6 Remove the center DC spike1: Options.2: Input ChannelCalibration for RX.3: Change Mode atthe top from Off toAuto.4: Click OK.This setting tells HDSDR to automatically calculate the removal of the center DC spike in the waterfalldisplay.HOW TO VIDEOhttps://www.youtube.com/watch?v FLcgi9o5z w12Michael Ladd www.mikexeno.com mikexeno@aol.com
Step-7 (Final) Calibrate the offset of the RSP1: Tune to the followingtime stations WWV (5,00010,000 or 15,000 Khz) orCHU Canada (3330 or 7850)2: Change the mode to ECSS(To the right of the AMbutton) and make sure AFCis selected (Turns Blue).3: Right click on the EXT/IObutton. Wait for it to getinto 0 or as close to zeroPhase (Zero phase in the 3o’clock position)4: Click Calculate5: Hit apply6: Click the X to close it.7: Change your mode backto AM.This setting tells HDSDR how to adjust the offset/frequency corre ction that almost all SDRS have. If youcannot get the phase arrow in the circle to rest near 0 then do the calibration when HF conditions arebetter. Ideally you want to calibrate your RSP with the 15 WWV time stationHOW TO VIDEOhttps://www.youtube.com/watch?v J2C5gBlpkA13Michael Ladd www.mikexeno.com mikexeno@aol.com
Tweaking the RSP EXT/IO:14Michael Ladd www.mikexeno.com mikexeno@aol.com
SDRPlay EXT/IO Optimization:EXT/IO panel: Later on in this guide we will go over the other EXT/IO settings. I want to bring you up tospeed on how to use HDSDR vs confuse you with settings we basically won’t touch for HF listening. Onevery important thing is The RSP receives radio signals over a very wide range. However, when it iscompared with other radios or receivers specifically designed for a certain frequency range, itssensitivity, may or may not be inferior within that range. This is because their circuit designs arecompletely different then the RSP.Let's setup the EXT/IO provided by SDRPlay. The EXT/IO configuration panel is not a one setting fits all.The most overlooked but least understood setting for any new SDR user is the Gain Control. Thisimportant setting is shown in the EXT/IO pop-up window. Knowing the proper number to set the gain iskey to getting the best signal to noise ratio manually.If your scratching your head with all these buzz words, then the easiest way to explain it would be to saywe are trying to obtain the best sounding signal with the least amount of noise and or static.Think of the gain control settings as a valve. Adjusting the gain slider up and down will tell the RSP howmuch or how little signal to get into the RSP's circuits for processing from your antenna. If you apply tomuch gain you will have vertical lines all over the waterfall and possibly hear 2 to 3 stations at 1 time.This intermixing of stations is called intermod. Think of intermod as having the valve opened way toomuch. Now if we lower the gain setting then it will result in to not being able to see or hear any s tationsat all. Same as shutting a valve.The EXT/IO by default will enable the AGC. When the Automatic gain control is checked and enabled itsjob is to try and figure out the best value for the gain and apply it in real time. I personally never enableany type of AGC for HF listenin
We will now setup and tune HDSDR to run perfectly with the RSP. The main setup process is broken down into 7 parts. Each step will be on a single page. Michael Ladd www.mikexeno.com mikexeno@aol.com 7 Step-1 Set your RX input and RX output This setting tells HDSDR how to use your audio input's and output's. If you are using VAC (Virtual Audio Cable) then select your VAC cables
