Transcription
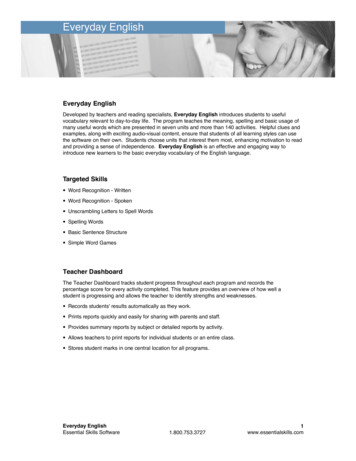
BURLINGTON ENGLISH EVERYDAYENGLISHGetting Your Students StartedA step-by-step orientation guidefor training students how to usethe BurlingtonEnglish program
Before you begin, please note that this document is best utilizedby those who have already had initial training on BurlingtonEnglish.The orientation is presented in an outline format so that facilitatingand following it is easy and smooth.Who should use the Program Orientation?The Program Orientation can be used to train teachers on how to use the programand by teachers to train their students.When should the Program Orientation be used?The Program Orientation should be used when students and teachers first begin touse BurlingtonEnglish. It can also be used as a refresher for students and teacherswho have been using BurlingtonEnglish, but need more training and practice withthe program.How long will it take to complete the Program Orientation?It will take about three hours to complete the entire Program Orientation. This includes50 minutes of hands-on practice. The Program Orientation can be divided into a fewsessions. The pacing of the Program Orientation should be at the discretion of thetrainer or teacher and is dependent on the level of the students and the time allotted.Where should the Program Orientation take place?The Program Orientation should take place in a lab where students will have accessto the program, or in a classroom with the hands-on practice afterwards. Ideally,students should be able to practice in a lab what they learned on the same day theyreceived the Orientation.Table of ContentsPage1.Introduction32.WebMic33.Menu / Getting Started34.HelpSpots35.Instructions Button46.Words Screen (including Training and s711.Summary72
Prior to starting the Orientation, make sure Control Menu for all the students in the class is set toEveryday English 3.1.Introduction Ask students to move away from their computers and to focus their attention on you while youdemonstrate the program. Tell students they will have time to practice after the orientation andwill be using the program regularly in the future. Tell students you are going to teach them the basics of the BurlingtonEnglish program and makesure they are using the program correctly.2.WebMic Hold up the WebMic and explain that it is a BurlingtonEnglish WebMic. Demonstrate how to wear the WebMic correctly. Tell students that the microphone should beabout two fingers away from and directly in front of their mouths. Emphasize that the program will not work if the WebMic is not positioned correctly.3.Menu / Getting StartedSee Screens 1 and 2: page 8 Demonstrate the login process. Watch the introductory video with the students. When you get to the Main Menu screen, explain that your computer has all the courses buttheirs will only have the courses that have been chosen for them to use. Explain that you will be using Everyday English 3 to demonstrate the program, but all the coursesare similar and if they can use Everyday English 3, they can use any of the BurlingtonEnglish courses. Click on Everyday English 3. Click on Module 5: Describing Present Experiences. Explain that a Module is like a unit. Readthrough the titles of a few of the Modules. Explain that every Module is divided into five Situations and that a Situation is like a lesson. Explain that each Situation is divided into two parts, based on the skills taught. There is Listen andSpeak and Read and Write. Click on Situation 1: At the Doctor’s Office – A: Listen and Speak. You are now on the Slideshowscreen.4.HelpSpotsSee Screens 3 and 4: page 9 Point out the HelpSpots button. Explain that HelpSpots are there to help students learn how touse the program. There is a HelpSpot for every button on the screen. Click on the HelpSpots button. Tell students that in help mode, the screen freezes, turns gray andHelpSpots appear. Show students how to access the HelpSpots. Demonstrate a few HelpSpots on the screen. Click on the HelpSpot next to the phrase “How can I help you, Ms. Hall”. Emphasize how muchinformation this one HelpSpot gives. Emphasize the importance of HelpSpots. They are there to help the students. If students readevery HelpSpot on every screen when they start using the program, they will be able to use theprogram without asking the teacher for help.3
5.Instructions ButtonSee Screens 3 and 4: page 9 Show students where the Instructions button is and click on it. Tell them why it is important. It tells them what to do on each screen and how to use theprogram. Explain to students that the Instructions button automatically opens when they go onto a newscreen. Show them how to turn this feature off by clicking on the icon when the Instructionsbutton is open. Note: There are translations for the instructions in all levels of Everyday English in the students’mother tongue. They can view the translations by clicking on the Translation icon in the Instructionsscreen.6.Words Screen (including Training and Practice)See Screen 4: page 9 Click on the Words tab Click on the HelpSpots button and open the HelpSpot for the phrase “allergic”. Read it out loudand demonstrate some of the things it does. Demonstrate how to record by clicking on the red dot next to the phrase “allergic” and sayingthe phrase into the WebMic. Emphasize the process of recording by emphatically stating that when they are recording theymust say every word, “One time, softly, slowly, and then wait for the green bars.” Demonstrate by recording examples for five words, some correctly and some deliberatelyincorrectly, for example, too loud, wrong word, etc. Tell the students they have to complete the whole screen to get a score. If they do not do thewhole screen, they will not get a score, their work will not be saved and their teacher will notknow they did it. Press the Simulate tab. Tell students that once they have completed the whole screen, it will looklike this. Point out the score and tell them that sometimes they will be sent to Training. Demonstrate Training Steps 1-3: Compare, Watch, and Listen. Click on Step 4: Practice. Tell them that they won’t get the green bars here when they arerecording. Instead, they get a message at the end that tells them if they improved, or if they stillneed to work on that sound. After Training, click on the Practice tab and show the students Activities 1-3. Click on Activity 4: Spelling. Tell students that in this activity, they get five hints to help them. Demonstrate spelling three words, with and without hints. Click on the Check button at the bottom of the screen to show them how to get a score. Theycan also see their mistakes. Remind them that in order to get a score, they must finish the exercise. They must also click onthe Check button if there is one.4
7.Dialogue 1See Screen 5: page 10 Click on the Dialogue 1 tab. Open the Instructions button and read the instructions out loud. Click on the Play button and listen to the entire conversation. Show students how to choose a character. Choose Amy. Tell students they must be patient whileyou record. Press the Record button and record the entire conversation taking the part of Amy. Play back the conversation with your recorded voice. Tell students it is good practice for havinga real conversation and that they can also get to hear themselves having a real conversation. Explain that sometimes they will be sent to Training, just like in Words. After Training, they are still not done. They must then choose the second character – in this caseDr. Green and record the conversation as him. Tell them they will be scored on both charactersand the teacher will check that they recorded as both characters.8.Check Click on the Check tab. Demonstrate how to complete the exercises on the screen by clicking onthe first Play button and listening. Answer the questions correctly. Do the second exercise but answer one or two of the questions incorrectly. Click on the Check button at the bottom of the screen. Show students that the red X means they got the question wrong. Click on the red X. They will be shown which is the correct answer, and the part of the dialoguewhere the correct answer can be found is played.Hands-On Practice (30 minutes)Assign Practice: Students will now practice what they have learned. Tell them to click onthe Menu button on the bottom of the screen and to click on Module 5: Describing PresentExperiences, Situation 2: A Day with Dr. Green – A: Listen and Speak. Tell them to complete theWord’s screen with the Practice activities, one Dialogue, and Check. If a student finishes all of theabove exercises, tell them to move on to the Read and Write to explore. Remind them to use theHelpSpots.Assist Students: Walk around to assist the students. Help students who have trouble recordingby scaffolding it for them. Explain that they listen to the word and then click the record button.When the red bar starts to flash, they say the word. If they have trouble, click the mouse for themand tap their shoulder as a signal to speak. Do this a few times until they get the hang of it. Thenlet them take the mouse and do it themselves. Continue scaffolding until they have successfullyrecorded 3-5 words on their own.Regain Attention: After all students have completed the Words screen, stop Hands-On Practiceand ask students to give you their attention. Tell them you are going to show them a few moreimportant things they must know in order to use the program.5
9.WordlistSee Screen 6: page 10 Tell students you will be showing them other parts of the program. Click on the Menu buttonand return to the course menu with the list of Modules and Situations. Click on the Wordlistbutton on the bottom of the screen. Show them the Complete Wordlist and explain that it includes all the words and phrases in thelevel they are using. Point out the Links on the right side of the screen. Explain that by clickingon a Link, they will be taken to the screen where that word / phrase is used in context. Click ona Link to demonstrate how they work. Point out and click on the Personal Wordlist. Explain to students that they choose which wordsthey want to add to this wordlist. Demonstrate how to do this by going back to the Words screenand clicking on the book icon to the left of the words. Now go back to the Wordlist and showthem how these words now appear in the Personal Wordlist. Point out and click on the Focus Wordlist. Tell students that their teacher will assign words forthem to add to this wordlist. Click on the Practice tab and demonstrate the Activities, Quizzes, and Games. Show the studentsthat they can choose to do activities, quizzes, or games from their Complete, Personal, or FocusWordlists. Explain that is better practice if they do the activities in their Personal, or FocusWordlists as it is more focused practice on the words they need to concentrate on. Point out the Pronunciation, Comprehension and Spelling Difficulties. Explain that theseWordlists are generated by the program. When they make a mistake, the program keeps trackand puts these words into their Difficulties Wordlists. Tell them that they will not have a lot of words in their wordlists in the beginning. It will taketime for them to create and generate their Difficulties Wordlists.Hands-On Practice (10-20 minutes)Assign Practice: Allow students to work for about 10-20 minutes in their Wordlists.Regain Attention: Stop Hands-On Practice and ask students to give you their attention. Tellthem you are going to show them a few more important things they must know in order to usethe program.6
10.ProgressSee Screen7: page 11 Click on the Menu button and return to the course menu with the list of Modules and Situations.Click on the Progress button on the bottom of the screen. Tell students that this is one of themost important buttons in the program. Demonstrate the Progress for the Whole Course. Mouse over a skill to see which activitiescontributed to this score. Click on Module 5. You will see the Progress for Situation 1. Explain that they receive progressfor every exercise they complete. Explain that a blank line means they have not done an exercise yet. Tell students that if they want to see the actual screen with their results, they can click on theactivity. They can view their first, last, and best tries. Tell students that if they want to get a higher score on an exercise, they can click on the Go Tolink to be taken to that specific exercise. Click on a Go To link to demonstrate. Tell students that they can use the Progress tab to:– check their progress by looking at the Progress tab– go back and redo exercises that they want to do better on– see which exercises they still need to doHands-On Practice (5-10 minutes)Assign Practice: Remind students that they worked in Module 5, Situation 2. Tell students toclick on the Progress tab and to look at the Progress on the work they just did in class. Tell themto click on the Go To links as well.Assist Students: Walk around to make sure students understand what to do.Regain Attention: Stop Hands-On Practice and ask students to give you their attention. Tellthem you are now going to review what they learned about how to use the program.11.Summary Review and ask the students the following, so that as they answer, you can demonstrate (or have oneof them demonstrate) the correct use of the program: HelpSpots Check Instructions Wordlists Words and Training, and Practice Exercises Progress Dialogue Tutorials Note: In case you do not manage to complete the Program Orientation and not everything iscovered, you can utilize the Student’s Zone Tutorials which can be found on the BurlingtonEnglishMain Menu to teach students how to use the program, as mentioned in the Best Practices forTeachers.See the corresponding Best Practices for Teachers’ Checklist fo
Explain that you will be using Everyday English 3 to demonstrate the program, but all the courses are similar and if they can use Everyday English 3, they can use any of the BurlingtonEnglish courses. Click on Everyday English 3. Click on Module 5: Describing Present Experiences. Explain that a Module is like a unit. Read through the titles of a few of the Modules. Explain that .
