Transcription
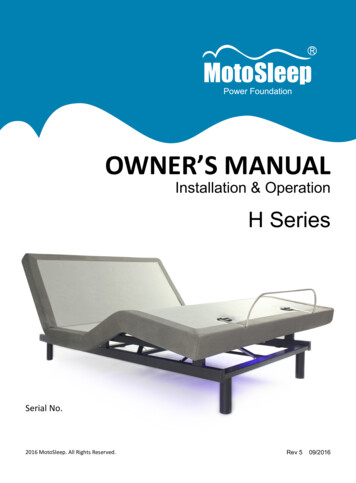
OWNER’S MANUALInstallation & OperationH SeriesSerial No.2016 MotoSleep. All Rights Reserved.Rev 509/2016
Table of ContentsSafety & Warranty Warnings 01Parts List 02H100/H100IR Electronics Quick Reference Guide 03H200/H200M Electronics Quick Reference Guide 04Installation Guide 05H100/H100IR Remote Control Instructions 06H200/H200M Remote Control Instructions 07Setting Programmable Positions and Pairing Remote 08Synchronizing Two Foundations 09Headboard Bracket Installation Guide 10Troubleshooting 11Customer Service Toll Free: 1-800-MY-MOTTO (1-800-248-5988)
Safety & Warranty WarningsREAD THE FOLLOWING INFORMATION CAREFULLY BEFORE USING THIS PRODUCTIf unable to understand warnings, cautions, and/or instructions, contact the dealer or technical personnelif applicable, before attempting to use the equipment. Otherwise, injury or damage may result.SAFETY WARNINGS:Product Rating:The motors are not designed to operate continuously for more than[2] minutes in an [18] minute time period or approximately 10% dutycycle. Attempting to circumvent or exceed this rating will shorten thelife expectancy of the foundation and may void the warranty. Do not use bed outdoors. Do not use bed near explosives. Using bed with oxygen administering equipment other than thenasal masked type creates a possible fire hazard. When using nasal or masked type administering equipment, routeand secure oxygen or air tubing properly to ensure that tubing doesnot become entangled or damaged during normal operation of thebed. Use caution when having liquids in or around the bed to ensure nospilling occurs. In case of spillage, stand in a dry, clean area of thefloor and unplug the bed immediately. Clean up spill and allow thearea around bed to dry thoroughly before using the electric controlsagain. Do not eat or drink hot liquids while operating the bed. This appliance is not intended for use by persons (includingOperating Information: After power foundation assembly is completed, operate remotecontrol to ensure proper functions. Keep moving parts free of obstruction during bed operation(including sheets, clothing, tubing, wiring, and products using electricpower cords). Distribute body weight evenly over bed surface. Do not place entireweight on head or foot sections of the bed, during repositioning andentering or exiting bed.Hospital Use Disclaimer:children) with reduced physical, sensory or mental capabilities, orThis power foundation is designed for residential use only. It islack of experience and knowledge, unless they have been givennot approved for hospital use and does not comply with hospitalstandards.supervision or instructions concerning use of the appliance by aperson responsible for their safety. Do not allow children or individuals with disabilities to operate thebed without adult supervision.Weight Limits:This product is not rated to support weights in excess of 650 poundsinclusive of the mattress and bedding. The bed will structurallysupport this weight, provided it is evenly distributed across thefoundation. The power foundation is not designed to support orlift this amount in the head or foot sections alone. Exceeding thisweight restriction could damage the bed and/or cause injury and willvoid the warranty. Do not allow any person or pet under the bed at any time. During bed operation, make sure body is positioned within theconfines of the bed. Do not place extremities over the sides of thebed when operating bed functions.WARRANTY WARNINGS:Do not open or tamper with control box, motors, or remote (with theexception of battery compartments). The warranty will be void if theinternal workings of these components are tampered with.RADIO FREQUENCY: 2.4 GHzFCC COMPLIANCE:This device complies with Part 15 of the FCC Rules. Operation is subject to the following two conditions: (1) This device may not causeharmful interference, and (2) this device must accept any interference received, including interference that may cause undesired operation.To comply with the FCC RF exposure requirements, no change to the antenna or the device is permitted. Any change to the antenna or thedevice could result in the device exceeding the RF exposure requirement and void user’s right to operate the device.Customer Service Toll Free: 1-800-MY-MOTTO (1-800-248-5988)—01—
Parts ListAll electronics and components that need to be installed are located in boxes under the foundation orattached to the frame. Before discarding the packing materials, ensure that all the parts are accounted for.INCLUDED WITH WIRED(1) Wired Remote(1) Power Supply withBattery Backup Box(1) Wireless Remote(1) Power Supply withBattery Backup Box(1) Power Cord(1) Sync Cord Only in TXL (1) Mattress Retainer Bar(4) Adjustable LegsINCLUDED WITH WIRELESS(1) Power Cord(1) Sync Cord Only in TXL (1) Mattress Retainer Bar(4) Adjustable LegsOPTIONAL HEADBOARD BRACKET KITS (NOT INCLUDED)(2) Headboard Brackets(2) T-Brackets(10) Short BoltsOPTIONAL EQUIPMENT (NOT INCLUDED)(2) 9-Volt BatteriesSocket and Crescent WrenchActual product appearance and functionality may vary from photographs.Customer Service Toll Free: 1-800-MY-MOTTO (1-800-248-5988)—02—(10) Nuts
Electronics Quick Reference GuideH100 WIRED OVERVIEWHead Motor PortFoot Motor PortHead MotorFoot MotorPower CordWired Remote PortSync Cord ConnectionControl BoxInput PowerCordPowerSupplyInput Cord ConnectionSync CordConnectionRemoteH100IR WIRELESS OVERVIEWPower CordInput Cord ConnectionSync Cord ConnectionPowerSupplySync CordConnectionFoot Motor PortHead Motor PortRemoteFoot MotorCustomer Service Toll Free: 1-800-MY-MOTTO (1-800-248-5988)—03—Input PowerCord
Electronics Quick Reference GuideH200 WIRELESS OVERVIEWPower CordInput Cord ConnectionSync Cord ConnectionUnderBed LEDUSB ConnectionLED ConnectionUSB ChargingPortsInput PowerCordPowerSupplyUSBChargerSync CordConnectionFoot Motor PortHead Motor PortRemoteFoot MotorH200M PACKAGE OVERVIEWPower CordUnderBed LEDInput Cord ConnectionSync Cord ConnectionInput PowerCordUSB ConnectionLED ConnectionUSB ChargingPortsSync CordConnectionPowerSupplyUSBChargerFoot MassageMotorFoot Motor PortHead Motor PortFoot Massage Motor PortRemoteFoot MotorHead Massage Motor PortHead MotorCustomer Service Toll Free: 1-800-MY-MOTTO (1-800-248-5988)—04—Head MassageMotor
Installation GuideTwo people are required to set up the foundation.NOTE: To avoid damage to the foundation,always open the carton while the bed is in the flatposition.STEP 6Locate the power supplyand install (2) 9-volt batteries (notincluded).STEP 7Carefully flip the foundation over onto its legs.Important: Two people are required to move the foundation.Do not drag across the floor. Do not rest frame on its side;excessive pressure may damage the legs.STEP 1STEP 8Place the foundation box in adesired location with the bottomof the box facing up.For WirelessEnsure that batteries are correctlyinstalled.Remove the binding straps andpacking materials, making surenot to puncture the box with anysharp objects.STEP 2Remove the foundation from the box, keeping the bottom of thefoundation facing upward for easier access to the bed's components.STEP 3For WiredEnsure that the wired remoteis plugged into the control box.To install the legs, thread thebolt of the leg to the nut onthe foundation frame, andtighten by hand. DO NOTOVERTIGHTEN.STEP 9Locate the mattress retainer bar brackets.STEP 4Uncoil the input power cord(connected to the control box’spower port) and plug it into thepower supply.Slide the left side of the mattress retainer bar into the bracket. Pullthe retainer bar to the opposite bracket and secure the right side.STEP 5Uncoil the power cord and connect it to thepower supply.Customer Service Toll Free: 1-800-MY-MOTTO (1-800-248-5988)—05—
Remote Control InstructionsH100IRH100USB PortFlatPositionFlatPositionLifts andLowers FootLifts andLowers HeadLifts andLowers FootLifts andLowers HeadADJUSTADJUSTThe HEADfoundation.arrows lift and lower the head section of theThe FOOTfoundation.arrows lift and lower the foot section of theONE TOUCH BUTTONThe HEADfoundation.arrows lift and lower the head section of theThe FOOTfoundation.arrows lift and lower the foot section of theONE TOUCH BUTTONOne touch FLAT preset position.One touch FLAT preset position.USB CHARGER STATIONUSB charger for electronic equipment.Customer Service Toll Free: 1-800-MY-MOTTO (1-800-248-5988)—06—
Remote Control InstructionsH200MH200FlatPositionLifts andLowers HeadLifts andLowers HeadLifts andLowers ionFlatPositionZero GPositionUnderneathLED on/offHeadMassage on(3 IntensityLevels)UnderneathLED on/offProgrammablePositionsLifts andLowers FootFootMassage on(3 IntensityLevels)Head/FootMassage offADJUSTADJUSTThe HEADfoundation.arrows lift and lower the head section of theThe HEADfoundation.arrows lift and lower the head section of theThe FOOTfoundation.arrows lift and lower the foot section of theThe FOOTfoundation.arrows lift and lower the foot section of theONE TOUCH BUTTONSONE TOUCH BUTTONSOne touch flat position.One touch FLAT preset position.One touch ANTI-SNORE preset position.One touch programmable positions.One touch TV preset position.One touch ZERO G preset position. ZERO G adjusts your legs to ahigher level than your heart, helping to relieve pressure of the lowerback and promote circulation.MASSAGE FEATUREThe button will turn on the head massage. Cycle through 3 massage lntensities.The button will turn on the foot massage. Cycle through 3 massage lntensities.One touch programmable positions.The button will turn off the head/foot massage.UNDERNEATH LED LIGHTINGUNDERNEATH LED LIGHTINGOne touch underneath LED lighting on/off.One touch under bed LED lighting on/off.Customer Service Toll Free: 1-800-MY-MOTTO (1-800-248-5988)—07—
Setting Programmable Positionsand Pairing RemoteSETTING PROGRAMMABLE POSITIONSPAIRING REMOTEThe wireless power bed has a programmable feature that allowsyou to save two custom positions.Please read all the instructions below before setting your custompresets on the remote.The original remote that comes in the box is already paired to thefoundation. No further action is required.In the event that the remote is not paired with the foundation, followthe steps below.STEP 1STEP 1Adjust the head and foot to your desired position.Make sure the batteries work fine. Replacethem when needed.STEP 2Unplug the power cord from the power source.If 9V batteries were installed in the power supply, remove them.STEP 2Press and hold the LED on/off buttonfirst, then press and holdone of the picture programmable buttonsfor 5 seconds untilyou hear a beep sound. The position is then saved.STEP 3Press and hold HEAD and FLATsimultaneously until the blue backlightsof the remote control are off.STEP 3STEP 4To adjust the saved positions, repeat steps 1 and 2 and the newposition will be saved.Plug the power cord back into the power source. You will hear abeep sound in 2 seconds; the remote is then paired.NOTETo get back to the factory setting, holdFLAT and FOOT simultaneouslyfor 10 seconds until you hear twobeeps from the control box.Customer Service Toll Free: 1-800-MY-MOTTO (1-800-248-5988)—08—
Synchronizing Two FoundationsIf simultaneous operation of two foundations is desired, use the sync cordto connect the electronics of both foundations together.STEP 1STEP 3Unplug foundations from the power source.If 9V batteries were installed in the power supply, remove them.Plug foundations back into the power source.STEP 2STEP 4Connect the male ends of the sync cord to the female sync plugs ofthe control boxes (Refer to illustration below).Check to ensure that all cords are securely attached.For wired, only one of the two remotes will operate both foundationssimultaneously.For wireless, either remote will operate both foundationssimultaneously.WIRED SYNCHRONIZING OVERVIEWControl BoxRemoteSync CordFemaleSync PlugFemaleSync PlugFemaleSync PlugControl BoxWIRELESS SYNCHRONIZING OVERVIEWControl BoxControl BoxRemoteSync CordFemale Sync PlugFemale Sync PlugCustomer Service Toll Free: 1-800-MY-MOTTO (1-800-248-5988)—09—Remote
Headboard Bracket InstallationGuide (Optional)Headboard brackets are an optional accessory and are not included.A 9/16'' (14 mm) socket and 1/2'' (13 mm) crescent wrench are necessary to complete installation.HEADBOARD BRACKET COMPONENTS(2) Headboard Brackets(2) T-Brackets(10) Short Bolts(10) NutsSTEP 1STEP 2a) Align the hole in the bracket to the sleeve into which the legthreads. Hold the bracket in place and screw the leg into thefoundation until it is snug. DO NOT OVERTIGHTEN. Too muchforce may cause the leg to spin freely.a) To put the T-Bracket and Headbroad Bracket together, you willneed (2) M8 16 bolts and (2) nuts. Slip the bolts through the holesfrom T-Bracket to Headbroad Bracket with the head of bolt facingoutward. Use the 9/16” (14 mm) socket and 1/2'' (13 mm) wrench totighten the bolts.b) The headboard bracket will have 2 tabs to accomodate any frametype. Align the appropriate tab on the bracket with the hole on thefoundation. Use a short bolt and a nut to secure the bracket. Makesure the bolt is tight.STEP 3You may now connect your headboard to the attachment plates using the remaining short bolts and nuts to secure it to the brackets. The headsof the bolts will face outward. Use a 9/16" (14 mm) socket and 1/2" (13 mm) wrench to tighten the bolts.Customer Service Toll Free: 1-800-MY-MOTTO (1-800-248-5988)—10—
TroubleshootingIn the event that the power foundation fails to operate, assess the symptoms and possible solutionsprovided in the chart below.SYMPTOMSSOLUTIONSRemote control illuminates and appears to be operable, but will notactivate bed.Verify that the power cord is plugged into a working, groundedelectrical outlet. Test the outlet by plugging in another workingappliance.Program the remote control (see the Setting Programmable Positionsand Pairing Remote section of this manual for programmingprocedures).Unplug the power cord, wait 30 seconds and plug back to resetelectronic components.No features of the power foundation will activate.The surge protection device or the electrical outlet may be defective.Test the outlet by plugging in another working appliance.Verify that the connector on the wired remote control is securelyattached to the control box.Wireless remote will not illuminate.Replace the batteries in the wireless remote.Bed mechanism may be obstructed. Elevate bed and check forobstruction. Remove obstruction.Head or foot section will elevate, but will not return to the horizontal(flat) position.Head section may be too close to the wall.Headboard may be too close to the edge of the mattress. Verifythat there is enough distance between the headboard brackets andmattress. Adjust if required.Customer Service Toll Free: 1-800-MY-MOTTO (1-800-248-5988)—11—
TroubleshootingIn the event that the power foundation fails to operate, assess the symptoms and possible solutionsprovided in the chart below.SYMPTOMSSOLUTIONSCheck batteries in wireless remote control, replace with three (3) newAAA batteries if necessary.Make sure that you are following the duty cycle of the motors (donot operate more than two minutes over a 20-minute period, orapproximately 10% duty cycle).Head & Foot lift function has minor interference durling operation.Press the lift buttons squarely and accurately.Wireless remote control may be experiencing common RadioFrequency Interference from other radio transmitting devices. Waitseveral seconds, and then try pressing appropriate button again, SeeFCC Compliance Statement on page 1 of this guide.If the bed is located on hard surface flooring, place carpet pieces orrubber pieces (not included) under each leg.Using the wireless remote control, elevate the head, foot or necksection a short distance to realign the lift/lower mechanisms with thebed support platform.Excessive massage motor noise.Verify that your MotoSleep Power Foundation is not positionedagainst a wall, nightstand, or other object that may cause thevibration or noise.If the MotoSleep Power Foundation is installed over a bed frame,verify that the massage motors are not causing the bed frame (or bedframe components) to vibrate.Verify that the headboard attachment hardware is properly tightened(if used).A clicking noise is heard under the bed when raising or lowering.This is normal. The lift motor relays “click” when they are engaged.No action is erquired.Massage motor overheats or stops.If the vibration motor overheats, the thermal protection will turn themotor off. Wait 30 minutes, turn the massage back on. If it does notcome on, turn it off and report the situation to customer service.Customer Service Toll Free: 1-800-MY-MOTTO (1-800-248-5988)—12—
Thank you for purchasing a MottoSleepPower Foundation.Contact Customer Service Toll Free at 1-800-MY-MOTTO (1-800-248-5988)www.motosleep.com
bed. Use caution when having liquids in or around the bed to ensure no spilling occurs. In case of spillage, stand in a dry, clean area of the floor and unplug the bed immediately. Clean up spill and allow the area around bed to dry thoroughly before using the electric controls again. Do not eat or drink hot liquids while operating the bed.
