Transcription
Caring for Your Hickman CatheterHave a smartphone? Open your camera app and focus on the QR code towatch a video about flushing your central line catheter or go towww.dana-farber.org/centralline.Caring for your Hickman catheter includes learning to shower with it, washing your hands soyou can change the bandages, and changing the bandages—also called dressing.How do I shower with my Hickman catheter? You can shower the same day as your procedure, but you must completely cover yourdressing and catheter and keep the dressing dry. Coil your catheter gently and cover it completely with plastic wrap and tape or a productlike Press and Seal. Avoid facing the shower directly. Try to shower with your back facing the shower head. Your catheter cannot go underwater in a pool, tub, lake, etc., even if it’s covered inplastic wrap If the dressing gets wet, it needs to be changed right away.How do I wash my hands in preparation to change the dressing?1. Use warm water to get your hands wet Dana-Farber Cancer Institute, Patient and Family Education Committee. Last revised 11/2020. Page 1 of15
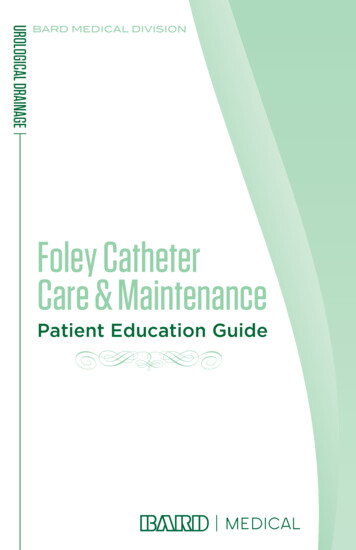
CARING FOR YOUR HICKMAN CATHETER2. Apply soap3. Rub your hands together vigorously. Be sure the scrub your nails, the back of yourhands, thumbs, and the areas between your fingers4. Continue rubbing hands together for at least 10 seconds while rinsing5. Dry your hands with a clean paper tower or hand dryer. If it’s possible, use a paper towelto turn off the water so that you avoid any germs on the faucetHow often should I change the dressing? Change the clear dressing every 7 days If you have gauze underneath the clear dressing, change it every 2 days If your dressing gets wet or loose, change it immediatelyHow do I change the dressing?1. Find a spot, like a tabletop or counter, for all your supplies2. Clean the area with a disinfectant wipe3. Gather all supplies: Dressing kit 2 pairs of plastic gloves Mirror Mask Open trash can (this goes on the floor, notyour surface)4. Wash your hands with soap and water.5. Open the dressing kit on your surface. It is sterileinside, so don’t touch it with your bare hands Dana-Farber Cancer Institute, Patient and Family Education Committee. Page 2 of 15
CARING FOR YOUR HICKMAN CATHETER6. Put on your plastic gloves and mask7. Loosen the edges of the old dressing, carefully take it off, and throw it in the trash. If youhave a Biopatch or gauze, also take them off and throw them away. Be careful not to pullon your catheter when removing the old dressing, gauze, or Biopatch.8. Take off your plastic gloves and throw them away. Wash your hands.9. Use the mirror to check the area around the catheter for signs of infection, like: Redness, swelling, or warmth Pus or drainage A red streak on the skinIf you see any signs of infection, call your doctor as soon as you finish changing thedressing10. Put on a new pair of gloves Dana-Farber Cancer Institute, Patient and Family Education Committee. Page 3 of 15
CARING FOR YOUR HICKMAN CATHETER11. Open the ChloraPrep package in your kit, and squeeze the plastic wings on the side12. Clean the skin around your catheter with the ChloraPrep swab. Scrub back and forth for30 seconds. Then gently scrub over and under your catheter.13. Leave the area alone after cleaning while it dries. Let it air-dry completely. This will takeabout 1-2 minutes14. If you have any drainage around your catheter, put new gauze over the area where thecatheter comes out of your skin.15. While wearing your gloves, open the clear dressing. Touch only the outer edge. If youtouch the inner part, throw it away and get a new dressing. Peel the backing off the cleardressing. Dana-Farber Cancer Institute, Patient and Family Education Committee. Page 4 of 15
CARING FOR YOUR HICKMAN CATHETER16. Put the clear dressing over your catheter.17. Peel the paper frame off the clear dressing. Gently press around the edges of yourdressing to make sure the edges stick to the skin.18. The paper frame you peeled off contains tape to secure the dressing. Peel the notchededge off the paper edge. Dana-Farber Cancer Institute, Patient and Family Education Committee. Page 5 of 15
CARING FOR YOUR HICKMAN CATHETER19. Place the notched tape under the catheter tubing and over the clear dressing. Placeanother piece of tape over the catheter tubing and over the clear dressing.20. Loop the IV tubing and secure with tape. Tape to your skin, not the clear dressing. Writethe date on the tape so you know when to change it next.21. Take off your gloves and mask and throw them awayWhat other precautions should I take with my Hickman catheter? Keep an extra clamp on hand in case your catheter cracks, splits, leaks, or is accidentallycut. If any of these things happen, clamp your catheter and then call your care teamimmediately.Do not use sharp objects like scissors, knives, or safety pins around your catheter. Theycould damage your catheter. Dana-Farber Cancer Institute, Patient and Family Education Committee. Page 6 of 15
CARING FOR YOUR HICKMAN CATHETERWhat signs and symptoms should I watch out for?If you notice any of the following signs, call your cancer care team immediately A fever of 100.5 F or higher Shaking and chills after you flush your catheter Redness, tenderness, bleeding, or drainage where your catheter is A skin rash under your bandages Pail, swelling, or numbness in your arm or neck on the same side as your catheter If your catheter cuff can be seen at the exit site Trouble flushing your cathetero If this happens, don’t force it – this can cause your catheter to breakBreaks, tears, or leaks in your catheteroIf this happens, clamp the catheter between the damaged area and your body.Cover the catheter with a sterile piece of gauze and call your cancer care teamimmediately.This document is for informational purposes only. The content is not intended as a substitute for professional medicaladvice, diagnosis, or treatment. Always seek the advice of your physician or other qualified health provider with anyquestions you may have regarding a medical condition. Dana-Farber Cancer Institute, Patient and Family Education Committee. Page 7 of 15
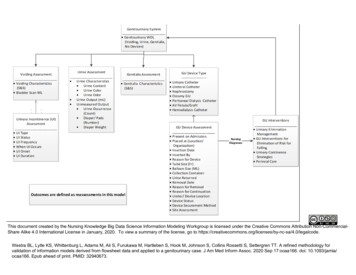
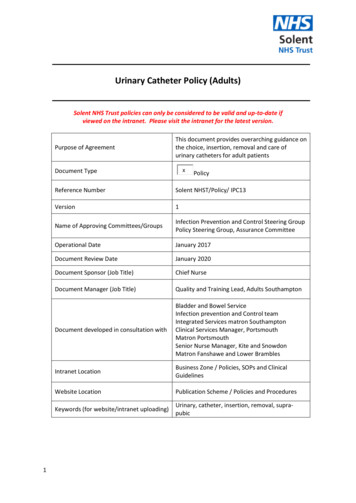
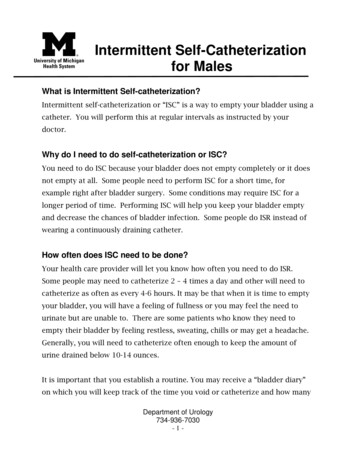
Flushing Your Central LineCatheterEach lumen of your Central Line Catheter needs to be flushed once a day with a 0.9% SalineFlush. A lumen is a small tube within your catheter.These same steps can be used for either a PICC or a Hickman Central Line. You may or may notchoose to wear gloves, but handwashing is a must!ClampSingle Lumen PICCCatheterCapDouble LumenTo flush your catheter, follow the steps on the next pages.Step 1 Clean your work table with a disinfectant wipeStep 2Gather your supplies (enough for each lumen): Catheter caps Alcohol wipes Prefilled 10mL 0.9% saline flush Gloves – optional Alcohol cover (Curos )GlovesAlcohol WipesAlcohol Covers (Curos )Flush Syringe Dana-Farber Cancer Institute, Patient and Family Education Committee. Last revised 08/2019. Page 8 of15
FLUSHING A CENTRAL LINEStep 3Step 4 Wash your hands well with soap and water.Dry your hands with a clean paper towel.You may also use an alcohol-based hand sanitizer.If you have been taught to or want to use gloves, put them on now.Step 5 Step 6Take the flush syringe from the package Hold the syringe straight up in the air with the plunger pointing to the floor.Tap the syringe so that any air bubbles rise to the top. Dana-Farber Cancer Institute, Patient and Family Education Committee. Page 9 of 15.
FLUSHING A CENTRAL LINEStep 7Take off the syringe cap Step 8 Push the plunger to the 10mL mark. This willtake out any air and extra flush from the syringe.Some flush may drip out. This is okay. Hold the syringe upright. Do not let thesyringe touch anything!Plunger Dana-Farber Cancer Institute, Patient and Family Education Committee. Page 10 of 15.
FLUSHING A CENTRAL LINEStep 9 - AIf You Have a Green Alcohol Cover Over Your Catheter Cap Remove the green alcohol cover only (do not reuse). Leave the catheter cap in place. Do NOT let the end of the cathetercap touch anything, including your body.ORStep 9 - BIf You Do NOT Have a Green Alcohol Cover Over Your Catheter Cap Open the alcohol wipe. Scrub the catheter cap with the alcohol wipe for at least 10 seconds. Let it dry completely. Do NOT let the end of the catheter cap touch anything, including your body after ithas been cleaned with alcohol. Dana-Farber Cancer Institute, Patient and Family Education Committee. Page 11 of 15.
FLUSHING A CENTRAL LINEStep 10Step 11 Hold the catheter cap.Push in and screw the flush syringe onto the end of the catheter cap. Open the clamp on the catheter. Dana-Farber Cancer Institute, Patient and Family Education Committee. Page 12 of 15.
FLUSHING A CENTRAL LINEStep 12 Flush the line with the salineusing a push pause method.The turbulence helps to keepyour line clear.Firmly push 1cc then pauseContinue to push 1cc and pause untilthe line is flushed with all 10 cc’s.If it is hard to push the flush, go to Step 19.Do not use force to flush.Step 13 Be sure that the clamp is over the wording“clamp here.” Close the clamp on the catheter. You should hear a click. Dana-Farber Cancer Institute, Patient and Family Education Committee. Page 13 of 15.
FLUSHING A CENTRAL LINEStep 14Hold the catheter captightly and unscrew the syringe from the catheter. Be careful not to loosen the catheter cap fromthe catheter. Step 15Important! Always check to be sure the catheter cap is on tight!Step 16 Put a new green alcohol cover (Curos ) onto the catheter cap. Dana-Farber Cancer Institute, Patient and Family Education Committee. Page 14 of 15.
FLUSHING A CENTRAL LINEStep 17Step 18 Now flush all the other lumens of the catheter. Do Steps 1 through 16 again. After you flush all your lumens, throw your supplies away. If it is hard to push the flush, check to make sure the clamp is open. If it wasclamped, open the clamp, and try Step 12 again. If it is still hard to push, STOP. Do not push the flush.Step 19Close the clamp. Unscrew and remove the syringe.Call your doctor or Oncology Nurse Navigator. You may need to come into clinic tohave it looked at.The above information contains some, but not necessarily all, of the information that you may need to care for yourcentral line. Please speak with your doctor or nurse if you have questions or issues you may experience.This document should not take the place of conversations with members of your health care team about yourtreatment and affects you may experience during and after the use of a central line.If you experience any significant change in your health during or after treatment, contact a member of your healthcare team right away.Developed by the Dana-Farber Cancer Institute and Brigham and Women’s Hospital Central Line Education Team,August 2013. Updated July 2019. Dana-Farber Cancer Institute, Patient and Family Education Committee. Page 15 of 15.
Trouble flushing your catheter o If this happens, don't force it - this can cause your catheter to break Breaks, tears, or leaks in your catheter o If this happens, clamp the catheter between the damaged area and your body. Cover the catheter with a sterile piece of gauze and call your cancer care team immediately.