Transcription
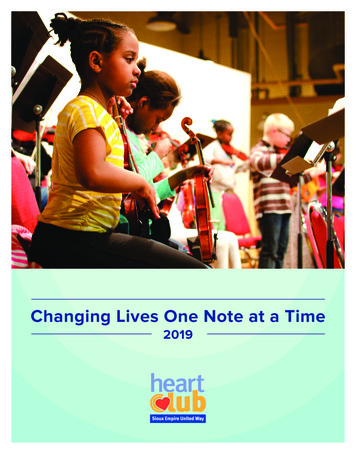
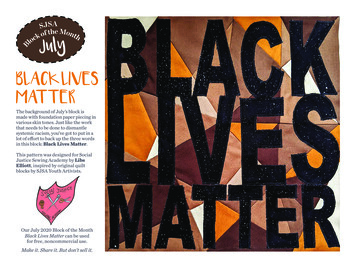
J u lyBLACK LIVESMATTERThe background of July’s block ismade with foundation paper piecing invarious skin tones. Just like the workthat needs to be done to dismantlesystemic racism, you’ve got to put in alot of effort to back up the three wordsin this block: Black Lives Matter.This pattern was designed for SocialJustice Sewing Academy by LibsElliott, inspired by original quiltblocks by SJSA Youth Artivists.Our July 2020 Block of the MonthBlack Lives Matter can be usedfor free, noncommercial use.Make it. Share it. But don’t sell it.
BLACK LIVES MATTERJoin Sara, our student artivists, Libs, and SJSA in putting in the work to support Black lives every day.Founded in 2016 by SaraTrail, the Social JusticeSewing Academy (SJSA) isan art program that bridgesartistic expression withactivism and empowersyouth to amplify their voicethrough art that advocatesfor social justice. By usingtextile art as a vehicle forpersonal transformation andcommunity cohesion, SJSA empowers youthto become agents of social change. We supportyouth to become civically engaged artists as theyare challenged to tackle current social issuesin their community that directly affect theirlives. A unique part of our program intentionallybridges generational, racial, and socioeconomicdivides by sending youth art blocks to hundreds ofembroiderers across the world.To donate or become an SJSA embroiderer visit:http://www.sjsacademy.comOn Instagram: @sjsacademy ww.facebook.comOn Facebook: wsocialjusticesewingacademy/Libs Elliott is a textile artist known for exploring theintersection of technology and traditional craft by usinggenerative code to make quilts. Libs travels all around theworld to exhibit her work and teach quilting workshops. Libs iscommitted to learning and being an ally to all BIPOC and LGBTQpeople and understands this means putting in a lifetime of work.She lives with her family in Toronto, Canada.See more of Libs’ work at: www.libselliott.comFind Libs on Instagram and Facebook as: @libselliott
Fabric Requirements: S ix fabric colors were used in the background. Adjust this amount if you’d like. Colors used in the sample areRobert Kaufman Kona Solids in the background (listed below) with the main lettering in Spectrostatic by Giucy Giuce.Letters: 1 fat quarter of contrasting fabric. Background: Color 1: Coffee, ⅛ yd; Color 2: Cappuccino, 1/16 yd;Color 3: Sable, ⅛ yd; Color 4: Roasted Pecan, 1/16 yd; Color 5: Taupe, 1/16 yd; Color 6: Parchment, 1/16 ydTools & Supplies: F usible Web: 3/ 8.5" x 11" sheets such as Steam-a-Seam 2 Lite, fabric and paper scissors, rotary cutter, cutting mat, quiltingruler, temporary marking tool like chalk or a Hera marker, co-ordinating thread, iron and ironing board, sewing machineCreating your Block Finished block size: 12"x 12" (12.5" x 12.5" unfinished). All seam allowances are ¼"This block is made using foundation paper piecing (FPP) for the backgroundand raw edge appliqué with fusible web for the text. Read through all theblock instructions before starting.If you are unfamiliar with FPP, watch a video tutorial before you start such asthis one by Crafty Gemini: https://www.youtube.com/watch?v 8uaW26igygEFoundation Paper-Pieced Background (See photos on next page.)1. Cut out all the paper templates. (Figure 1)2. Lay out the paper templates to make sure you’ve got all 10 of them.Note: They will appear backwards to the design layout as they are a mirrorof your finished block.3. Foundation piece each section. Note: The numbers on each sectioncorrespond to each fabric color. (Figure 2)4. Trim excess fabric away along the edge of the paper, using your rulerand rotary cutter. (Figure 3)5. Stitch the sections together (Figure 4) in this order:A B, then C. D E.Then sew A/B/C to D/E.This makes your Left side.Sew F G. Sew i J, then H.Then sew F/G to H/i/J.This makes your Right side.Sew two halves together to complete your background.6. Remove the papers and press with your iron.Fusible Applique Lettering (See photos on next page.)1. Trace lettering onto paper side of fusible sheets. Your letters shouldbe backwards. The closer you trace them together, the less fabricwaste. (Figure 5)2. Roughly cut out around the letters, cutting away excess fusible.3. Iron the fusible to the WRONG side of your main fabric. (Figure 6)4. Cut the letters out from the fabric.5. Use your marking tool on your block background to mark 1/4"all the way around the outside of the block to account for seamallowance. (Figure 7)6. Arrange your letters within the marked, visible area of the blockaccording to the block layout diagram.7. Peel off the paper side of the fusible and stick each section down tothe pieced background. Adjust before ironing. (Figure 8)8. Iron all the letters to fuse them permanently to the background.9. Zigzag, straight stitch, or embroider around all the letters in a coordinating thread color.Congratulations on finishing your block!
12364587
Colors used in the sample are Robert Kaufman Kona Solids in the background(listed below)with the main lettering in Spectrostatic by Giucy Giuce.
Cut out both pieces on thispage. Tape the smallersection over the larger sectionoverlapping the red lines tocomplete the pattern piece.
BLACK LIVES MATTER The background of July’s block is made with foundation paper piecing in various skin tones. Just like the work that needs to be done to dismantle