Transcription
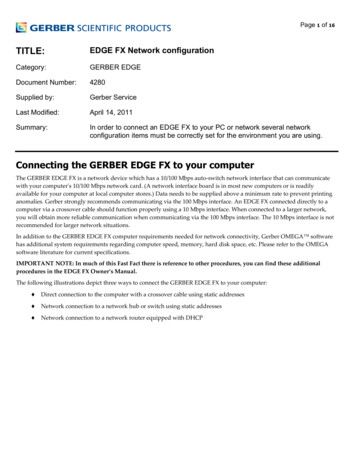
Page 1 of 16TITLE:EDGE FX Network configurationCategory:GERBER EDGEDocument Number:4280Supplied by:Gerber ServiceLast Modified:April 14, 2011Summary:In order to connect an EDGE FX to your PC or network several networkconfiguration items must be correctly set for the environment you are using.Connecting the GERBER EDGE FX to your computerThe GERBER EDGE FX is a network device which has a 10/100 Mbps auto‐switch network interface that can communicatewith your computerʹs 10/100 Mbps network card. (A network interface board is in most new computers or is readilyavailable for your computer at local computer stores.) Data needs to be supplied above a minimum rate to prevent printinganomalies. Gerber strongly recommends communicating via the 100 Mbps interface. An EDGE FX connected directly to acomputer via a crossover cable should function properly using a 10 Mbps interface. When connected to a larger network,you will obtain more reliable communication when communicating via the 100 Mbps interface. The 10 Mbps interface is notrecommended for larger network situations.In addition to the GERBER EDGE FX computer requirements needed for network connectivity, Gerber OMEGA softwarehas additional system requirements regarding computer speed, memory, hard disk space, etc. Please refer to the OMEGAsoftware literature for current specifications.IMPORTANT NOTE: In much of this Fast Fact there is reference to other procedures, you can find these additionalprocedures in the EDGE FX Owner’s Manual.The following illustrations depict three ways to connect the GERBER EDGE FX to your computer: Direct connection to the computer with a crossover cable using static addresses Network connection to a network hub or switch using static addresses Network connection to a network router equipped with DHCP
Page 2 of 16Direct connection to the computer with a crossover cableWhen the GERBER EDGE FX ships its default network setting is a static network address designed for direct connection to acomputer using a crossover cable. See the following illustration. Refer to “Using direct connection”. If your computer useshigh speed internet access via a DSL modem, you will need to obtain a switch to connect the GERBER EDGE FX and themodem to the computer. See the following scenarios “Network connection to a network hub or switch using staticaddresses” or “Network connection to a network router equipped with DHCP.”Direct ConnectionCrossover cableGERBEREDGE FXComputerwith OMEGA2.1 orhigherDefault automatic IP addressDefault static IPaddress Connect computer and GERBER EDGE FX withcrossover cable. GERBER EDGE FX uses default static networkaddress (no need to change settings.) Computer uses default Automatic Private IPAddressing (no need to assign networkaddresses). Install OMEGA 2.1 or higher. Install GERBER EDGE FX in OMEGA using theBrowse button in GSPTray. Turn on GERBER EDGE FX before turning oncomputer. TIP: Assign static address to computer if boottimes are excessive.Network connection to a network hub or switch using static addressesSome locations may connect the EDGE FX to a new or existing network that uses static network addresses. Two typicalscenarios are shown in the following illustrations: a new network or an existing network. See “Using network connectionwith static addresses”.Existing Network using Static IP AddressesNetwork cablesPossibleinternetconnectionNetwork hub,switch, orserver Contact network administrator toobtain compatible IP address forGERBER EDGE FX. Connect GERBER EDGE FX tonetwork hub/switch with straightthrough Category 5 RJ45 Ethernetcables (or crossover cables if hub isauto-sensing). Use GERBER EDGE FX keypad toassign a static IP address providedby network administrator. Existing computers and equipmentretain static addresses (no need tochange). Install OMEGA 2.1 or higher. Install GERBER EDGE FX in OMEGAusing the Browse button in GSPTray.GERBEREDGE FXAssign compatiblestatic IP addressExistingcomputerwith OMEGA2.1 or higherOthercomputer orequipmentOthercomputer orequipmentExisting staticIP addressExisting staticIP addressExisting staticIP address
Page 3 of 16New Network Connection using Static IP AddressesNetwork cablesPossibleinternetconnectionNew networkhub, switch, orserver withoutDHCP Connect new computer and GERBEREDGE FX to network hub/switch withstraight-through Category 5 RJ45Ethernet cables (or crossover cables ifhub is auto-sensing). GERBER EDGE FX uses default staticnetwork address (no need to changesettings.) New computer(s) uses default AutomaticPrivate IP Addressing (no need to assignnetwork addresses). Install OMEGA 2.1 or higher. Install GERBER EDGE FX in OMEGA usingthe Browse button in GSPTray. TIP: Assign static address to computers ifboot times are excessive.GERBEREDGE FXDefault staticIP addressNewcomputerwith OMEGA2.1 or higherDefaultautomatic IPOther newcomputerOther newcomputerDefaultautomatic IPDefaultautomatic IPNetwork connection to a network router equipped with DHCPSome locations may activate DHCP (dynamic host configuration protocol) on the GERBER EDGE FX and allowing a networkequipped with a DHCP server to automatically assign addresses. Two typical scenarios are shown in the followingillustrations: a new network with DHCP cable/DSL router or an existing DHCP network. See “Using DHCP to assignnetwork addresses”.New Network with a DHCP Cable/DSLRouterNetwork cablesInternetconnectionCable/DSLrouter withDHCP Connect GERBER EDGE FX andcomputer(s) to cable/DSL router withstraight-through Category 5, RJ45Ethernet cables (or crossover cables ifrouter is auto-sensing). Activate DHCP on the GERBER EDGE FXkeypad. Cable/DSL router with DHCPautomatically assigns IP addresses for allequipment. Install OMEGA 2.1 or higher. Install GERBER EDGE FX in OMEGA usingthe Browse button in GSPTray.GERBEREDGE FXActivate DHCPDHCP assignsIP addressComputerwith OMEGA2.1 or higherOthercomputer orequipmentOthercomputer orequipmentDHCP assignsIP addressDHCP assignsIP addressDHCP assignsIP address
Page 4 of 16DHCP NetworkNetwork cablesInternetconnectionNetwork routeror server withDHCP Connect GERBER EDGE FX to DHCProuter/server with straight-throughCategory 5, RJ45 Ethernet cables (orcrossover cables if router/server isauto-sensing). Activate DHCP on the GERBER EDGEFX keypad. DHCP automatically assigns IPaddresses for all equipment. Install OMEGA 2.1 or higher. Install GERBER EDGE FX in OMEGAusing the Browse button in GSPTray.GERBEREDGE FXActivate DHCPDHCP assignsIP addressComputerwith OMEGA2.1 or higherOthercomputer orequipmentOthercomputer orequipmentDHCP assignsIP addressDHCP assignsIP addressDHCP assignsIP addressUsing direct connectionA new computer defaults to DHCP (dynamic host configuration protocol) for network addressing. When the computerinitializes it first searches for a DHCP server. If it fails to find a DHCP server, the computer automatically selects a networkaddress using Windows Automatic IP Addressing. The range of IP addresses in Automatic Private IP Addressing are asfollows: 169.254.000.000 to 169.254.255.255The default network address of the GERBER EDGE FX falls with in the range of Automatic Private IP Addressing: GERBER EDGE FX IP Address: 169.254.128.129 Subnet Mask for GERBER EDGE FX: 255.255.0.0A new (unconfigured) computer connected directly to the printer via a crossover cable should be able to communicatewithout altering the network address of either piece of equipment.To directly connect the GERBER EDGE FX to the computer1 Connect one end of the supplied Category 5 crossover cable to the RJ45 jack on the back of the GERBER EDGE FXand the other end into the network interface board RJ45 jack on the computer.2 When connecting directly to a computer that has not been configured for networking, the default IP Address andNetwork Mask of the GERBER EDGE FX should be correct and will not need to be changed.3 If the computer is running under Windows default networking scheme, the computerʹs network address will beassigned by Windows Automatic Private IP Addressing and should not need to be changed.If the computer has been previously configured for networking, you may need to set your computerʹs networkaddress or GERBER EDGE FX network address to be compatible with each other. See “Setting the network addressof the GERBER EDGE FX from the printer keypad” or “Setting the IP Address and Network Mask of yourcomputer for direct connection” for detailed instructions.4 Install the GERBER EDGE FX using GSPTray. The software should automatically find the printer on the network.See “Installing the GERBER EDGE FX in OMEGA software”.
Page 5 of 165 If you have trouble finding or communicating with the GERBER EDGE FX, check if the network jack LEDs lightwhen the cable is connected. You can also check connectivity between the computer and printer as described in“Checking network connections”.Tip: If you have connected the computer directly to the GERBER EDGE FX using the Windows default network addressingscheme, and the computer initialization time seems to be excessive, you can assign a static IP address. Follow the procedure“Setting the IP Address and Network Mask of your computer for direct connection”.Note: Turn on and allow the GERBER EDGE FX to initialize before starting the computer that is connected via the crossovercable. Some computers ignore Ethernet connections if they are not live when the computer is initialized.Setting the network address of the GERBER EDGE FX from the printer keypadThe default address for the GERBER EDGE FX was chosen to work with a crossover cable and Windows Automatic PrivateIP Addressing. For computers that have not been configured for networking, the default address should be acceptable. Forexisting networks, the defaults may not apply. Contact your network administrator or IT professional for assistance inassigning the correct address.This procedure uses the following default network address: GERBER EDGE FX IP Address: 169.254.128.129 GERBER EDGE FX Subnet Mask: 255.255.0.0If necessary, replace the network address in this procedure with the proper address obtained from your networkadministrator or IT professional.To set the network address of the GERBER EDGE FX from the printer keypad1 From the MAIN MENU use F1 to toggle to OFFLINE.MAIN MENUF1OFFLINECANCELF3F2Mode: SingleSYSTEMF4CANCELF3MOTIONF42 Press F4, SYSTEM to display the SYSYEM MENU.SYSTEM MENUF1NETWORKF2DIAG3 Press F1, NETWORK to display the NETWORK MENU.NETWORK MENUF1TCP/IPF2ETHERNETCANCELF3F4
Page 6 of 164 Press F1, TCP/IP to display the TCP/IP MENU where you can change the IP Address of the GERBER EDGE FX.TCP/IP MENUF1IP ADDR.F2SUBNET MASKCANCELF3DHCPF45 Press F1, IP ADDR. to open the IP ADDRESS MENU where you change the IP address. The ––– designates whichoctet (three digit section of the address ranging from 000 to 255) is available to be changed. Use F4, NEXT to movethe active designation to the octet that you wish to update.IP ADDRESS MENUF1SAVEF2–––CANCELF3NEXTF4169 . 254 . 128 . 1296 Use the Left or Right Slew keys to change the value of the octet. Press F4, NEXT to move the active designation tothe next octet and change that value. Continue until the entire IP Address is updated.Note: This procedure uses the default IP address of the GERBER EDGE FX as an example. Your IP address for the printermay be different.7 Press F1, SAVE to set the displayed IP Address. The display changes to: IP Address used after reboot. Continue withstep 8. The address will be active after cycling the printer power at the end of the procedure.8 Press F3, CANCEL to leave the IP Address Menu and return to the SYSTEM MENU.9 Press F1, NETWORK to display the NETWORK MENU.NETWORK MENUF1TCP/IPCANCELF2ETHERNETF3F410 Press F1, TCP/IP to display the TCP/IP MENU where you can change the Subnet Mask of the GERBER EDGE FX.TCP/IP MENUF1IP ADDR.F2SUBNET MASKCANCELF3DHCPF411 Press F2, SUBNET MASK to open the SUBNET MASK MENU where you can change the Subnet mask of theprinter. The ––– designates which octet is available to be changed. Use F4, NEXT to move the active designation tothe octet you wish to update.SUBNET MASK MENUF1SAVEF2–––CANCELF3NEXTF4255 . 255 . 000 . 00012 Use the Left or Right Slew keys to change the value of the octet. Press F4, NEXT to move the active designation tothe next octet and change that value. Continue until the entire Subnet Mask is updated.
Page 7 of 1613 Press F1, SAVE to set the displayed Subnet Mask. The display changes to: Subnet Mask used after reboot.14 Press F3, CANCEL to exit the menu and return to the MAIN MENU.15 Cycle the power to the GERBER EDGE FX. The network address will be active after cycling the printer power.Setting the IP Address and Network Mask of your computer for direct connectionIf you need to change the network address of you computer that is directly connected to the GERBER EDGE FX, follow theprocedure for your Windows operating system (Windows 98 SE (with Internet Explorer 5.5 or higher), Windows XP, orWindows 2000). These procedures use the following address for the computer: Computer IP address: 169.254.128.130 Computer Network Mask: 255.255.0.0To set the IP Address and Network Mask for Windows 98 SE with IE 5.5 or higher1 Click Start Settings Control Panel.2 Double‐click the Network icon.3 Click the Configuration tab.4 Click TCP/IP.5 Click Properties to open the TCP/IP Properties dialog box.
Page 8 of 16Note: Depending on your setup, your computerʹs IP address may vary.6 On the IP Address tab, click Specify an IP Address:7 Enter 169.254.128.130 for the IP Address.8 Enter 255.255.000.000 for Network Mask.9 Do not enter a Gateway address; it is not required for direct connection.10 Click OK to close the TCP/IP Properties dialog box.11 Click OK to close the Network dialog box.To set the IP Address and Network Mask for Windows XP1 Click Start Control Panel.2 Click Network and Internet Connections.3 Click the Network Connections icon.4 Right
14.04.2011 · The GERBER EDGE FX is a network device which has a 10/100 Mbps auto‐switch network interface that can communicate with your computerʹs 10/100 Mbps network card. (A network interface board is in most new computers or is readily available for your computer at local computer stores.) Data needs to be supplied above a minimum rate to prevent .