Transcription
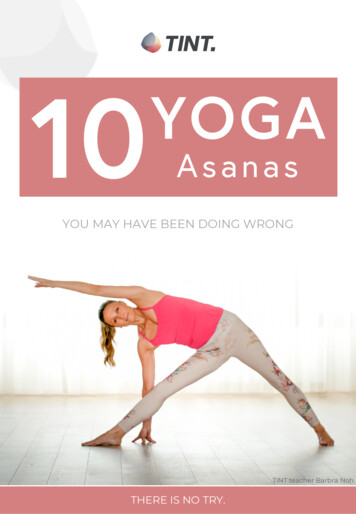
10YOGAAsanasYOU MAY HAVE BEEN DOING WRONGTINT teacher Barbra NohTHERE IS NO TRY.
CONTENTBut What About Traditional Alignment?3STANDING POSESWarrior 1 – Strength and Balance4Warrior 2 – Not as Easy as You Think7Triangle – Why It’s Not Too Basic10Tree Pose – Mirror of Your Inner State13BACKBENDSChair Pose – You Love to Hate It16Cobra Pose – Cause of Back Pain?19Camel Pose – A Safe Backbend?22Wild Thing – Open Your Heart25ARM SUPPORT POSESDownward-Facing Dog – The Ultimate Asana28Crow Pose – Overcome Your Fears312
BUT WHAT ABOUT TRADITIONAL ALIGNMENT?Although yoga is a 5000-year-old tradition, it would be naive to assume that theyoga poses (asanas) are thousands of years old, and that they have been taughtunchanged since the beginning of yoga.In fact, this is far from the truth: There is no evidence of any form of traditional oreven original practice of yoga poses. The truth is that only very few poses have beenrecorded in the ancient texts and they were all variations of seated or supinemeditation postures. There was no Triangle pose or Downward-Facing Dog. TheSanskrit word asana actually only means “seat”.Apart from that, there is no clear textual history or historical lineage of theteachings of yoga. The textual documentation of hatha yoga rather is quiteobscure. So, the question arises whether there is such thing as a “traditional” yogapractice or alignment.Instead, consider yoga as a science and try to understand it on the basis of themost recent insights into applied anatomy and body mechanics. And don’t beafraid of questioning them from time to time.This is why we have created this asana library eBook, which is based on personalexperience, on-going study and collective knowledge of the world’s greatest yogaminds: our teachers on TINT.This eBook will not only help you to maximize your range of motion and provideyou with helpful alignment cues, but it will also enable you to unleash your truepotential and create more health and happiness in your life.So, step on your mat to feel the difference and ask your inner guru what feels bestfor you.Namasté!TINT. There is no try. Made within Frankfurt.3
WARRIOR 1 – STRENGTH AND BALANCEWarrior 1, called Virabhadrasana 1 in Sanskrit, is the first variation of a series ofthree standing asanas referred to as warrior poses: Warrior 1, Warrior 2, and Warrior3. Consider Warrior 1 a yoga position that is a symbol of focus and strength to carryyou through the most challenging moments of your yoga practice.TINT teacher Matt GiordanoSTEP BY STEP INTO THE POSE1.From Mountain pose, step one foot back into a high-lunge position.2.Put the heel down and angle the foot to a 45 – 60 degree angle.3.Press the front heel into the ground to engage the buttocks.v4. Square the pelvis as much as possible with the front of the yoga mat.5.Press the head of the back thigh away to ground the back heel6. Bend the front knee so that it is aligned over the ankle of the front foot.7.Draw the abdomen up and lift the ribcage away from the pelvis.8. Take the arms overhead with the palms facing each other.9. Keep the head in a neutral position and gaze forward.4
A QUICK GLANCE AT YOGA ANATOMYWhat Are the Joints Doing?Upper Body§§§§axial extension of spine with aslight rotation in the thoracic spineabduction and upward rotationof scapulaeabduction and external rotation ofshoulderslight flexion of elbowsLower BodyFront leg:§ nutation of SI joint§ flexion of hip§ flexion of knee§ dorsiflexion of ankleBack leg:§ counternutation of SI joint§ extension and adduction of hip§ dorsiflexion of ankleWhich Muscles Are Engaged?Upper Body§§§§spinal extensors and flexors tomaintain alignment of the spineserratus anterior to upwardlyrotate and abduct scapulaerotator cuff muscles to stabilizeshoulder jointsdeltoids and biceps brachiito abduct shoulderLower BodyFront leg:§adductor longus and brevis toprevent knee abduction at hip§gluteus maximus and hamstringsto flex hip and knee§intrinsic and extrinsic muscles offoot for ankle dorsiflexionBack leg:§hamstrings, gluteus medius andmaximus, adductor magnus toextend the hip§articularis genu and vastii toextend knee.§intrinsic muscles of foot tomaintain the arches of the footBENEFITS Strengthens and stretches the entire body Improves focus, balance and stability Encourages blood circulation and respiration Helps to build strength and stamina5
YOGA SEQUENCE KIT§ Practice Warrior 1 as part of the Sun Salutation series (Surya Namaskar),especially Sun Salutation B.§ Build up to Warrior 1 from High Lunge, Mountain pose or Warrior 2, or build asequence of one or several of these poses.§ Warrior 1 is a good preparation for deeper backbends and a great posture totransition into more complex standing poses such as Prayer Twist or Warrior 3.§ Move further into Humble Warrior by bringing the upper body down on theinside of the bent leg, clasp the hands behind the back, straighten the arms andmove the hands towards your head.ALIGNMENT QUICK FIXES§ Letting the back toes point rather forward makes the pose more accessible.§ Choosing a shorter stance provides more stability in the legs.§ To angle both hips towards the front, lift the back heel up for a high-lungeposition or keep the feet hip-width apart as if on separate train tracks.§ Reach actively through the pinkie-finger sides of the hands toward the ceiling.PUT IT INTO PRACTICEIf you're looking for inspiration on how to incorporate Warrior 1 and other standingposes to gain a strong and stable foundation, check out Faith Hunter's ChakraAwakening Body & Soul program or Desirée Rumbaugh and Adrew Rivin'sTransformational Home Practice program.If you want to understand the foundations of proper alignment in Warrior 1, checkout Matt Giordano’s Essentials of Yoga.Experience a variety of warrior poses to really feel the strengthening effects of theseposes with Sianna Sherman’s Rasa Yoga Warrior Practice.PRACTICE NOW.14-Day Free Trial. Cancel Anytime.6
WARRIOR 2 – NOT AS EASY AS YOU THINKWarrior 2 is a very common yoga pose and seems so basic that it is often neglected.However, if properly executed, Virabhadrasana 2 can be a very intense posesince it aligns the whole body. Therefore, it’s very important to be careful about thealignment in this position and to practice it with dignity.TINT teacher Barbra NohSTEP BY STEP INTO THE POSE1.Start in Mountain pose (Tadasana) and take a big step back with one leg.2.Align the back foot with the short edge and the front foot with the longedge of the mat.3.Bend the front knee in a 90 degree angle above your ankle.4. Externally rotate the front thigh and push the front leg forward and theback thigh backward.5.vExternally rotate the back thigh and keep the back leg straight with thefoot engaged.6. Lift the arms parallel to the floor with external rotation to open the chest.7.Maintain this openness and rotate the hands to let the palms face down.8. To increase the lung volume, lift the armpits and lengthen the waistline.9. Keep the spine straight, i.e. the body in a vertical line.7
A QUICK GLANCE AT YOGA ANATOMYWhat Are the Joints Doing?Upper Body§§§§§neutral spine with a slight rotationin the chestpelvis levelabduction and external rotation ofshoulderabduction of scapulaepronation of forearmsLower BodyFront leg:§ nutation of SI joint§ flexion and abduction of hip§ extension of knee§ dorsiflexion of ankleBack leg:§ counter-nutation of SI joint§ extension and abduction of hip§ extension of knee§ dorsiflexion of ankleWhich Muscles Are Engaged?Upper Body§§§§§spinal extensors and flexors tomaintain alignment of spineserratus anterior to abductscapulaerotator cuff muscles to stabilizeshoulder jointsdeltoids and biceps brachii to flexshoulderspronator quadratus and teres topronate forearmsLower BodyFront leg:§gluteus medius and minimus toabduct hip§pelvic muscles to prevent hip fromcollapsing§hamstrings to flex hip and knee§intrinsic muscles of foot for ankledorsiflexionBack leg:§gluteus medius and minimus,hamstrings, piriformis and pelvismuscles to extend and abduct hip§articularis genu and vastii toextend knee§intrinsic muscles of foot tomaintain arches of the footBENEFITS Opens the hips, chest and shoulders Activates the back muscles, especially the erector spinae Strengthens the quadriceps, adductors and hamstrings Stretches the inner thighs, groin and chest Strengthens the ankles and arches of the feet8
YOGA SEQUENCE KIT§ Practice Warrior 2 in dynamic transitions into and out of a High Lunge, Warrior 1,or Warrior 3.§ Prepare the muscles of the outer and inner hips for the external rotationrequired in Warrior 2 by performing Bound Angle pose.§ One of the most common transitions may be moving from Warrior 2 intoReversed Warrior, back to Warrior 2 and into Side Angle or Extended Side Angle.§ Practice Warrior 2 as a transition into or out of Triangle pose since the alignmentof the feet is the same. You just need to straighten the front leg whentransitioning into Triangle.ALIGNMENT QUICK FIXES§ Do not hyperextend and lock the knee of the back leg.§ Engage the legs by pulling the feet and shins in and pushing the hips back.§ Engage the whole waistline and firm the belly.§ Keep a slight curve in the lower back to avoid stress in the front of the back hip.PUT IT INTO PRACTICEGet some inspiration on how to incorporate Warrior 2 and other standing posesinto your yoga practice from Desirée Rumbaugh and Adrew Rivin'sTransformational Home Practice program or David Lurey and Mirjam Wagner ‘s Yin& Yang for Hips and Lower Spine.Dive deeper into the proper alignment in Warrior 2 with Barbra Noh’s TherapeuticAlignment Immersion.Yoga newbies can start with the basics of Warrior 2 in Matt Giordano’s Yoga for theAbsolute Beginner.PRACTICE NOW.14-Day Free Trial. Cancel Anytime.9
TRIANGLE – WHY IT’S NOT TOO BASICTrikonasana, as this pose is called in Sanskrit, consists of straight lines and clearangles: The spine, upper arm, and front leg form a perfect triangle. Although it is avery basic yoga pose that is accessible for beginners and advanced practitioners, itshould never be considered too basic to pay attention to the proper alignment inthis asana.TINT teachersDesirée Rumbaugh & Andrew RivinSTEP BY STEP INTO THE POSE1.Enter Triangle pose from Extended Side Angle pose.2.Bend the knees, place both hands on the ground and arch the back.3.Straighten the legs again and widen the sitting bones.4. Pull up the pubic bone and lift the arm of the back-leg side.5.Turn the head to the floor without collapsing the chest.v6. Lengthen the bottom side of the body to create space in the upper body.7.Angle the back foot in a 90 degree angle.8. Push the front thigh down and the back thigh backward.9. Turn the navel toward the upward-facing side of the body.10. Open the chest without collapsing into the shoulder joints.11. Bring the arms and shoulders in one vertical line.10
A QUICK GLANCE AT YOGA ANATOMYWhat Are the Joints Doing?Upper Body§§§§neutral spine with slight rotation inthe chestabduction of scapulaeabduction and external rotationof shouldersneutral position of forearmsLower BodyFront leg:§ nutation of SI joint§ flexion and abduction of hip§ extension of knee§ slight plantar flexion of ankleBack leg:§ counter-nutation of SI joint§ extension and adduction of hip§ extension of knee§ dorsiflexion of ankleWhich Muscles Are Engaged?Upper Body§§§§spinal extensors and flexors tomaintain alignment of spineserratus anterior to abductscapulaerotator cuff muscles to stabilizeshoulder jointsdeltoids and biceps brachiito abduct shoulder jointsLower BodyFront leg:§gluteus medius and minimus toabduct hip§articularis genu and vastii toextend knee§gluteus maximus and piriformis toabduct and flex hip§intrinsic and extrinsic muscles offoot to stabilize itBack leg:§hamstrings to extend hip§articularis genu and vastii toextend knee§piriformis and pelvic muscles tomaintain extension of hip§gluteus medius and minimus toabduct hipBENEFITS Strengthens the muscles in the upper body Opens the chest and hip Increases flexibility in the groins and hamstrings Strengthens the thighs, knees and ankles Stretches the entire body Stimulates the abdominal organs11
YOGA SEQUENCE KIT§ To make the pose more accessible, place the palm of the bottom hand on ablock or place it higher up the leg.§ Transition from Warrior 2 into Extended Side Angle and then into Triangle pose.§ From Triangle pose, move into other standing poses such as Warrior 2, HighLunge, Warrior 1, Revolved Triangle, or Revolved Side Angle.§ Extend the arms to the sides for Five-Pointed Star pose and fold forward into astanding wide-legged forward fold.§ Engage the core by taking the weight out of the bottom hand and let it hover.§ Wrap the top arm behind the back and catch the inner thigh of the back leg.ALIGNMENT QUICK FIXES§ Enter the pose from Extended Side Angle instead of Warrior 2.§ Arch the back to bring the hip into an anterior tilt before straightening the leg.§ Suck the upper arm bone into the shoulder socket before raising the arm.§ To avoid compression in the neck, look to the ground rather than to the ceiling.§ Imagine you want to tear the mat apart to engage the legs.PUT IT INTO PRACTICEPractice Triangle pose in a well-rounded sequence in one of the programs on TINT,such as Alex Harfield's Dips, Binds and Balances or Matt Giordano's Essentials ofYoga.Thanks to Desirée Rumbaugh and Adrew Rivin's Transformational Home Practiceprogram, you can practice along with their instructions right in your living room orflow through a reviving yoga practice with David Lurey and Mirjam Wagner’s Yin &Yang for Hips and Lower Spine.PRACTICE NOW.14-Day Free Trial. Cancel Anytime.12
TREE POSE – MIRROR OF YOUR INNER STATETree pose (Vrksasana) is one of the first standing balancing poses that yogapractitioners learn. However, the fact that it is a fairly easy asana doesn't mean thatit can't be challenging. Unsteadiness and lack of focus can turn this yoga pose intoa mirror of your inner state.TINT teachersDesirée Rumbaugh & Andrew RivinSTEP BY STEP INTO THE POSE1.Start in Mountain pose and shift the body weight into one leg.2.Raise the other leg up and bend the knee.3.Reach down with the hand to catch the ankle.4. Place the sole of the foot against the upper thigh of the standing leg withthe toes pointing down.5.vSqueeze the lifted foot into the thigh of the standing leg and the thighagainst the foot.6. Bring the bent knee into the midline.7.Stretch the spine from inside the ribs in two directions, i.e. down into thelegs and up through the top of the head.8. Gaze at a fixed point on the floor in front of you for focus and balance.9. Once the body is stable, take the arms up overhead.13
A QUICK GLANCE AT YOGA ANATOMYWhat Are the Joints Doing?Upper Body§§§§§§Lower Bodyneutral spinepelvis levelslight flexion and adduction ofshoulderextension of elbowspronation of forearmsextension of wrist, hand and fingersStanding leg:§ neutral hip§ extension of kneeLifted leg:§ flexion, external rotation andabduction of hip§ flexion of the knee§ dorsiflexion of ankleWhich Muscles Are Engaged?Upper Body§§§Lower Bodyspinal extensors and flexorsmaintain alignment of spinetriceps to extend the elbowpronator quadratus and teres topronate forearmsBENEFITS Stretches groins and inner thighs Stretches chest and shoulders Improves focus and balance“Like a tree, extend your roots down andblossom your arms up toward the sun. Thestronger the roots, the taller the tree.– Baron Baptiste Strengthens the core and spine Opens the hipStanding leg:§articularis genu, quadriceps, andhamstrings to keep knee in neutralextension§intrinsic and extrinsic muscles offoot to maintain balanceLifted leg:§iliacus and psoas major to flex hip§gluteus and pelvic muscles toexternally rotate ‚leg§adductor magnus and minimus topress foot into standing leg§pectinueus, adductor longus andbrevis, gracilis passively lengthenthe leg14
YOGA SEQUENCE KIT§ Make the pose more accessible by practicing it against a wall: Place either thebuttocks, the bent knee or the hand against the wall for support.§ Make it a challenge by practicing it on an uneven surface or with closed eyes.§ Try a bound tree pose variation by bringing the bent leg into a Half Lotusposition. Wrap the arm of the same side behind the back and try to clasp the bigtoe. Fold into a Standing Forward Bend.§ Experiment with different variations of aligning the arms: bring them straightup, in a cactus shape, or let the palms touch to form an inverted V shape.ALIGNMENT QUICK FIXES§ Keep the hips as square as possible and avoid letting one side pop out.§ Do not place the lifted foot directly onto the knee of the standing leg.§ Keep the bent knee pointing outside rather than forward.§ Spread the toes of the standing leg instead of clenching the foot.§ Externally rotate the upper arms and rotate the scapulae upwards.PUT IT INTO PRACTICEExplore your inner state with Tree pose in a well-rounded sequence especiallydesigned for beginners with Matt Giordano and his Yoga for the Absolute Beginner.Experience the benefits of this and other standing asanas in Desirée Rumbaughand Andrew Rivin’s Building Blocks for a Transformational Home Practice wherethey devoted two entire classes to standing poses, including Tree pose.PRACTICE NOW.14-Day Free Trial. Cancel Anytime.15
CHAIR POSE – YOU LOVE TO HATE ITFive syllables that make every yoga student sigh and every yoga teacher feel like adrill instructor: ut-ka-ta-sa-na, an asana also known as Chair pose, Awkward Poseor Fierce pose. Since the knees are in a very vulnerable position, it bears the risk ofcausing knee pain. Compressing the lumbar spine can turn this asana into theculprit for back pain. That’s why proper alignment is crucial in this pose.TINT teacher Sianna ShermanSTEP BY STEP INTO THE POSE1.Start in Mountain pose with the feet hip-width apart and bend the knees.2.Lower the hips down and picture an imaginary chair behind you.3.Open the chest and raise the arms up overhead with the palms facing.4. Lift and spread the toes to engage the feet.5.Widen the knees and inwardly rotate the thighs.v6. Create a gentle concave curve in the lower back.7.Lift chest and shoulder blades up and outwardly rotate the upper arms.8. Shift the body weight backward and tilt the pelvic floor to the front.9. Lengthen and lift up the ribcage.10. Lift up the chin slightly without hyperextending the neck.11. Don't forget to smile – it makes the pose a lot easier!16
A QUICK GLANCE AT YOGA ANATOMYWhat Are the Joints Doing?Upper Body§§§§Lower Bodyaxial extension of spineabduction, elevation and upwardrotation of scapulaeflexion of shoulderextension of elbows§ flexion of hip§ flexion of knees§ dorsiflexion of anklesWhich Muscles Are Engaged?Upper Body§§§§§Lower Bodyerector spinae and other backmuscles to maintain alignment ofspinepsoas minor and abdominalmuscles to avoid anterior tilt ofpelvis and overextension of lowerbacktrapezius and serratus anterior toupwardly rotate, abduct andelevate scapulaerotator cuff muscles, pectoralismuscles, biceps brachii anddeltoids to stabilize and flexshoulder jointstriceps brachii to extend the elbowBENEFITS§§§adductor muscles to keep kneesstablegluteus muscles and hamstrings toflex hip and kneeintrinsic muscles of feet to effectankle dorsiflexion“Chair pose is a defiance of spirit, showinghow high you can reach even whenyou're forced down.– Terri Guillemets Strengthens the entire legs Strengthens supporting muscles around the knees, hips, ankles, and shoulders Lengthens the spine Stimulates abdominal organs, diaphragm, and heart Builds strength and heat in the body17
YOGA SEQUENCE KIT§ Approach Chair pose in two separate steps: prepare the lower body first bybending the knees before working on stretching the arms.§ Experiment with the position of the arms: clasp the hands behind the back for anice shoulder stretch and bow down into a forward fold.§ Bring your palms together into a prayer position. Twist to one side and hook theelbow on the thigh for Revolved Chair pose.§ Use Chair pose as a transition into or from Mountain pose, Crescent Moon, orStanding Forward Fold.§ Make the pose more challenging by squeezing a block between the thighs.ALIGNMENT QUICK FIXES§ Increase the range of motion on the hip by bringing the feet hip-width apart.§ Instead of tilting the pelvic floor back (posterior tilt), bring it into an anterior tilt.§ Lengthen through the sides of the body and lift the ribcage.§ Open your hands to increase the space in the shoulder area.§ Lift the shoulders up towards the ears instead of pulling them down.PUT IT INTO PRACTICEBuild stamina and tone your entire body by practicing Chair pose in SiannaSherman’s Fearless Heart Activation.For a well-rounded strengthening and detoxing yoga practice, hop on the mat withMatt Giordano an his Detox Flow.Dive deeper into the proper alignment in Chair pose with Young Ho Kim’s InsideYoga Alignment on TINT.PRACTICE NOW.14-Day Free Trial. Cancel Anytime.18
COBRA POSE – CAUSE OF BACK PAIN?After sitting in front of a computer all day, Cobra pose (Bhujangasana) can be agreat counteraction to stretch out the spine and chest. Although this asana canbring more flexibility to the spine and open the chest and heart, it can also causeback pain itself if not practiced correctly.TINT teacher Barbra NohSTEP BY STEP INTO THE POSE1.Lie down on the belly with the legs straight and the feet hip-width apart.2.Press all ten toe nails into the ground to engage the leg muscles.3.Place the palms on the ground next to the ribs with the forearms vertical.4. Outwardly rotate the forearms so the index fingers face forward.5.vBend the knees slightly and lift the pelvis to widen the sitting bones.6. Pull the pubic bone to the navel and roll up the spine.7.Lower the pubic bone again and lengthen through the thoracic spine.8. Lift up the shoulders and armpits and move the shoulders back.9. Outwardly rotate the upper arms.10. Rotate the tips of shoulder blades towards each other.11. Push the chest forward and up and lift the chin slightly.19
A QUICK GLANCE AT YOGA ANATOMYWhat Are the Joints Doing?Upper Body§§§§Lower Bodyextension of spineslight flexion of elbowspronation of forearmsdorsiflexion of wrists§§§§counter-nutation of SI jointextension and adduction of hipextension of kneesplantar flexion of anklesWhich Muscles Are Engaged?Upper Body§§§§§§Lower Bodyspinal extensors to extend spineserratus posterior superior toextend thoracic spinepsoas minor and abdominalmuscles to avoid overextension oflower backserratus anterior and rotator cuffmuscles to stabilize shouldersbiceps brachii to flex elbowspronator quadratus and teres topronate forearms§§§adductor magnus and hamstringsto extend, adduct and internallyrotate hipvastii to extend kneessoleus to effect plantar flexion ofankles“A mind that is stretched by new experiencecan never go back into its old dimensions.– Oliver Wendell Holmes, Jr.BENEFITS Mobilizes the spine Strengthens the spine, legs, and buttocks Strengthens the arms and shoulders Stretches the entire front of the body Stimulates the abdominal organs20
YOGA SEQUENCE KIT§ Cobra pose is often practiced as part of Sun Salutations (Surya Namaskar) andcan also be an alternative to Upward-Facing Dog in Vinyasas as a transition fromPlank pose into Downward-Facing Dog.§ The lower variation Baby Cobra is easier accessible if less flexible in the spine.§ Make the pose more challenging by lifting the palms off the floor.§ An easer variation is Sphinx pose with the forearms on the ground.§ Try a more advanced variation with Upward-Facing Dog where the legs are liftedoff the ground.ALIGNMENT QUICK FIXES§ Keep the elbows slightly bent for more range of motion in the shoulder.§ Decompress the lower back by pushing the lower body down and back, andthe upper body up and forward.§ Keep the neck long instead of hyperextending the neck.§ Push the thighs away to create more space for the hip flexors.PUT IT INTO PRACTICEPractice Cobra pose in the context of a well-rounded class such as Barbra Noh’sBamboo Backbends.Flow through some Vinyasas in one of the flowing yoga programs on TINT, suchas Kristin McGee's Yoga Flow or through some rounds of Sun Salutations withDavid Lurey and Mirjam Wagner in their Yin & Yang for Hips and Lower Spine.Let Desirée Rumbaugh and Adrew Rivin guide you step by step through the properalignment in Building Blocks for a Transformational Home Practice, where theydevoted two entire classes to backbends such as Cobra pose.PRACTICE NOW.14-Day Free Trial. Cancel Anytime.21
CAMEL POSE – A SAFE BACKBEND?While most of us picture really strong, deep backbends such as Wheel pose, Camelpose (Ustrasana) may be much more accessible. It is a great exercise not only forthe body, but also for the mind since this asana teaches to let go of the ego insteadof forcing the body into an Instagram-worthy position for which it may not beready yet.TINT teacher Barbra Noh with studentsSTEP BY STEP INTO THE POSE1.To enter the pose, kneel on the mat with the knees hip-width apart.2.Tuck the toes and widen the feet so that they are about mat-width apart.3.Place the hands onto the waistline and push the buttocks back.4. Bring the bent elbows towards each other to open the chest.5.Pull up the pubic bone so that the pelvis moves back (posterior tilt).v6. Push the buttocks forward until there is a gentle stretch on the thighs.7.Bring the feet back in so that the shins are parallel to each other.8. Lift the chest and move the shoulders up and back.9. Reach back to the heels and outwardly rotate the arms.10. Push down through the toes and push the thighs back.11. Elevate the heart up to the ceiling.12. To come out of the pose, raise one arm up and pull the upper body up.22
A QUICK GLANCE AT YOGA ANATOMYWhat Are the Joints Doing?Upper Body§§§§extension of spineadduction and downward rotationof scapulaeextension and adduction ofshouldersextension of elbowsLower Body§§§§counter-nutation of SI jointextension and adduction of hipflexion of kneesplantar flexion of anklesWhich Muscles Are Engaged?Upper Body§§§§§spinal extensors to extend spinepsoas minor and abdominalmuscles to avoid hyperextension oflower backrhomboids and levator scapulae toadduct, elevate and downwardlyrotate scapulaerotator cuff muscles to stabilize theshoulder jointtriceps brachii to extend theelbows, and extend and adduct theshoulderLower Body§§§adductor magnus, gluteusmaximus and hamstrings toextend, internally rotate andadduct the hipeccentric contraction of rectusfemoris, to resist hip extension andknee flexionarticularis genu and vastii to resistknee flexion“Body is not stiff, mind is stiff.– Patthabi JoisBENEFITS Strengthens the back muscles Improves flexibility of the spine Stretches the entire front body Creates space in chest and lungs Stimulates the abdominal organs23
YOGA SEQUENCE KIT§ Use props to modify Camel pose: Press a block with the inner thighs or placeblocks on the outsides of the feet to rest the hands on.§ Open the chest, shoulders and arms more by crossing the forearms andreaching for the opposite ankles.§ Try the one-legged version Eka Pada Ustrasana by kneeling on one leg only andstepping the other one forward into a 90-degree angle.§ Build Camel pose into a sequence before or after one or several of the followingposes: Table pose, Hero pose, Child’s pose, or Gate pose.ALIGNMENT QUICK FIXES§ Tuck the toes instead of pointing them. This helps to engage the leg muscles.§ Place the fingers inside the heels and the thumbs on the outsides.§ Avoid hyperextending the neck to keep your airway open.§ Push the thighs back to avoid compression in the lower back.PUT IT INTO PRACTICEIt is always a good idea to prepare the body for Camel pose by specifically warmingup for backbends. On TINT, Young Ho Kim provides a well-rounded and safe warmup sequence for backbends.Feel the great benefits of backbends such as Camel pose in Mathieu Boldron’sMaster Your Backbends or Barbra Noh’s Bamboo Backbends or in Finlay Wilson’sprogram Deep Roots, Strong Foundations , where a whole class is devoted tobackbends.Practice Camel pose in preparation for King Pidgeon with Matt Giordano.PRACTICE NOW.14-Day Free Trial. Cancel Anytime.24
WILD THING – OPEN YOUR HEARTAn asana that has many names: Wild Thing, Rock Star, Flip Dog, or in SanskritCamatkarasana. The word Camatkarasana can be translated as "the ecstaticunfolding of the enraptured heart." This is a pretty good description of the strongback-bending pose, since the open chest does not only open your heart, but alsogives you strength and confidence.TINT teacher Faith HunterSTEP BY STEP INTO THE POSE1.Start in a seated position with one leg straight and the other one bentwith the foot on the floor.2.Place the hand of the straight-leg side on the ground behind you.3.Outwardly rotate the hand on the ground to outwardly rotate the arm.4. Bend the elbow, lift the shoulder up and back. Then straighten the arm.5.vLift the buttocks up to come into the pose.6. Push the inner edge of the straight leg into the ground to lift the hip.7.Push the mat away with the hand that is on the floor to lift the shoulder.8. Push the heart up and keep the legs strong.9. Bring the hand of the bent-leg side behind the head and push the backof the head against the hand to engage the back muscles.10. Straighten the arm again and outwardly rotate this arm as well.25
A QUICK GLANCE AT YOGA ANATOMYWhat Are the Joints Doing?Upper Body§§§§§§§§extension of spineupward rotation and elevationof scapulaeflexion of shouldersextension of elbowspronation of forearmswrist dorsiflexion of weight-bearingarmpalmar flexion at wrist in the airextension of hands and fingersLower Body§ extension and adduction of hip§ extension or slight knee flexion ofweight-bearing leg§ knee flexion at knee of non-weightbearing leg§ ankle dorsiflexion of weight-bearingleg§ ankle pla
three standing asanas referred to as warrior poses: Warrior 1, Warrior 2, and Warrior 3. Consider Warrior 1 a yoga position that is a symbol of focus and strength to carry you through the most challenging moments of your yoga practice. STEP BY STEP INTO THE POSE 1. From Mountai