Transcription
ESSENTIAL MICROSOFT OFFICE 2010: Tutorial for TeachersCopyright Bernard John Poole, 2010. All rights reserved6INTRODUCTION TO THE ACCESS DATABASEKeeping student recordsLEARNING OUTCOMESIn this tutorial you will learn about databases in general and about the Office 2010 Accessdatabase in particular. The concept of a database is not quite as easy to grasp as that of a wordprocessor or a spreadsheet. So if this is the first time you are learning about databases you mightlike to read over the lesson first, away from the computer, and perhaps highlight the text to easeunderstanding.Specifically this tutorial will introduce you to the following: the general idea behind a databaseplanning a new databasecreating a database templateadding records to a new or existing databaseviewing the data in a databaseclearing entries and records from a databasemaking a backup copy of a databaseA caveat before you begin: You'll find it easiest to use the tutorial if you follow the directionscarefully. On computers there are always other ways of doing things, but if you wander off onyour own be sure you know your way back!6.1 AN OVERVIEW OF THE DATABASE CONCEPTThe database component of Microsoft Office 2010 is designed to act as an "intelligent"1 filingcabinet. Like a manual filing cabinet, it enables you to: collect together sets of related data and, if you are careful and conscientious, keep the dataorganized;1 The word "intelligent" is enclosed in quotes so as not to create a false impression. With regard to computers, theword is overused, and strictly speaking inappropriate. It also can be misleading. The only "intelligence" exhibited bythese otherwise "dumb" machines has been programmed into them by intelligent human beings.194
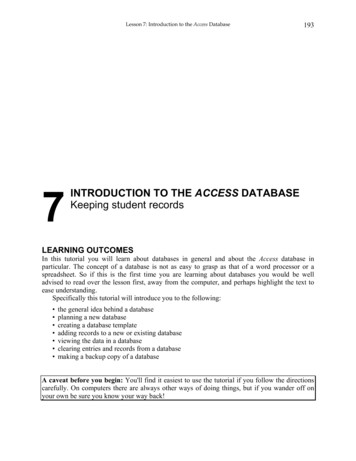
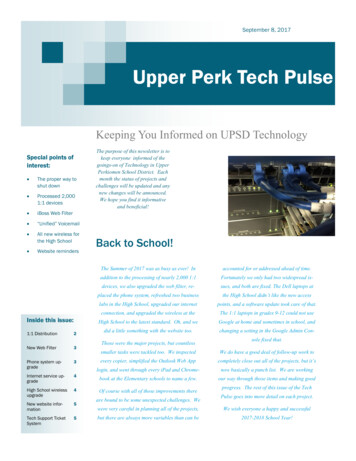
Lesson 6: Introduction to the Access Database update the data once you've collected them, adding or deleting records, or changing thecontents of existing records;A database, however, is an electronic filing cabinet which makes it easy for you to quickly workwith the data—sort them, create reports, merge the data with other documents, and so forth.How is a database organized?Access is an object-oriented relational database management system. Access is designed to helpan organization such as a company or an institution such as a school or school district, or even anindividual teacher, collect, organize, manage, and access data in such a way that it can be easilyaccessed and made available to users in a variety of useful ways.The database objects that you can create using Access are listed in Access Objects menu inthe left hand frame of the database illustrated in Fig. 6.1. Let’s take a look at each of theseobjects now to see how they can be used to help you organize and access the informationcollected into a database (in this case a database of information about different birds).Fig. 6.1 The Access database objects A Table is the fundamental object in a relational database and tables use rows and columnsto present the data—rather like a spreadsheet. For this reason, when you view the data as atable in an Access database, you are in what Access calls a Datasheet View. You will learnabout Tables and Datasheets in this lesson, as well as how to use the Design View to createa table, add fields to a table, and define the type of data that is in a specific field. A Form gives the user another way of looking at the data in the database. Whereas a Tableallows the user to view many records at once, a Form displays the contents of just onerecord at a time. Forms are very useful for entering data into new records or updating thedata in existing records. You will learn about Forms in this lesson, too. A Report is used to present a selected set of information from a database in a format that isneatly laid out and thus easier for the user to mentally digest. You will learn about reportsin Lesson 7.195
ESSENTIAL MICROSOFT OFFICE 2010: Tutorial for TeachersCopyright Bernard John Poole, 2010. All rights reserved A Query makes a request to the database, asking it to find some specific data that arestored in the database. You will learn about queries in Lesson 7, too.The general terminology used to describe data storageWords are our stepping stones to knowledge. For the most part, personal computers today stilluse electronic disks and drives of one sort or another to store data. The Windows computeroperating system, like other operating systems, organizes data hierarchically on the disk usingdocuments or files which are usually stored in directories or subdirectories that are part of theoverall directory file management system.Within documents, different terminology is used to describe the organization of datadepending on the type of document in question. Word processed documents organize the data (mostly text) in paragraphs and sentences; Spreadsheet documents organize the data (mostly numbers) in rows and columns; Databases organize the data (of all kinds) into records and fields.Access database terminologyAn Access database is able to contain thousands, hundreds of thousands, even millions ofrecords, depending on the purpose for which the database has been designed. A teacher mayhave dozens of records in his or her class databases; a school district may well have hundreds orthousands of records to collect and maintain; a company like IBM will have hundreds ofthousands of records, maybe even millions of records in multiple databases containinginformation about employees and other kinds of data; a US government office, such as the IRS,will surely have databases with millions of records.Maintaining masses of data such as this is hard. Actually, maintaining even small amounts ofdata is hard, so it’s not surprising that the computer has been brought to the rescue of those of uswho want to manage data.To avoid a hodge-podge of data organized at random, people have come up with the idea oforganizing data into records. Records contain fields. Each field contains entries made up of textand numbers, which are the basic building blocks of data.For example, let us say you have given a student an assignment to study birds and to build adatabase to store the data collected. The student decides to set up a record for each bird sighted.Each record will include several field names, such as Common Name of the bird, Type(Family) of the bird, Size of the bird, Habitat, etc. A field name such as Common Name, forexample, might contain the entry "Seagull" or “Red Ibis.”A database thus contains records; records have fields; the fields contain entries. These entriesare made accessible by the Data View (Table), Form, and Report functions of the Accessdatabase. At the end of a school year, for example, a student would be able to use the wordprocessor (Word) to write a relatively sophisticated paper, and merge into the paper some of thedata collected in the database of Birds information. The student might well also add illustrationsof the birds.6.2 LET’S GET PRACTICALIt will be useful for you at this stage to see an actual Access database on the computer.Make sure you have your Work Files for Office 2010 available on yourcomputer, then open Access (Start All Programs Microsoft Office Access 2010)196
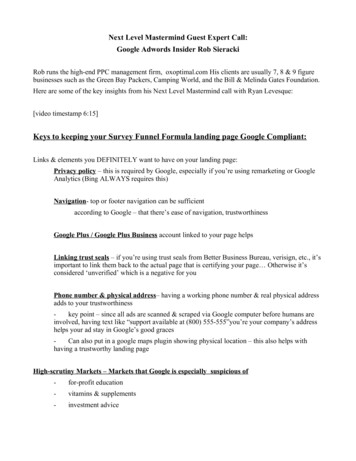
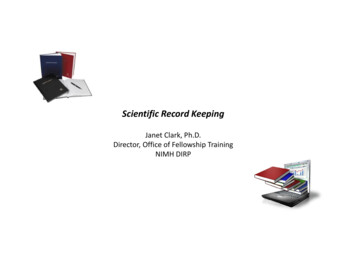
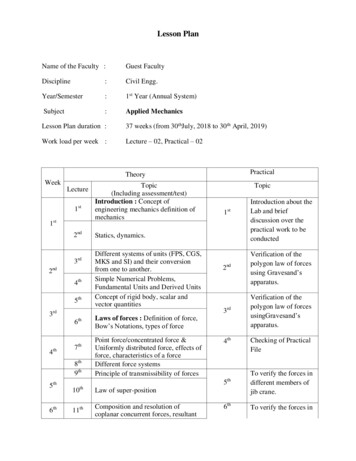
Lesson 6: Introduction to the Access DatabaseIn the File menu select OpenAccess will display the Open dialog box (Fig. 6.2).Fig. 6.2 File menuLocate the Work Files for Office 2010 folder on your disk and open it, thenopen the Access Files folder (Fig. 6.2 above)The database document named Birds should be listed in the dialog box, sodouble click on it to Open itAccess displays a dialog box asking you to decide how you want to view the data in the databaseon the screen. It’s likely that you’ll see a Security warning there (Fig. 6.3), indicating that“Certain content in the database has been disabled.”Fig. 6.3 Security warningIt’s a standard security warning from Microsoft to alert you to the fact that the database does notcontain a digital signature validating its authenticity. You needn’t be alarmed about this withregard to the Birds database we’ll be working with, but it is good for you to know that Microsoft197
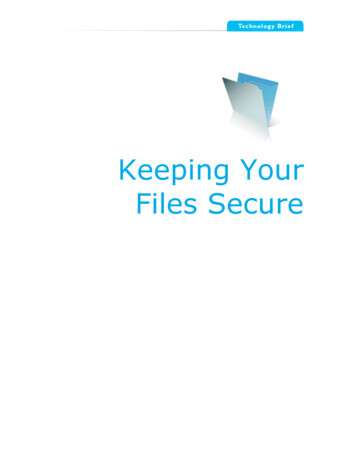
ESSENTIAL MICROSOFT OFFICE 2010: Tutorial for TeachersCopyright Bernard John Poole, 2010. All rights reservedis watching out for you to protect your computer from infiltration by viruses and so forth. Youcan remove that warning for now.Next to the Security warning, click on the Options button, then click in theradio button next to Enable this content and click on OKEach of the Access Objects listed in the menu on the left side of the database window (Fig. 6.4)represents one of the possible ways to view the data in the Birds database.These are the two objects currentlyin the Birds database (one Tableand one Form)Fig. 6.4 How do you want to view the data in the database?You can view the data as a form, record by record, as illustrated in Fig. 6.5.Fig. 6.5 The Form View of the database198
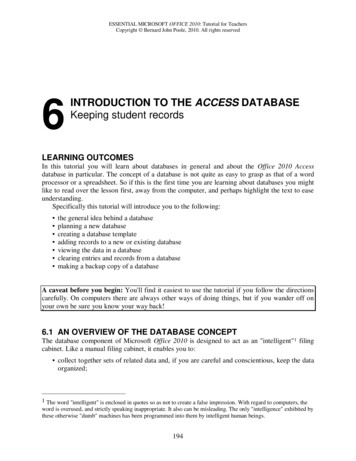
Lesson 6: Introduction to the Access DatabaseThis Forms view lets you review the records one by one. You use the tools in the lower leftcorner of the Forms window to toggle from one record to another in the database. On the otherhand, you can view the data as a Table, where the data for all the records in the database aredisplayed in columns or as a list (Fig. 6.6).Fig. 6.6 Records listed in Table ViewLet’s use the Table view now to look at different sets of data in the Birds database.If you didn’t already do so, double click on the BirdSightings table listed inthe Tables Objects in the left frame of the Birds database window (see Fig.6.6 above)In the upper left corner of the Table or Form’s window, in the window’s Title bar, you see theTable or Form name—BirdSightings (Fig. 6.6 above). In the lower left area of the Form andTable window are tools to toggle through and access specific records in the database.Fig. 6.7 illustrates what each of these navigation tools does (Fig. 6.6 above).Fig. 6.7 Navigation tools in the Access databaseThere are 50 records in the Birds database. The field names (Common Name, Family, Size, etc.)are at the top of each column of data. As you can see, the screen is not big enough to allow yousimultaneously to see all the records in the database. If you want to scroll through the records orlook at any specific record, you have several options.You can use the scroll bar on the right of the screen to scroll through the records.199
ESSENTIAL MICROSOFT OFFICE 2010: Tutorial for TeachersCopyright Bernard John Poole, 2010. All rights reservedTry this nowTo move one by one through the records, you can click left or right on the arrows in thenavigation tools in the lower left corner of the window.Try this nowTo go directly to a specific record, you can select the number of the record you want to view bytyping the number of that record in the small data entry box between the arrows (Fig. 6.7).Try this now to select record 12In the Home Ribbon, you can use Go To tool in the Find Group and go to either the First,Previous, Next, or Last record, or you can opt to create a New record.Try this now6.3 PLANNING A NEW DATABASESo much for the nuts and bolts of databases. You are now ready to get your feet wet planningyour own database of student records.Click on the File menu and select Close Database to close the Birdsdatabase, then click on the File menu again and click on the Exit button atthe bottom of the pop up File menuIt will be good for you to start from scratch for the next database exercise. Before you develop anew Access database, you need to have made up your mind where you are going to save the newdatabase (which disk drive are you going to use—your hard disk drive or an external drive suchas a USB Flash drive or Thumb drive, for example. Make sure you know where you are going tosave the new database before you proceed. If you are completing this exercise in a computer labat your school, your instructor will advise you what to do.There are three rules of database design:Rule 1—Plan; Rule 2—Plan; Rule 3—Plan!The more complex the data, the more you need to plan. But even the simplest database should bethought through on paper before being created in Access. Poor planning often results in adatabase that fails to meet longer term, overlooked needs.So think about your database ahead of time—and PLAN!!Points to ponder when planning a databaseThe rule of thumb that should guide you, when planning a database, is that it becomesincreasingly difficult to make changes the further along you go in the process of building a newdatabase. If you think about it, this is true of anything you create.Here, then, are some words of wisdom that you should bear in mind when designing adatabase.Taking your time up front saves time later onThe database you create will have a long, useful life if you take time to plan it carefully. Afteryou have decided on the fields to include with each record, and before you create the database,you should still invest time designing layouts for reports. Thinking about reports will cause youto think about what data you plan to put in the database.200
Lesson 6: Introduction to the Access DatabaseTeamwork helpsDuring the planning stage, run your ideas by others who are familiar with the kind of databaseyou have in mind. Network among your friends. Tell them what you have in mind. Ask them toreview your design. You'll be surprised how many valuable ideas they'll come up with that mayhave escaped you if you had relied on your own resources. Another good idea is to involve yourstudents in the design. This will help them learn skills that will benefit them throughout theirlives.Keep fields simpleThe more "atomic" your fields the more flexible will be your database. Atomic here means"reduced to its simplest form." For example, in a database of names and addresses, you wouldkeep each part of the person's name as a separate field. The first name should be stored by itself;the same for the middle name and l
Locate the Work Files for Office 2010 folder on your disk and open it, then open the Access Files folder (Fig. 6.2 above) The database document named Birds should be listed in the dialog box, so double click on it to Open it Access displays a dialog box asking you to decide how you want to view the data in the database on the screen. It’s likely that you’ll see a Security warning there (Fig. 6.3), indicating that