Transcription
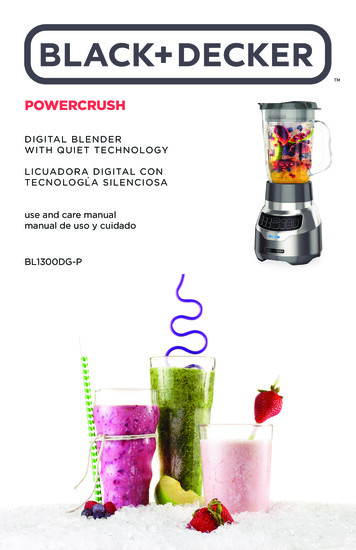
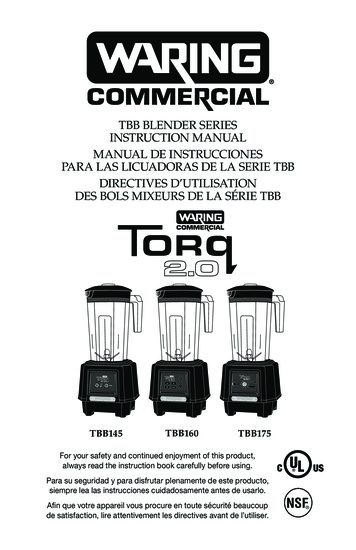
TBB BLENDER SERIESINSTRUCTION MANUALMANUAL DE INSTRUCCIONESPARA LAS LICUADORAS DE LA SERIE TBBDIRECTIVES D’UTILISATIONDES BOLS MIXEURS DE LA SÉRIE TBBTBB145TBB160TBB175For your safety and continued enjoyment of this product,always read the instruction book carefully before using.Para su seguridad y para disfrutar plenamente de este producto,siempre lea las instrucciones cuidadosamente antes de usarlo.Afin que votre appareil vous procure en toute sécurité beaucoupde satisfaction, lire attentivement les directives avant de l’utiliser.
IMPORTANT SAFEGUARDSWhen using electrical appliances, basic safety precautions shouldalways be taken, including the following: 2
SAVE THESE INSTRUCTIONSGROUNDING INSTRUCTIONS For your protection, Waring Commercial Blenders areequipped with a 3-conductor cord set. 120 volt units are supplied with a molded 3-prong groundingtype plug and should be used in combination with a properlyconnected grounding-type outlet, as shown in Figure 1.If a grounding-type outlet is not available, an adapter, shown inFigure 2, may be obtained to enable a 2-slot wall outlet to beused with a 3-prong plug.3
Referring to Figure 3, the adapter must be grounded by attachingits grounding lug under the screw of the outlet cover plate.CAUTION: Before using an adapter, it must be determined thatthe outlet cover plate screw is properly grounded. If in doubt,consult a licensed electrician.Never use an adapter unless you are sure it is properly grounded.NOTE: Use of an adapter is not permitted in Canada.BLENDER SPECIFICATIONS Capacity: 48 oz. Working Capacity Rating: 220-240 Volts, 60 Hz, 13.0 Amps Base Material: Polycarbonate Bearing: High-Precision Ball Bearing Cord: 6-Foot, Three-Conductor Ground Cord with Strain Reliefin Base Overall Height: 17 Inches cULus, NSF Listed Operating Cycle: 1 min. ON/3 min. OFFControls:TBB145 / TBB160 – LO 20,500, HI 24,000, PULSE 24,000TBB175 – Variable speed dial from 1,000 to 17,000 RPM withPulse, 24,000 RPM4
PARTS & ASSEMBLYA. BaseDB. Jar PadC. Container48 oz., BPA-free copolyestercontainer.CD. LidCenter part of the two-piecelid is removable for addingingredients.EBE. BladeStainless steel cutting blades.F. Operating LightLighted LED indicates thatthe unit is in standby mode.LED will blink during operation.AG. Power Cord (not shown)Control Panel VariationsF TBB145 – Toggle Switch Controls withHI, LO, OFF & PULSE TBB160 – Electronic Touchpad Controlswith HI, LO, STOP, PULSE & 60-Second TimerLED with Up& DownTBB145F TBB175 – Variable Speed Control Dial & PULSE PULSE Button FeaturePULSE overrides HI speed for a quickburst of power.All parts that come in contact withfood are BPA free.TBB160FTBB1755
BEFORE FIRST USEAfter unpacking, follow the Cleaning and Sanitizing Instructionson page 9 before first use and if you have not used your blenderfor a period of time. Thoroughly dry the container before placing iton the base.OPERATING INSTRUCTIONSTBB145 – Toggle Switch ControlsNOTE: This blender utilizes a Slow Start feature. Whenbeginning HI or LO operation, the unit will start in a lower speedfor 1 second and then switch to the full selected speed. PULSEutilizes a .5-second Slow Start . This allows for a more evenblending of ingredients in the container.6
TBB160 – Electronic Touchpad Controls with TimerFollow steps 1–3 from the TBB145operating instructions.4. This blender is equipped withelectronic touchpad controlswith HI, LO, STOP and PULSEbuttons as well as a 60-secondcountdown timer. Always use HIor PULSE for crushing ice.NOTE: Blender can operate in twomodes: Timer Mode & Continuous Mode.5. For timer mode, press the upor downarrow to setthe desired time on the LED display, up to 60 seconds.Press and hold the upor downarrow for fast scrolling.After the time is set, press either LO or HI to start theblender. LED will blink during blending. The timer will countdown to 0 in 1-second intervals and then the blender willstop. Once you set a time, it will be kept and is repeatableuntil reset or unplugged.NOTE: If you want to increase or decrease the time while thetimer is counting down, press the upor downarrow symbolsas needed. Time will increase in 1-second intervals. Pressing thePULSE or STOP button during timer mode willstop the motor regardless of how much time is left on the timer.NOTE: This blender utilizes a Slow Start feature. Whenbeginning HI or LO operation, the unit will start in a lower speedfor 1 second and then switch to the full selected speed. PULSEutilizes a .5-second Slow Start . This allows for a more evenblending of ingredients in container.7. Allow motor to come to a complete stop before removingcontainer from blender base. Never place the container7
on the motor base or remove it from the motor base whilemotor is running.8. Always hold container with one hand when starting andwhile blending. Never operate without lid.9. Wash and dry the container after each use. See Cleaningand Sanitizing Instructions.10. Unplug to turn off all power to blender.TBB175 – Variable Speed ControlsFollow steps 1–3 in the TBB145operating instructions.4. This blender is equipped witha Variable Speed Control Dialthat operates from speeds 1–10and POWER, START/STOP andPULSE buttons. Always useSpeed 10 or PULSE for crushingice.5. For continuous blending, turn the variable speed controldial clockwise to set the speed from 1–10. Press the START/STOP button to start blending. The LED will blink duringblending. When blending is complete, press the START/STOP button to stop blending. You may wish to start at alow speed and increase to a higher setting.6. For momentary operation, press the PULSE button; motorwill run on MAX speed until the button is released.NOTE: This blender utilizes a Slow Start feature. Whenbeginning HI or LO operation, the unit will start in a lower speedfor 1 second and then switch to the full selected speed. PULSEutilizes a .5-second Slow Start . This allows for a more evenblending of ingredients in container.8
RESETTING THERMAL PROTECTION Your blender is equipped with a manual reset switch to protectthe motor from overheating. If your blender stops running under heavy use, or if the LEDlight starts to blink much more rapidly than usual during normalblending, press the power switch to OFF and unplug the powercord. Empty the blender container of all its contents and allowapproximately 5 to 10 minutes for the motor to cool down. Plug the power cord back into the outlet and continueblending. If your blender does not function properly following thisprocedure, discontinue use and contact a certified WaringCustomer Service Center.CLEANING AND SANITIZING INSTRUCTIONSTHE CONTAINER MUST BE CLEANED AND DRIED AFTER EACHUSE OF THE BLENDER ACCORDING TO THE FOLLOWINGINSTRUCTIONS.FAILURE TO DO SO MAY ALLOW RESIDUE OF PROCESSEDMATERIAL TO COLLECT ON THE INTERNAL SEALS OF THEBLADE ASSEMBLY, RENDERING THEM INEFFECTIVE. Wash, rinse, sanitize and dry container prior to initial use andwhenever it will not be used again within a period of 1 hour. Wash and rinse container after each use. Clean and sanitize motor base prior to initial use and after eachuse. Washing solutions based on non-sudsing detergents andchlorine-based sanitizing solutions having a minimum chlorineconcentration of 100 PPM are recommended.The following washing, rinsing, and sanitizing solutions, or theirequivalents, may be used.9
SOLUTIONPRODUCTDILUTION IN ation LF2100Liquid Low-FoamCleaner1%–2%: 1¼ – 2¾Ounce/Gallon (lowerdilution of 1% for normalcleaning and up to 2% formore stubborn soils)RoomTemperatureRinsingPlain WaterSanitizingClorox Regular Bleach(8.25% HypochloriteConcentration)Warm 95 F (35 C)2 Teaspoons/Gallon(Alternately a bleachwith 5.25% HypochloriteConcentration can beused at dilution of 3Teaspoons/Gallon) In repetitive batch-processing applications, frequent cleaningof the container will prolong the life of the blade assembly. Inno case should actual running time between cleanings exceedone-half hour. Do not use container to store processed foods or beverages.TO WASH AND RINSE CONTAINERIMPORTANTNOTE: IN ORDER TO MINIMIZE POSSIBILITY OF SCALDING,TEMPERATURE OF WASHING SOLUTION AND RINSE WATER10
MUST NOT EXCEED 115 F (46 C), AND QUANTITY USED MUSTNOT EXCEED ONE-QUARTER CONTAINER FULL.TO SANITIZE AND DRY CONTAINERTO CLEAN AND SANITIZE MOTOR BASESERVICERefer to the list of Authorized Service Centers enclosed with yourWaring Commercial Blender for the name of the nearest ServiceCenter, or write to:Waring Factory Service CenterP.O. Box 3201314 Ella T. Grasso AvenueTorrington, CT 06790(800) 492-7464NOTE: If your application involves theprocessing of biologically active material, we request that anyitems returned for service be sterilized before being shipped.11
Such items must be clearly identified as having been sterilized,both by a tag on the item itself and by a statement in theaccompanying correspondence. Waring will not accept deliveryof any return unless it is so identified.Replacement parts for your out-of-warranty repairs are obtainableat the address below.WARRANTYLIMITED TWO YEAR MOTOR WARRANTYLIMITED ONE YEAR PARTS AND LABOR WARRANTY(U.S. and Canada Only)Waring warrants every new Waring Commercial Blender to befree from defects in material and workmanship for a period ofone year from the date of purchase when used with foodstuffs,nonabrasive liquids (other than detergents) and nonabrasivesemiliquids, providing it has not been subject to loads in excessof the indicated rating. In addition, the motor in this appliance hasa full two year warranty.Under this warranty, Waring will repair or replace any part that,upon our examination, is defective in materials or workmanship,provided the product is delivered prepaid to the Waring ServiceCenter at: 314 Ella T. Grasso Ave., Torrington, CT 06790, or anyFactory Approved Service Center.This warranty does not: a) apply to any product that has becomeworn, defective, damaged or broken due to misuse or due torepairs or servicing by other than the Waring Service Center ora Factory Approved Service Center, or due to abuse, misuse,overloading or tampering; or b) cover incidental or consequentialdamages of any kind.The warranty is applicable only to appliances used in the UnitedStates or Canada; this supersedes all other express productwarranty or warranty statements. For Waring products soldoutside of the U.S. and Canada, the warranty is the responsibilityof the local importer or distributor. This warranty may varyaccording to local regulations.Warning: This warranty is void if appliance is used on DirectCurrent (DC).Waring Commercial314 Ella T. Grasso AvenueTorrington, CT m12
MEDIDAS DE SEGURIDADIMPORTANTESAl usar aparatos eléctricos, siempre debe tomar precaucionesbásicas de seguridad, incluso las siguientes:13
GUARDE ESTAS INSTRUCCIONESINSTRUCCIONES DE PUESTA A TIERRA Para su protección, este aparato está equipado con un cablede puesta a tierra.14
Los cables de los aparatos de 120 V están dotados de unenchufe con puesta a tierra, el cual debe ser conectado a unatoma de corriente debidamente puesta a tierra (Fig. 1).Si una toma de corriente puesta a tierra no está disponible, sepodrá usar un adaptador para conectar el aparato a una toma decorriente polarizada (Fig. 2).El adaptador debe ser puesto a tierra mediante un tornillo demetal que conecte la lengüeta del adaptador a la placa de latoma de corriente (Fig. 3).PRECAUCIÓN: antes de conectar el adaptador, asegúrese deque la toma de corriente esté puesta a tierra. Si no está seguro(a),comuníquese con un electricista.Nunca use un adaptador sin estar seguro de que la toma decorriente está puesta a tierra.NOTA: está prohibido usar un adaptador en el Canadá.ESPECIFICACIONES TÉCNICAS Capacidad: 1.4 L (48 onzas) Clasificación nominal: 120 V, 60 Hz, 13.0 Amp. Base: policarbonato Rodamiento: rodamiento de alta precisión Cable: cable de 1.85 m (6 pies) con clavija de tierra y aliviadorde tensión reforzado Altura total: 43 cm (17 pulgadas) Certificación cULus y NSF Ciclo de operación: 1 minuto encendido/3 minutos apagadoControles:TBB145 / TBB160 – LO (20 500 RPM), HI (24 000 RPM), PULSE(24 000 RPM)TBB175 – Velocidad variable desde 1000 hasta 17 000 RMP ypulso de 24 000 RPM15
PIEZAS Y ENSAMBLAJEA. BaseB. Cojinete amortiguadorC. JarraJarra de 48 onzas (1.4 L) decopoliéster sin bisfenol A (BPA)D. TapaTapa de dos piezas con tapónmedidor removible que permiteagregar ingredientes sin interrumpirel licuado.E. CuchillasCuchillas de acero inoxidable.F. Indicador luminosoPermanece encendido cuando elaparato está en el modo de espera;parpadea durante el funcionamiento.G. Cable (no ilustrado)H. Panel de controlF TBB145F TBB160Ninguna de las piezas en contactocon los alimentos contiene bisfenol A (BPA).FTBB17516
ANTES DEL PRIMER USOAntes del primer uso, o si no ha usado el aparato por un largoperíodo de tiempo, siga las instrucciones de limpieza detalladasen la sección “Instrucciones de limpieza y desinfección” (página22). Seque bien la jarra antes de colocarla sobre la base.INSTRUCCIONES DE OPERACIÓNTBB145 – Controles mecánicos1. Coloque la jarra sobre la base,tras haberse asegurado de queel aparato esté desconectadoy de que el interruptor esté enla posición de apagado (OFF).Cerciórese de que la jarra estédebidamente asentada sobre labase y de que el acoplamientode transmisión esté engranadocorrectamente.NOTA: esta licuadora está equipada con el sistema de arranquelento Slow Start . Siempre se pondrá en marcha a velocidadbaja y luego, después de un segundo, alcanzará la velocidadescogida. Este plazo es de solamente medio segundo conla función de pulso, lo que permite obtener resultados máshomogéneos.17
TBB160 – Controles electrónicos y temporizadorSiga los pasos 1–3 de las instruccionesde operación del modelo TBB145.4. Este modelo cuenta con controleselectrónicos HI, LO, STOP yPULSE, y un temporizador de60 segundos. Siempre utilice lavelocidad alta (HI) o la función depulso (PULSE) para picar hielo.NOTA: la licuadora puede funcionar con o sin temporizador.5. Para fijar el temporizador, oprima repetidamente el botóno; el tiempo programado aparecerá en la pantalla.Para desplazarse más rápidamente, mantenga el botónooprimido. Después de fijar el temporizador,oprima el botón HI o LO para poner el aparato en marcha.El indicador luminoso parpadeará durante elfuncionamiento. El temporizador contará hacia atrás, enincrementos de 1 segundo, y se apagará (así como elaparato) al final del tiempo prefijado. El tiempo programadopermanecerá en la memoria hasta reiniciarse o hasta quedesconecte el aparato.NOTA: para reducir o incrementar el tiempo durante elfuncionamiento, simplemente oprima el botóno;el tiempo subirá o bajará en incrementos de 1 segundo. Paraapagar el aparato, incluso antes del final de la cuenta, oprima elbotón PULSE o STOP.6. Para encender el aparato, oprima el botón LO o HI. Después18
de terminar, presione el botón de apagado OFF. Para usarla función de pulso, oprima el botón PULSE; el motorfuncionará a velocidad alta hasta que suelte el botón.NOTA: esta licuadora está equipada con el sistema de arranquelento Slow Start . Siempre se pondrá en marcha a velocidadbaja y luego, después de un segundo, alcanzará la velocidadescogida. Este plazo es de solamente medio segundo conla función de pulso, lo que permite obtener resultados máshomogéneos.TBB175 – Velocidad variableSiga los pasos 1–3 de lasinstrucciones de operación delmodelo TBB145.4. Este modelo cuenta conuna perilla de control develocidad y botones POWER(alimentación), START/STOP(encendido/apagado) y PULSE(pulso). Siempre utilice la velocidad 10 o la función de pulso(PULSE) para picar hielo.5. Para encender el aparato, primero elija la velocidaddeseada, desde 1 hasta 10, girando la perilla en sentidohorario. Luego, presione el botón START/STOP. Elindicador luminoso parpadeará durante el uso. Despuésde terminar, presione el botón START/STOP para apagar.Se aconseja empezar a licuar a velocidad baja, y aumentar19
progresivamente la velocidad hasta el nivel deseado.6. Para usar la función de pulso, oprima el botón PULSE; elmotor funcionará a velocidad máxima hasta que suelte elbotón.NOTA: esta licuadora está equipada con el sistema de arranquelento Slow Start . Siempre se pondrá en marcha a velocidadbaja y luego, después de un segundo, alcanzará la velocidadescogida. Este plazo es de solamente medio segundo conla función de pulso, lo que permite obtener resultados máshomogéneos.DISPOSITIVO DE PROTECCIÓN DEL MOTOR Su aparato está dotado de un dispositivo de proteccióntérmica que apaga automáticamente el motor en caso derecalentamiento. Si esto ocurriera, o si el indicador luminoso verde empezaraa parpadear más rápidamente de lo normal durante el uso,apague (OFF) y desenchufe el aparato. Vacíe la jarra y permitaque el aparato se enfríe por 5–10 minutos. Cuando el motor esté frío, vuelva a conectar el aparato y sigalicuando. Si el aparato no funcionara debidamente después de seguirestos pasos, deje de usarlo y comuníquese con un centro deservicio autorizado.20
INSTRUCCIONES DE LIMPIEZA YDESINFECCIÓNLIMPIE Y SEQUE LA JARRA DESPUÉS DE CADA USO, SEGÚNSE INDICA A CONTINUACIÓN.EL INCUMPLIMIENTO DE ESTAS INSTRUCCIONES PUEDECAUSAR UNA ACUMULACIÓN DE RESIDUOS SOBRE LOSSELLOS INTERNOS DE LA CUCHILLA, PERJUDICANDO SUBUEN FUNCIONAMIENTO. Lave, enjuague, sanee y seque la jarra antes del primer uso ydespués de cada uso, a menos que vuelva a utilizarlo dentrode la hora siguiente. Lave y seque la jarra después de cada uso. Limpie y sanee el bloque-motor antes del primer uso ydespués de cada uso. Recomendamos que use soluciones limpiadoras a base dedetergente sin espuma y soluciones desinfectantes con unaconcentración mínima de cloro de 100 ppm.Se podrán usar las soluciones siguientes o sus URAPara lavarDetergentelíquido bajo enespuma LF2100de IntermationalProductsCorporation1–2 %: 1¼ onza (40 ml)a 2¾ onzas (80 ml) dedetergente por galón(3.8 L) de agua (dilucióndel 1 % para la limpiezanormal, hasta 2 % para lalimpieza intensiva)TemperaturaambientePara enjuagarAguaParadesinfectarCloro Clorox (con concentraciónen hipoclorito del8.25 %)Tibia 95 F ( 35 C )2 cucharaditas (10 ml) decloro por galón (3.8 L) deagua (o 3 cucharaditas/15ml si el cloro tieneuna concentración enhipoclorito del 5.25 %) Limpiar la jarra frecuentemente incrementará la vida útil de lascuchillas. Nunca debería transcurrir más de media hora entredos limpiezas. No guarde alimentos o líquidos procesados en la jarra.21
LIMPIEZA DE LA JARRAIMPORTANTENOTA: PARA REDUCIR EL RIESGO DE QUEMADURAS,ASEGÚRESE DE QUE LA TEMPERATURA DE LA SOLUCIÓNLIMPIADORA O DEL AGUA NO EXCEDA 45 C (115 F) Y NOLLENE LA JARRA MÁS DE LO INDICADO.DESINFECCIÓN Y SECADO DE LA JARRALIMPIEZA DEL BLOQUE-MOTOR22
agua y solución desinfectante. Estruje bien la esponja o elpaño para evitar que el agua penetre adentro del aparato.NO SUMERJA LA BASE EN SOLUCIÓN LIMPIADORA, AGUA OSOLUCIÓN DESINFECTANTE.SERVICIO POSTVENTAConsulte la lista de los centros de servicio autorizados, adjunta,o contacte a:Waring Factory Service CenterP.O. Box 3201314 Ella T. Grasso AvenueTorrington, CT 06790(800) 492-7464NOTA: si el aparato ha sido usado paraprocesar sustancias biológicamente activas, se deberánesterilizar las piezas antes de enviarlas. Las piezas esterilizadasdeberán ser claramente identificadas, mediante una etiquetapuesta en las mismas y una declaración adjunta. Waring noaceptará la entrega de artículos esterilizados que no tenganidentificación adecuada.Piezas de repuesto para reparaciones “fuera de garantía” estándisponibles en la misma dirección.GARANTÍAGARANTÍA LIMITADA DE DOS AÑOS SOBREEL MOTOR Y DE UN AÑO SOBRE LOS MATERIALESY LA MANO DE OBRA(VÁLIDA EN LOS EE.UU. Y EN CANADÁ SOLAMENTE)Waring garantiza toda nueva licuadora Waring Commercialcontra todo defecto de materiales o fabricación durante un año apartir de la fecha de compra, siempre que haya sido usada conalimentos, líquidos no abrasivos (a excepción de detergentes) ysemi-líquidos no abrasivos, y que no haya sido sujeta a cargasque excedan su máxima capacidad. Por otra parte, el motor deeste aparato tiene una garantía completa de dos años.Bajo esta garantía, Waring reparará o reemplazará toda piezaque, tras estar inspeccionada por nuestro servicio posventa,demuestre defectos de materiales o fabricación, siempre que el23
producto se entregue con franqueo pagado a: Waring ServiceCenter, 314 Ella T. Grasso Ave. Torrington, CT 06790, o acualquier servicio postventa aprobado.Esta garantía: a) no se aplica a ningún producto desgastado,defectuoso, dañado o roto debido a uso, reparaciones/serviciorealizados por personas no autorizadas, o abuso, mal uso,sobrecarga o daños intencionales; b) no cubre daños incidentaleso consecuentes de ningún tipo.Esta garantía es válida solamente para los aparatos compradosen los Estados Unidos y el Canadá y reemplaza todas las demásdeclaraciones expresas de garantía. La garantía de los productosWaring adquiridos fuera de los Estados Unidos y del Canadá esla responsabilidad del importador/distribuidor local. Los derechosde garantía pueden variar según las regulaciones locales.Advertencia: utilizar este aparato con corriente continua(C.C./DC) invalidará la garantía.Waring Commercial314 Ella T. Grasso AvenueTorrington, CT m24
IMPORTANTES CONSIGNESDE SÉCURITÉL'utilisation d'appareils électriques requiert la prise de précautionsélémentaires, parmi lesquelles les suivantes :25
GARDER CES INSTRUCTIONSINSTRUCTIONS DE MISE À LA TERRE Pour votre protection, votre appareil est doté d'un cordon à troisfils de mise à la terre. Les appareils de 120 V sont équipés d'une fiche à trois26
broches. Cette fiche doit être branchée dans une prise de terrecorrectement configurée (Fig. 1).Vous pouvez utiliser un adaptateur temporaire (Fig. 2) pourbrancher l’appareil dans une prise polarisée jusqu’à ce que vousfassiez installer une prise de terre par un électricien.Afin d'assurer la mise à la terre, la languette de l’adaptateur doitêtre fixée au boîtier par une vis en métal (Fig. 3).ATTENTION : vérifier que le boîtier est mis à la terre avantd'utiliser l'adaptateur. En cas de doute, demander conseil à unélectricien.Ne jamais utiliser un adaptateur, à moins qu'il ne soitcorrectement mis à la terre.REMARQUE : l’utilisation d’un adaptateur comme celuimentionné ci-dessus est interdite au Canada.SPÉCIFICATIONS TECHNIQUES : Capacité : 1.4 L (48 onces) Spécifications électriques : 120 V, 60 Hz, 13.0 Amp. Socle : polycarbonate Palier : palier à roulement à billes de haute précision Cordon : 1.85 m (6 pieds), avec prise de terre et manchonrenforcé Hauteur : 43 cm (17 po.) Certification cULus et NSF Cycle de fonctionnement :1 minute de marche/3 minutes de reposContrôles :TBB145 / TBB160 – LO (20 500 tr/min), HI (24 000 tr/min), PULSE(24 000 tr/min)TBB175 – Vitesse variable de 1 500 à 20 000 tr/mn PULSE(24 000 tr/min)27
PIÈCES ET ASSEMBLAGEA. SocleB. Coussin amortisseurC. RécipientRécipient de 1.4 L (48 onces)en copolyester sans BPA.D. CouvercleCouvercle en deux pièces avecbouchon doseur amoviblepermettant d'ajouter des ingrédientspendant le fonctionnement.E. CouteauLames en acier inoxydable.F. Voyant lumineuxReste allumé quand l'appareil esten mode veille ; clignote pendantle fonctionnement.G. Cordon d'alimentation (non illustréH. Bloc commandeF TBB145FTBB160 Aucune des pièces en contact avec lesaliments ne contient de bisphénol A (BPA).FTBB17528
AVANT LA PREMIÈRE UTILISATIONAvant la première utilisation ou si vous n'avez pas utilisé l'appareilpendant un certain dans, suivre les instructions de nettoyage dela section “Nettoyage et désinfection” (page 35). Bien sécher lerécipient avant de le placer sur le socle.DIRECTIVES D’UTILISATIONTBB145 – Contrôles mécaniquesREMARQUE : l'appareil est équipé du système de démarragelent Slow Start . Il se mettra toujours en marche à très bassevitesse puis, au bout d'une seconde, atteindra la vitesse voulue.Avec la fonction PULSE, ce délai n'est que d' une demi-seconde ;cela produit des résultats plus homogènes.7. Attendre que le moteur se soit complètement arrêté avantde retirer le récipient du socle. Ne jamais placer ou retirer lerécipient alors que le moteur tourne.29
TBB160 – Ccontrôles électroniques et minuterieSuivre les étapes 1–3 des directivesd'utilisation du modèle TBB145.4. Ce modèle est doté d'un panneaude contrôle électronique avectouches HI, LO, STOP et PULSE,ainsi que d'une minuterie de 60secondes. Toujours utiliser lavitesse rapide (HI) ou la fonctionPULSE pour piler la glace.REMARQUE : l'appareil peut fonctionner avec ou sans minuterie.REMARQUE : Pour changer le temps programmé pendant lefonctionnement, appuyer sur la toucheou; cela modifierale temps restant, en incréments d'une seconde. Pour arrêterl'appareil, y compris avant la fin du temps programmé, appuyersur la touche PULSE ou STOP.30
REMARQUE : l'appareil est équipé du système de démarragelent Slow Start . Il se mettra toujours en marche à très bassevitesse puis, au bout d'une seconde, atteindra la vitesse voulue.Avec la fonction PULSE, ce délai n'est que d' une demi-seconde ;cela produit des résultats plus homogènes.7. Attendre que le moteur se soit complètement arrêté avantde retirer le récipient du socle. Ne jamais placer ou retirer lerécipient alors que le moteur tourne.8. Tenir le récipient d'une main lors du démarrage et pendantle fonctionnement. Ne pas utiliser l'appareil sans lecouvercle.9. Laver et sécher le récipient après chaque utilisation (voir lesinstructions de nettoyage et de désinfection).10. Débrancher l'appareil pour couper l'alimentation électrique.TBB175 – Vitesse variableSuivre les étapes 1–3 des directivesd'utilisation du modèle TBB145.31
REMARQUE : l'appareil est équipé du système de démarragelent Slow Start . Il se mettra toujours en marche à très bassevitesse puis, au bout d'une seconde, atteindra la vitesse voulue.Avec la fonction PULSE, ce délai n'est que d' une demi-seconde ;cela produit des résultats plus homogènes.DISPOSITIF DE PROTECTION DU MOTEUR Votre appareil est équipé d’un dispositif de protectionthermique qui arrête le moteur automatiquement en cas desurchauffe. Si cela se produisait, ou si le voyant lumineux commençait àclignoter beaucoup plus rapidement que d'habitude, arrêtez(OFF) et débranchez l'appareil. Vider le récipient, puis laisserrefroidir l’appareil pendant 5 à 10 minutes. Une fois le moteur refroidi, rebrancher l'appareil et continuer. Si l'appareil ne fonctionne pas comme il se doit, cesserl'utilisation et contacter un service après-vente autorisé.NETTOYAGE ET DÉSINFECTIONLAVER ET SÉCHER LE RÉCIPIENT APRÈS CHAQUEUTILISATION, SELON LES INSTRUCTIONS SUIVANTES.LE NON-RESPECT DE CES INSTRUCTIONS PEUTENTRAÎNER UNE ACCUMULATION DE RÉSIDUS SUR LEMÉCANISME INTERNE DU COUTEAU, NUISANT À SON BONFONCTIONNEMENT.32
Nettoyer, rincer, désinfecter et sécher le récipient avant del'utiliser pour la première fois et après chaque utilisation, àmoins que vous ne le réutilisiez dans l'heure qui suit. Laver et sécher le récipient après chaque utilisation. Nettoyer et désinfecter le socle-moteur avant d’utiliserl’appareil pour la première fois et après chaque utilisation. Nous recommandons l'utilisation d'une solution de nettoyageà base de détergent non moussant et d'une solutiondésinfectante à base de chlore, avec une concentrationminimum de 100 ppm.Vous pouvez utiliser les solutions suivantes ou leur équivalent rgentliquide peumoussant LF2100d'InternationalProductsCorporation1–2 % : 1¼ once (40 ml) à2¾ onces (80 ml)de détergent par gallon(3.8 L) d'eau (dilution à1 % pour le nettoyagenormal, jusqu'à 2 % pourle nettoyage intensif)TempératureambianteRinçageEau claireDésinfectionEau de javel Clorox (concentration enhypochlorite de8.25 %)Tiède 95 F (35 C)2 c. à thé (10 ml) d'eaude javel par gallon (3.8 L)d'eau (ou 3 c. à thé/15ml si l'eau de javel aune concentration enhypochlorite de 5.25 %) Le nettoyage régulier du récipient augmentera la durée de viedu couteau. Il ne devrait jamais s'écouler plus d'une demiheure entre deux nettoyages. Ne pas garder d'aliments ou de liquides dans le récipient.LAVAGE ET RINÇAGE DU RÉCIPIENT33
IMPORTANTREMARQUE : AFIN DE RÉDUIRE LES RISQUES DE BRÛLURE,VÉRIFIER QUE TEMPÉRATURE DE LA SOLUTION DENETTOYAGE OU DE L'EAU NE DÉPASSE PAS 45 C (115 F) ETNE PAS REMPLIR LE RÉCIPIENT AU-DELÀ DE LA QUANTITÉINDIQUÉE.DÉSINFECTION ET SÉCHAGE DU RÉCIPIENTNETTOYAGE ET DÉSINFECTION DUSOCLE-MOTEUR34
NE PAS SUBMERGER LE SOCLE DANS LA SOLUTION DENETTOYAGE, L'EAU OU LA SOLUTION DÉSINFECTANTE.2. Laisser sécher le socle à l’air libre avant de l'utiliser ànouveau.SERVICE APRÈS-VENTEConsulter la liste des services après-vente autorisés ci-jointe, oubien contacter :Waring Factory Service CenterP.O. Box 3201314 Ella T. Grasso AvenueTorrington, CT 06790Tel. (aux É.-U.): 1- 800-492-7464REMARQUE : si l'appareil est utilisé pour letraitement de matériaux biologiquement actifs, il sera nécessaired'en stériliser les pièces avant de l'expédier à un de nos centresde service. Les pièces stérilisées doivent être clairementidentifiées au moyen d'une étiquette et d'une déclaration jointe.Waring se réserve le droit de ne pas accepter les pièces, à moinsqu'elles ne soient identifiées de cette manière.Les pièces détachées pour réparations “hors garantie” sontégalement disponibles à l’adresse ci-dessus.GARANTIEGARANTIE LIMITÉE DE DEUX ANS SURLE MOTEUR ET D’UN AN SUR LES PIÈCES ET LAMAIN D’OEUVRE(VALABLE AUX É.-U. ET AU CANADA UNIQUEMENT)Waring garantit tout nouvel appareil Waring Commercial contretout vice de matière ou de fabrication pe
Mar 26, 2020 · TBB BLENDER SERIES INSTRUCTION MANUAL. MANUAL DE INSTRUCCIONES PARA LAS LICUADORAS DE LA SERIE TBB. DIRECTIVES D’UTILISATION DES BOLS MIXEURS DE LA SÉRIE TBB. For your safety and continued enjoyment of this product, always read the instruction book