Transcription
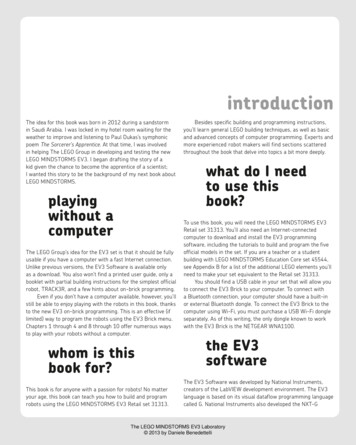
introductionThe idea for this book was born in 2012 during a sandstormin Saudi Arabia. I was locked in my hotel room waiting for theweather to improve and listening to Paul Dukas’s symphonicpoem The Sorcerer’s Apprentice. At that time, I was involvedin helping The LEGO Group in developing and testing the newLEGO MINDSTORMS EV3. I began drafting the story of akid given the chance to become the apprentice of a scientist;I wanted this story to be the background of my next book aboutLEGO MINDSTORMS.playingwithout acomputerThe LEGO Group’s idea for the EV3 set is that it should be fullyusable if you have a computer with a fast Internet connection.Unlike previous versions, the EV3 Software is available onlyas a download. You also won’t find a printed user guide, only abooklet with partial building instructions for the simplest officialrobot, TRACK3R, and a few hints about on-brick programming.Even if you don’t have a computer available, however, you’llstill be able to enjoy playing with the robots in this book, thanksto the new EV3 on-brick programming. This is an effective (iflimited) way to program the robots using the EV3 Brick menu.Chapters 1 through 4 and 8 through 10 offer numerous waysto play with your robots without a computer.whom is thisbook for?This book is for anyone with a passion for robots! No matteryour age, this book can teach you how to build and programrobots using the LEGO MINDSTORMS EV3 Retail set 31313.Besides specific building and programming instructions,you’ll learn general LEGO building techniques, as well as basicand advanced concepts of computer programming. Experts andmore experienced robot makers will find sections scatteredthroughout the book that delve into topics a bit more deeply.what do I needto use thisbook?To use this book, you will need the LEGO MINDSTORMS EV3Retail set 31313. You’ll also need an Internet-connectedcomputer to download and install the EV3 programmingsoftware, including the tutorials to build and program the fiveofficial models in the set. If you are a teacher or a studentbuilding with LEGO MINDSTORMS Education Core set 45544,see Appendix B for a list of the additional LEGO elements you’llneed to make your set equivalent to the Retail set 31313.You should find a USB cable in your set that will allow youto connect the EV3 Brick to your computer. To connect witha Bluetooth connection, your computer should have a built-inor external Bluetooth dongle. To connect the EV3 Brick to thecomputer using Wi-Fi, you must purchase a USB Wi-Fi dongleseparately. As of this writing, the only dongle known to workwith the EV3 Brick is the NETGEAR WNA1100.the EV3softwareThe EV3 Software was developed by National Instruments,creators of the LabVIEW development environment. The EV3language is based on its visual dataflow programming languagecalled G. National Instruments also developed the NXT-GThe LEGO MINDSTORMS EV3 Laboratory 2013 by Daniele Benedettelli
programming language for the previous LEGO MINDSTORMSNXT generation.If you are an NXT user and you have programmed withNXT-G, you will find EV3 programming much clearer: Nowall the blocks show all settings at once, and you don’t have toselect a block to see its settings in the Configuration Panel. Thesoftware allows you to zoom and pan through the programs toexplore them more easily. You’ll also find additional programming features.the structureof this bookThis book is both a manual and a workbook. It introducesnew concepts as the story in the comics develops. (Look at thecomics carefully, as they include hidden clues to downloadingbonus material from the companion website, including AUDR3Y,the people-eating plant; the L3AVE-ME-ALONE box; and manymore.) “Digging Deeper” sidebars explain some advanced topicsin depth. If you’re an expert, you may want to skip some ofthe more introductory chapters and go directly to Chapters 9through 16, where you learn how to build and program thefour main robots. The chapters also contain experiments toapply and deepen what your knowledge. Here’s what you’ll findin each chapter:NNNNNNNNxxthe companionwebsiteThe companion website, http://EV3L.com/, contains the EV3projects for the robots, errata, additional tips and tricks, andthe bonus models for this book.let’s startalready!Welcome to the journey! Follow Dexter and Danny throughtheir adventure and become an EV3L scientist’s apprentice!Chapter 1: Contents of the 31313 set; identifying LEGOTechnic elements.Chapters 2, 3, and 4: Build ROV3R, a wheeled robot that canbe built quickly and programmed without a computer.Chapters 5, 6, and 7: Introduction to EV3 programming usingthe computer.Chapter 8: LEGO building techniques.Chapters 9 and 10: Build and program WATCHGOOZ3, awalking robot that can be programmed with or without acomputer.Chapters 11 and 12: Build and program the SUP3R CAR,a steering car.Chapters 13 and 14: Build and program the SENTIN3L,a walking defense robot.Chapters 15 and 16: Build and program the T-R3X, a fearsome walking dinosaur.introductionThe LEGO MINDSTORMS EV3 Laboratory 2013 by Daniele Benedettelli
The LEGO MINDSTORMS EV3 Laboratory 2013 by Daniele Benedettelli
2 The EV3L Scientist’s ApprenticeThe LEGO MINDSTORMS EV3 Laboratory 2013 by Daniele Benedettelli
The LEGO MINDSTORMSEV3 LaboratoryTheEV3L Scientist’s Apprentice 2013 by Daniele Benedettelli3
4 The EV3L Scientist’s ApprenticeThe LEGO MINDSTORMS EV3 Laboratory 2013 by Daniele Benedettelli
1your LEGO MINDSTORMS EV3 setYour LEGO MINDSTORMS EV3 31313 set includes a collectionof LEGO elements, a printed manual (with instructions for building the official robot, TRACK3R, and some hints about how toget started with the EV3 Intelligent Brick), a USB-to-miniUSBcable to connect the EV3 Brick to your computer, and a papertest pad (just unroll the sleeve surrounding the box)—but nosoftware. Where is the software? You can download it fromthe Downloads section of the LEGO MINDSTORMS EV3 officialwebsite (http://LEGO.com/mindstorms/ ). The LEGO Technic ele ments in the box are beams, pins, gears, and wheels as well aselectronic components like motors, sensors, cables, and theEV3 Intelligent Brick itself.the studlessway of buildingAs you may already know, there are no classic LEGO bricks inthe EV3 box, and the beams don’t have any studs. So how doyou connect them?Since 2000, LEGO Technic sets have been composedmainly of “studless” parts. The good old sharp-edged Technicbricks with studs (called studded) have slowly been replacedby smooth, studless Technic beams, which give the models asleeker look (Figure 1-1).I remember when I first switched from studded to studless building: Despite years of experience with “classic” LEGOTechnic, I suddenly felt as though I could not build even thesimplest thing. I was so frustrated! But as I took a close lookat the offi cial LEGO Technic models, I became more and morefamiliar with the parts. Sure, I had to learn a completely different way of building, but it was worth the effort. Studless building produces models that are lightweight, solid, and beautiful.Once you get started with studless building, you’ll wonder howyou could have lived without it!Figure 1-1: A classic 8M Technic brick compared to a 7M studless beam.Building with studless parts isn’t always as intuitive as the classic way of build ing with LEGO by stacking bricks and plates from bottom to top. In fact, studlesstechnique requires you to think three-dimensionally, from the inside out.studless vs. studded:the structural differencesTechnic bricks have an even number of studs and an odd number of holes (a two-stud brick has one hole, a six-stud brickhas five holes, and so on), and you measure and name them bycounting their studs. Technic beams are like a minimalist, studless version of Technic bricks. Measure them by counting theirholes, as shown in Figure 1-1. Like the studs on a LEGO brick,Technic pins act as the “glue” for your LEGO creations, as youcan see in Figure 1-2.The round ends of Technic beams allow you to buildstructures and mechanisms that are more compact and lighterthan the ones you might build with standard LEGO bricks. Forexample, in order for two studded bricks to rotate next to eachother on pegs, the pegs need to have two empty holes betweenthem (see Figure 1-3). In contrast, the studless beams’ pegscan be right next to each other.The LEGO MINDSTORMS EV3 Laboratory 2013 by Daniele Benedettelli
naming thepiecesFigure 1-2: Like studs are for bricks, pins are the “glue” for studless beams.Imagine that we’re building a LEGO robot together and youfind that you’re missing a LEGO part. You ask me if I have one,but all you can muster is “Danny, would you pass me that . . .something, thingamajig, whatchamacallit, doodad, a habbawhatsa?” and I don’t understand what you need! Or worse,if you need to buy parts online (from a site like BrickLink;http://www.bricklink.com/ ) and you don’t know how to refer tothe parts, you’ll be at a loss and unable to finish your robot.Names are important. It’s much easier to master LEGObuilding techniques if you know how to classify, name, andmeasure LEGO parts. You can’t write a novel if you don’t knowgrammar and vocabulary, and the same holds true for LEGO.You’ve got to know the parts.The pieces in the EV3 31313 set can be divided into thesecategories:beams straight beams, angular beams, frames, thinbeams, and linksconnectors pins, axles and bushes, axle and pin connectors, and cross blocksgears spur gears, bevel gears, and worm gearswheels and treads wheels, treads, and tiresdecorative pieces panels, teeth, swords, and so onmiscellaneous pieces balls, ball magazine, ball shooter,rubber bandelectronic pieces the EV3 Intelligent Brick, motors,sensors, and cablesN ote For these categories, I’ve chosen to use the namesthat I think are the easiest to remember. For the officialLEGO names, see Appendix A.I’ll describe the categories briefly, with a minimum of boring chatter.beamsFigure 1-3: Technic beams occupy less space than bricks, allowing you to buildmore compact structures.On the other hand, you can make sturdier, more rigidstructures using standard bricks and plates. Depending onwhat you want to make, you might use studded, studless,or a combination of both techniques.6 Chapter 1As mentioned earlier, beams are the studless equivalent ofTechnic bricks. This category includes straight beams, angularbeams, and frames. We’ll include thin beams and links in thiscategory too. Beams can have round holes, which can fit pins,or cross holes, which can fit axles or axle pins. Links have ballsockets that fit pins with towballs.The LEGO MINDSTORMS EV3 Laboratory 2013 by Daniele Benedettelli
straight beamsangular beamsFigure 1-4 shows the straight beams; their names are listedin Table 1-1. The beams are measured by counting theirholes. For example, a straight beam with three holes is a 3Mbeam (and you can omit the adjective “straight”). The numberof holes in a beam corresponds to the length of the beam asexpressed in Fundamental LEGO Units, or modules (1M about8 mm). In all LEGO building instructions, you’ll see a box foreach building step that lists the parts needed in that step. Thelength of a beam is noted at its top-right corner.Figure 1-5 and Table 1-2 show the angular beams and theirnames. An angular beam with three holes before and sevenholes after the bend is a 3 7 angular beam. The same namingpattern is used for the other angular beams. Notice that someangular beams have cross holes at their ends.BAC1MDEFFigure 1-5: The angular beamstable 1-2: the angular beamsABCDEFGHFigure 1-4: The straight beamstable 1-1: the straight beamsLabel in Figure 1-4NameColorA15M beamBlackB13M beamBlackC11M beamRedD9M beamBlackE7M beamBlackF5M beamBlackG3M beamBlackH2M beam with cross holeBlackLabel in Figure 1-5NameColorAT beamBlackB2 4 angular beamBlackC3 5 angular beamBlackD4 4 angular beamBlackE3 7 angular beamBlackFDouble angular beamBlackThe angular beams labeled A, B, and C have right angles,while F has two 45-degree bends. But what about the others?What kind of strange angle is that, and how do you use it tobuild? You’ll learn the secrets of working with the variousangular beams in Chapter 8.framesWe also have special beams called frames, as shown in Figure 1-6. We refer to these based on their shapes as O-frames(or simply frames) and H-frames. Once you know how to workwith them, you’ll find that they allow you to build rock-solidstructures that will not come apart!The LEGO MINDSTORMS EV3 Laboratory 2013 by Daniele Benedettelliyour LEGO MINDSTORMS EV3 set7
connectorsMost parts in the EV3 set are connectors. When buildingwith wood or metal, we use nails, glue, staples, screws, bolts,washers, and so on to connect the various pieces. In the won derful world of LEGO Technic, we use pins, axles and bushes,axle connectors, and various cross blocks.pins and axle pinsPins hold beams together when fitted inside the beams’ roundholes. Pins are divided into two groups: pins with friction andpins without friction (also called smooth pins). Figure 1-8 andTable 1-4 show 2M and 3M pins, axle pins, pins with towballs,and a special 3M pin with a stop bush (also called a bushing).AEBFCGFigure 1-6: The O-frame and the H-framethin beams and linksThe thin beams and linksare shown in Figure 1-7and Table 1-3. Thin beamshave cross holes at eachend, and they are onehalf-module thick. Thinkof the 6M and 9M links asbeams with ball sockets attheir ends. These fit pinswith towballs (items D andH in Figure 1-8). Ball jointsallow for a wide range ofmotion and rotation, similar to your shoulder or hipjoints.ATechnic pins. The straightBline signifies the pinsDwithout friction (A–C); theHwavy line indicates pins withfriction (E–I). The axle pinwith towball (D), while notICtechnically a smooth pin, islisted here for comparisonDwith the pin with towball (H).table 1-4: the pins and axle pinsFigure 1-7: The thin beams and linkstable 1-3: the thin beams and linksLabel in Figure 1-7NameColorACamBlackB3M thin beamGreyC6M linkBlackD9M linkBlack8 Chapter 1Figure 1-8: The renownedLabel in Figure 1-8NameColorAPin without frictionGreyB3M pin without frictionTanCAxle pin without frictionTanDAxle pin with towballGreyEPin with frictionBlackF3M pin with frictionBlueGAxle pin with frictionBlueHPin with towballBlackI3M pin with stop bushRedThe LEGO MINDSTORMS EV3 Laboratory 2013 by Daniele Benedettelli
Pins without friction (labeled A, B, and C in Figure 1-8) turnsmoothly and freely in the Technic holes. They are color coded:2M pins are always grey, while 3M pins and axle pins are tan.Pins without friction are mainly used to connect moving beams.The EV3 set has no axle pins without friction,labeled C in Figure 1-8, but I’ve included it here for thesake of completeness. Axle pins without friction can beused to hold a gear so that it can turn freely.Pins with friction are great for building stable structuresbecause they hold beams together better than pins withoutfriction. In the following chapters, you’ll learn many ways touse pins and axle pins.axles and bushesNOTEThe pins with friction (labeled E, F, G, H, and I) have ridgesthat increase friction and make it harder for them to turn in theTechnic holes. The ridges also prevent the pins from rattling.2M pins with friction are always black, and 3M pins with friction and axle pins with friction are blue. 3M pins with stop bushcome in many colors, but they’re red in the EV3 set. The pinsare color coded to help you identify their function at first sight.Axles are designed to transfer rotational movement, for examplefrom a motor shaft to a wheel. Axles can also be used to holdstructures together. Their cross section looks like a cross (theircomplete name is actually cross axle), and they fit perfectly intoparts that have cross holes, such as gears, angular beams, andcross blocks.Like beams, axles come in many lengths. You can measurethem by putting them next to a beam and counting the holes inthe beam. Once you get used to working with them, you will beable to sort them by size at a glance, even without measuringthem. This superpower really amazes people!crosses and holesBuild the following assemblies. Each one has a symbol tohelp you pick the right pieces. Wavy lines indicate a pinwith friction (black or blue) and straight lines indicatesmooth pins (grey or tan). A plus ( ) indicates axle pinsand a circle indicates round pins.NNOnce you’ve built the assemblies, hold them and tryto make the inclined beam swing. What happens ineach case?In the rightmost assembly, which 2 4 angular beam isthe easiest to turn?The LEGO MINDSTORMS EV3 Laboratory 2013 by Daniele Benedettelliyour LEGO MINDSTORMS EV3 set9
Like pins, axles are color coded, as shown in Figure 1-9:The 2M axle is red, odd-length axles are light grey (3M, 5M,7M, 9M), and larger even-length axles are black (4M, 6M, 8M,10M, 12M). The EV3 set doesn’t have normal 4M and 8M axles;it includes a tan axle with a cylindrical stop in the middle (4c),as well as some axles with a stop at one end (3s, 4s, and 8s).Unlike the 4M and 8M axles with stop (4s and 8s), the 3M axlewith stop (3s) has a protruding stud. In the 3s, 4s, and 8s axles,the stop looks like a built-in bush, and it stops the axle frompassing through a hole or a cross hole. In the 4c axle, the stopin the middle stops the axle from passing completely through across hole.Figure 1-9 also shows two bushes, labeled B1 (yellow,one half-module thick) and B2 (red, one module thick). You’llusually fit these bushes over axles to prevent the axles fromcoming out of holes, or you’ll use them to keep space betweentwo or more elements of a structure. Because the bushes aremainly used with axles, I’ve listed them together.B1axle, pin, and angle connectorsFigure 1-10 shows the axle, pin, and angle connectors, andTable 1-5 lists their names. Each angle connector (thoselabeled E, F, G, and H) is identified by a number embossedon its body.B2ABCDEFGH23Figure 1-10: The axle, pin, and angle connectors3stable 1-5: the axle, pin, and angle connectors4c4s55.5678sLabel in Figure 1-10NameColorAConnector with axle holesGreyBConnector hub with 3 axlesGreyCPin connectorGreyDAxle connectorRedEAngle connector #1RedFAngle connector #2RedGAngle connector #4RedHAngle connector #6Redcross blocksHere comes the fun! Cross blocks are essential to studlessbuilding because they allow you to build—and think—in threedimensions. Remember, studless building isn’t about simplystacking bricks; we’re adding parts from all sides, as shown inFigure 1-11.9Figure 1-9: The axles and bushes (with 13M beam shown for comparison)10 Chapter 1The LEGO MINDSTORMS EV3 Laboratory 2013 by Daniele Benedettelli
ABCDEFGHIJKLFigure 1-11: With cross blocks, you can build in any direction, not just frombottom to top.Figure 1-12 shows the cross blocks in the EV3 set, andTable 1-6 lists their names. Some entries also list a nicknamefor the piece; for example, “Mickey” and “Minnie” are funnynames for parts D and E, respectively. (Thanks to LEGOMINDSTORMS Education designer Lee Magpili for these nicknames.) The part labeled L can be used as a gearbox to hold90-degree-coupled 12z and 20z bevel gears (for example, see“Medium Motor with Gearbox” on page 126).It would be nearly impossible to show you all of the combinations you can build with cross blocks. The best way to learnhow to use them is to draw your inspiration from the projectsin this book and from the many Technic models in the wild.gearsWhen people think of complicated machines, gears often popinto their minds, even if the machine is a computer with fewmoving parts! And when a machine stops working, peopleoften blame its (sometimes imaginary) gears.Gears are rotating wheels with teeth that mesh withother toothed parts (like gears, gear racks, and worm gears)to transmit movement. Figure 1-13 shows the gears includedin the EV3 set, with their corresponding names in Table 1-7.LEGO gears are identified by number of teeth, as indicated intheir name followed by z; for example, a 24-tooth gear is calleda 24z gear.Figure 1-12: The cross blockstable 1-6: the cross blocksLabel in Figure 1-12NameColorA2M beam with 4 pinsGreyB3M beam with 4 pinsGreyC3M pin with holeGreyD2 1 cross block (“Mickey”)RedE2 2 fork cross block (“Minnie”)RedF3 2 cross blockGreyG2M cross blockRedH3M cross blockRedIDouble cross blockRedJ2 2 2 fork cross blockGreyK3M cross block, steeringGreyLGearbox cross blockBlackThe LEGO MINDSTORMS EV3 Laboratory 2013 by Daniele Benedettelliyour LEGO MINDSTORMS EV3 set11
AC½MBwheels, tires, and treadsFThe simplest and most efficient way for your robots to move ison wheels. The EV3 set contains four large wheels with tires,three medium wheels with tires, four small wheels with twosmall tires, and two rubber treads. Figure 1-14 shows the various types of wheels, tires, and treads in the set, and Table 1-8lists their names.1MDGAEBECFHDGFigure 1-13: The gearstable 1-7: the gearsLabel in Figure 1-13NameColorA12z bevel gearTanB20z bevel gearTanC12z double-bevel gearBlackD20z double-bevel gearBlackE36z double-bevel gearBlackF4z knob wheelBlackGWorm gear (1z)GreyH24z gearDark GreyMost gears are 1M thick, with the exception of the 12zand 20z bevel gears, which are both one half-module thick. The24z gear (labeled H) is a spur gear, but “spur” can be omittedfrom the name (8z, 16z, and 40z spur gears also exist in theLEGO system). The worm gear is a particularly tough gear.You’ll learn more about it and how to combine gears in Chapter 8 and while building the robots in this book.12 Chapter 1Figure 1-14: The wheels, tires, and treadstable 1-8: the wheels, tires, and treadsLabel in Figure 1-14NameColorARubber treadBlackBSmall wheelGreyCMedium wheelGreyDLarge wheelBlackESmall tireBlackFMedium tireBlackGLarge tireBlackThe large tires have their dimensions printed on theiredge; for example, 43.2 22 ZR. These measurements arein millimeters: In this example, 43.2 mm is the tire diameterand 22 mm is the width of the tire. The medium tire has a30 mm diameter and is about 3 mm wide. The small tire hasa 14 mm diameter and is 6 mm wide.The LEGO MINDSTORMS EV3 Laboratory 2013 by Daniele Benedettelli
decorative piecesmiscellaneous piecesThe EV3 set contains several decorative pieces. In addition tothe teeth with axle holes, there are many white panels, blades,and swords, as you can see in Figure 1-15. Their names aregiven in Table 1-9. The panels come in mirrored pairs and areidentified by a number embossed on the concave side. Becausethese panels have many connection holes, you can even usethem as large cross blocks when building.The miscellaneous pieces are special elements: a ball magazine,a ball shooter, three balls, and a rubber band. LEGO rubberbands are color coded; the red one included in the EV3 set hasa 24 mm diameter. These parts are shown in Figure 1-16 andlisted in Table 1-10.CAGADBBCDHEFigure 1-16: The miscellaneous piecesFIJFigure 1-15: The decorative piecestable 1-9: the decorative piecesLabel in Figure 1-15NameColorALong panel #5WhiteBLong panel #6WhiteCMedium panel #3WhiteDMedium panel #4WhiteERight mudguardWhiteFLeft mudguardWhiteGSwordRed/GreyHCurved bladeWhiteIToothWhiteJToothRedtable 1-10: the miscellaneous piecesLabel in Figure 1-16NameColorABall magazineBlackBBall shooterBlackCBallRedDRubber bandRedelectronic piecesFinally, here’s what makes a MINDSTORMS set a real roboticstool kit: the electronic pieces! These pieces are shown in Figure 1-17 and their names are listed in Table 1-11. The 31313set contains two Large Servo Motors and seven cables: four25 cm (10 in) cables, two 35 cm (14 in) cables, and one 50 cm(20 in) cable.The EV3 Intelligent Brick is a microcomputer that actsas the brain for your robotic creations. It features the Linuxoperating system running on a 300 MHz ARM9 controller. Ithas 64MB of RAM and 16MB of flash memory, expandable witha microSD card up to 32GB! The screen resolution is 178 128pixels (black and white).The LEGO MINDSTORMS EV3 Laboratory 2013 by Daniele Benedettelliyour LEGO MINDSTORMS EV3 set13
The EV3 Servo Motors are not plain LEGO motors: Theyhave a built-in rotation sensor (1 degree resolution) to allowprecise motion control. The Large Servo Motor runs at 160 to170 rpm, with a running torque of 20 N cm and a stall torqueof 40 N cm. The Large Servo Motor is slower but stronger thanthe Medium Servo Motor, which runs at 240 to 250 rpm with arunning torque of 8 N cm and a stall torque of 12 N cm.A motor is in stall (or is stalled) when it is commanded toturn but the shaft is blocked by some mechanical stop and isunable to move. This consumes a lot of battery power, and youshould avoid this situation by, for example, turning the motoroff before it gets stuck or removing the block that’s preventingthe shaft from turning freely.The sensors give your robots the ability to touch and see.The Touch Sensor is basically a switch that your robot can useto detect contact with objects. The Color Sensor can measureambient light, measure the amount of light reflected by objects,and recognize the color of objects. The IR Sensor can measuredistance, detect the distance and the bearing to the Remote IRBeacon, and receive remote commands from the Remote IRBeacon. I’ll describe the various sensors in detail later in the book.ABCDEGHFthe differencesbetween theEV3 retail andeducation setsFigure 1-17: The electronic piecestable 1-11: the electronic piecesLabel in Figure 1-17NameAEV3 Intelligent BrickBLarge Servo MotorCTouch SensorDColor SensorEMedium Servo MotorFRemote IR BeaconGIR SensorHConnector cableconclusionYou can connect the EV3 Brick to a computer with a mini USB 2.0 port, and you can connect other devices (daisy-chainedEV3 Bricks or a Wi-Fi Dongle) to the USB 1.1 host port on itsside. You can also connect up to four motors and four sensorsto the Brick. The EV3 Brick can recognize which motor or sen sor is attached to its ports, thanks to the Auto-ID feature. Youcan use 6 AA batteries to power it (LEGO Education sells arechargeable battery; see Appendix B for details).14 Chapter 1The EV3 set comes in two versions: Retail set 31313 (the setused in this book) and Education Core set 45544. The sets havedifferent assortments of parts, and they also differ in whichEV3 sensors they include. While in the Retail version you havea Touch Sensor, an IR sensor with a Remote IR Beacon, and aColor Sensor, in the Education set you have two Touch Sensors,a Color Sensor, an Ultrasonic Sensor, and a Gyroscopic Sensor.The differences between the two sets are listed in detail inAppendix B.This chapter has provided an overview of the contents ofthe LEGO MINDSTORMS EV3 31313 set. You learned howto identify the various elements in the set. You’ve also beenintroduced to the unique aspects of studless Technic parts:round and cross holes, connection blocks, pins with and with out friction, and so on. In Chapter 2, you’ll build a simplemobile robot to start exploring the world of robotics withLEGO MINDSTORMS EV3.The LEGO MINDSTORMS EV3 Laboratory 2013 by Daniele Benedettelli
The LEGO MINDSTORMSEV3 LaboratoryTheEV3L Scientist’s Apprentice 2013 by Daniele Benedettelli15
16 The EV3L Scientist’s ApprenticeThe LEGO MINDSTORMS EV3 Laboratory 2013 by Daniele Benedettelli
2building ROV3RNow that you’re familiar with the pieces that come in the EV3set, it’s time to build your first robot: ROV3R, a mobile robotthat is built with just a few parts. Thanks to its modular design,reconfiguring it for various missions is a snap. In this chapter,I’ll show you how to combine the wheeled version of ROV3Rwith different sensors and tools (see Figures 2-1 and 2-2),but you can easily swap out ROV3R’s wheels for treads. In thechapters that follow, you’ll learn how the added sensors andtools work and then program these ROV3Rs to accomplishvarious tasks.Along with the building instructions that follow, you’ll findmany tips and tricks. As you read through the instructions,you’ll learn various building techniques, tips for making gooddesign choices, and some rules of thumb for building robotswith studless LEGO Technic pieces.Although this book is printed in grayscale, the contrastand readability of the images have been maximized. Almost allof the parts in the 31313 set are white, black, or red. Whenknowing the color of a certain element is important —forexample, to distinguish pins with friction from pins withoutfriction (or axle pins)—I’ve added labels to indicate the color(see Table 2-1).Figure 2-1: An overview of ROV3R’s modulesThe LEGO MINDSTORMS EV3 Laboratory 2013 by Daniele Benedettelli
with wheels(page 23)with Front IR Sensor(page 30)wall follower(page 32)line follower(page 28)with Touch Sensor Bumper(page 25)floor sweeper(page 34)Figure 2-2: ROV3R can be reconfigured in many ways, thanks to its modular design. These are just a few of the possible combinations.When not otherwise specified, pins are black pins withfriction, axle pins are blue axle pins with friction, and 3M pinsare long blue pins with friction. And remember that odd-lengthaxles (3M, 5M, 7M, 9M) are light grey.This color legend applies to all elements throughoutthis book.N ote18 Chapter 2table 2-1: labels used to designate colorsin the building instructionsColorLabelWhiteWGreyGDark greyDGYellowYRedRBlueBTanTThe LEGO MINDSTORMS EV3 Laboratory 2013 by Daniele Benedettelli
base module1:1First you’ll need to build the Base Module, which can be usedwith wheels (see “ROV3R with Wheels” on page 23) or treads(see “ROV3R with Treads” on page 40).DGThe parts list box showsthe elements you’ll needfor that particular step.BAt the top of an axle, you will see a number indicating its length. To determinethe length of an axle, first place it next toa long beam and then count the holes inthe beam that lie alongside the axle. Youcan also use these real-scale pictures tomeasure axles.The exploded-view arrowsshow how the parts shouldbe assembled.The EV3 La
in helping The LEGO Group in developing and testing the new LEGO MINDSTORMS EV3. I began drafting the story of a kid given the chance to become the apprentice of a scientist; I wanted this story to be the background of my next book about LEGO MINDSTORMS. playing without a computer The LEGO Group’s idea fo