Transcription
Microsoft Project 2010 - Module 1CHAPTER 1MICROSOFT PROJECT BASICSINFOCUSWPL J400Project management software is arguably one of the most difficult tolearn, not only because you need to study how to use the software,but because you also need to know a little about projectmanagement theory.Nevertheless, you need to start somewhere. This is a roll up yoursleeves session where you will be introduced to the basic operatingphilosophy of Microsoft Project.In this session you will: Watsonia Publishinggain an understanding of Microsoft Project's operatingphilosophylearn how to start Microsoft Projectgain an understanding of the main Microsoft Projectscreen elementsgain an understanding of how Microsoft Project workslearn how to use the Ribbongain an understanding of Backstage View in MicrosoftProjectgain an understanding of the work area and project viewslearn how to change the view of your projectlearn how to split the project work area horizontallygain an understanding of tables in Microsoft Projectlearn how to change the Table Viewgain an understanding of the special Gantt Chart viewlearn how to work with the Gantt Chart viewlearn how to add a command to the Quick AccessToolbarlearn how to work with existing Microsoft Project fileslearn how to exit from Microsoft Project.Page 1Microsoft Project Basics
Microsoft Project 2010 - Module 1HOW MICROSOFT PROJECT WORKSthe other for resource information. By using themany views available in Project, you can displayyour project data from these tables in manydifferent ways.Microsoft Project is really a computer databasethat uses two main tables of data to keep track ofyour project. Project uses one table to storeinformation about the tasks of your project andTasksThis table is comprised of over 240 columns (or fields) which contain all sorts of information about thetasks such as scheduled start, scheduled finish, name, duration, cost, and the like. Some of thesefields require you to enter data, while others are calculated and filled by Microsoft Project for you.IDNameDurationStartFinishFixedCost8Erect fencing2 days1/2/20133/2/2013No 500etc.ResourcesThis table contains over 200 fields (or ertime Rate3BuilderFGContractor4 55.00/h 75.00/hetc.The two tables are joined together by assigning resources to tasks.ViewsTo help you see, or view, your data, Microsoft Project adopts techniques used in spreadsheets,databases, and graphics packages.For example you can see your task or resource table in sheets on the screen. Sheets are similar tospreadsheet programs where data is presented in rows and columns. In fact, many of the operationsused in spreadsheets, such as widening columns, deleting data, selecting cells, and the like, are alsofound in Microsoft Project.You can also see, or view, your data in forms. These forms are similar to a form view that you receivefor data entry screens in database programs. Forms allow you to add or edit data and you can usuallycycle through the cards as you would in a normal database.If you wish to see your data graphically you can view it as a Gantt Chart or Network Diagram.In addition you have a variety of other graphs for displaying resources. Watsonia PublishingPage 2Microsoft Project Basics
Microsoft Project 2010 - Module 1STARTING MICROSOFT PROJECTTo create a new project, or edit an existing one,the first thing that you need to do is to startMicrosoft Project. As a standard softwareapplication, how Microsoft Project is started isTry This Yourself:largely determined by Windows. For example, itcan be started from the Windows Start menu, froma shortcut, or from Windows Explorer byaccessing a file that was created in Project.1Before you begin, ensure thatyour computer is switched on andthat the Windows desktop isdisplayed on your screen Click on the Windows Startbutton (it’s a round buttonwith a Windows logo on it)at the bottom left-handcorner of the screen todisplay the menuClick on All ProgramsClick on Microsoft Officeto expand the menu andsee all of the MicrosoftOffice applications installedon your computer2Click on Microsoft Project2010After a few moments ofhuffing and puffing Projectwill start with a blank“project” on the screen4For Your Reference Handy to Know To start Microsoft Project:1. Click on the Windows Start button2. Click on All Programs3. Click on Microsoft Office After you have accessed Microsoft Projectseveral times it should appear in the first partof the Start menu – this means you won’tneed to continue to the All Programs menu.4. Click on Microsoft Project 2010 Watsonia PublishingPage 3Microsoft Project Basics
Microsoft Project 2010 - Module 1THE MICROSOFT PROJECT SCREENThe Microsoft Project screen will vary dependingupon the view, table, and filter that is currentlyactive. However, you will need to become familiarwith the basic components of the screen asshown below. Understanding the layout of thescreen, and its components and terminology willhelp you in using Microsoft rtScheduling modeStatus barQuick view buttonsRibbonThe Ribbon displays the commands required to use Microsoft Project. It is made up oftabs (File, Task, Resource, etc) which each contain groups of commands organised intological order.Active paneindicatorThe active pane indicator is a vertical bar with a dark colouring that runs down the leftside of a screen (or a view). The one above contains the words Gantt Chart so that youknow you have a Gantt Chart as the active view. You can actually have two differentviews open by splitting the screen – only one view, however, can be active becausethings like the commands on the Ribbon are controlled by what you are viewing. Theindicator shows which view is currently active.Sheet viewYour project’s tasks and resources can be seen as a table, much like a spreadsheet. InMicrosoft Project this is referred to as a sheet view.Scheduling modeYour project can be scheduled manually (the default) or automatically. This (veryimportant) indicator tells you which mode is currently applicable.Status barWatch this space – it tells you what Microsoft Project is currently up to.Quick view buttonsThere are many ways to change the view of the screen. These four buttons providequick access to the four most common views saving you the hassle of locating thecommands to do this on the Ribbon.Gantt chartThe Gantt Chart is the world’s most favourite view of a project. It shows your project’stasks as a series of timelines. It is the default view of Microsoft Project when it is firststarted and, in reality, will most likely be the one you use most. Watsonia PublishingPage 4Microsoft Project Basics
Microsoft Project 2010 - Module 1HOW MICROSOFT PROJECT 2010 WORKSFor a novice user the Microsoft Project 2010screen can seem intimidating. However, you’llsoon see that it is made up of only three keyareas. The data you type is placed in the workarea. The data here can be manipulated andchanged using commands on the Ribbon. Thedata is saved in a project file which is controlledthrough commands on the Backstage.The Work AreaThe work area occupies thelargest part of the screen andcontains the data associatedwith your project. The keypoint to remember is that aproject is made up of tasksand resources and the workarea allows you to view yourtask and resource data in anumber of different ways. Thework area may show your datain a sheet view, or maybe achart view like a Gantt chart ormaybe even both!The RibbonWhen you need to do something with the data in the work area, such as format it, colour it, analyse it,move it, copy it, change the view of it and much more, you’ll find all of the relevant commands on theRibbon. The Ribbon has commands organised thematically using a series of tabs across the top.Commands on each tab are further organised into groups of like-commands. It’s not too hard to get thehang of where a command can be found. Remember, a project is simply a view of task and resource data– hey, have a look at the Ribbon and you’ll find a Tasks and a Resources tab! So whatever you need todo with tasks can be found on the Tasks tab, and anything you want to do with resources can be foundon the Resources tab.BackstageWhen you want to do something withthe data in your work area, such assave it so that you can access it againlater, print it, share it with a colleague,send it to your boss, protect it fromprying eyes, or whatever, you willneed to access the Microsoft OfficeBackstage area of Microsoft Project.The Backstage is accessed using theFile tab on the Ribbon. Rather thanoffering you commands on a Ribbon,Backstage occupies the entire screenand has a series of options down theleft side. Here the Print option isactive, and that is why you can see apreview of the work area and a seriesof print-related options on the rightside of the Backstage. Watsonia PublishingPage 5Microsoft Project Basics
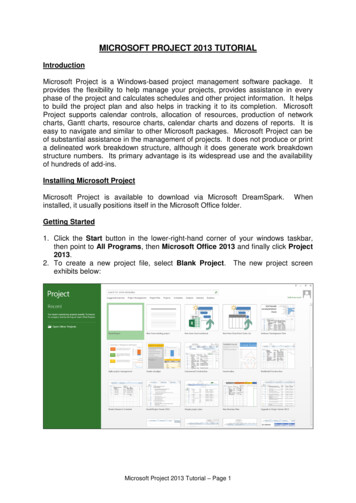
Microsoft Project 2010 - Module 1USING THE RIBBONThe Ribbon is the command centre for MicrosoftProject. It provides a series of commandsorganised into groups and placed on relevanttabs. Tabs are activated by clicking on theirname to display the command groups. Commandsare activated by clicking on a button, tool or galleryoption. Everything you could possibly want to do inProject will be found somewhere on this Ribbon.Try This Yourself:Before starting this exerciseensure that Project hasstarted. 1Examine the variousgroups on the Task tabThe group names appear atthe bottom of the Ribbon Click on the Resource tabThe commands on this tabare used to work withresources. Many will not beavailable because there areno resources in the blankproject on the screen. Youcan never be too sure whatyou’ll get when you click ona command 23Click on Resource Pool inthe Assignments group todisplay a menuClick on Share Resourcesto display the ShareResources dialog box4Click on [Cancel] to popthe box awayClick on the other tabs andspend some timeexamining the groups andcommands they containClick on the Task tabFor Your Reference Handy to Know To use the Ribbon:1. Click on a tab to display the commands2. Click on a button to activate a command,display a gallery, or display a dialog box Additional tabs known as Contextual tabsappear in specific circumstances. Forexample, if you insert a picture, the PictureTools: Format tab will appear. This providesquick access to all of the tools you may needto modify and work with the picture. Watsonia PublishingPage 6Microsoft Project Basics
Microsoft Project 2010 - Module 1UNDERSTANDING THE BACKSTAGE VIEWThe Ribbon allows you work on the content in aworksheet – you can add more content, colour it,chart it, analyse it, copy it, and much more. TheBackstage, which is accessed using the File tab,allows you to do something with the content youcreate. You can save it for reuse later, print it onpaper, send it via email, and more using theoptions found in Backstage view.The Backstage ScreenThe File tab on the Ribbon isnot a normal tab – as you cantell by the fact that it is coloured.Clicking on the File tab launchesa mini-program within MicrosoftProject known as BackstageView. Backstage, as it’s knownfor short, occupies the entirescreen although the tabs fromthe Ribbon still remain visible atthe top.At the left of the Backstage is anavigation pane which is madeup of Quick commands,smallish buttons which willperform an operationimmediately, and largish tabswhich display more options andinformation to the right of thescreen.The whole underlying purpose ofthe Backstage is to allow you toprotect your data, to share it withothers, and to provide you withvaluable information both aboutyour data and the status ofMicrosoft Project.Quick CommandsBackstage TabsThe Quick commands provide immediate accessto an operation.The Backstage tabs provide more options forworking with a projectSaves the current projectProvides status information aboutthe current project, and allows youto manage versions andpermissionsAllows you to save the currentproject under a different nameor locationProvides a list of recently savedprojectsOpens a previously savedprojectCloses the current projectAllows you to create a new projectand provides access to a hugegallery of templatesProvides access to optionsthat allow you to control howProject looks and worksAllows you to print the currentproject and also previews itAllows you to share your projectwith other peopleAllows you to close and exitfrom Microsoft Project Watsonia PublishingProvides access to Microsoft’shelp network and also provideslicensing information about yoursoftwarePage 7Microsoft Project Basics
Microsoft Project 2010 - Module 1THE PROJECT WORK AREAThe main part of the Microsoft Project screen ismade up of the work area where your projectdata is displayed. Remember, Project is reallyjust two tables of data – tasks and resources.The work area shows you different aspects andsometimes combined views of this data. Forexample you can view your tasks and theresources assigned to them.The View TabThe View tab on the Ribbonprovides you with access tothe views for your project’sdata.Notice, there is a TaskViews grouping and aResource Views groupinghere!When you click on the arrow for one ofthe View commands you’ll receive amenu of further views available to you.All of the menus feature the MoreViews command which displays theMore Views dialog box which lists allof the standard views available to youin Microsoft Project.Built-In Project ViewsMicrosoft Project contains 27 different built-in views for you. Seven of these views are available fromthe Task Views and Resource Views groupings on the View tab, while the full 27 are available fromthe More Views dialog box. Here’s a list of the 27 views – the ones marked with a (T) or (R) areaccessible directly from the View tab of the Ribbon.Bar RollupMultiple Baselines GanttTask Details FormCalendar (T)Network Diagram (T)Task EntryDescriptive
need to access the Microsoft Office Backstage area of Microsoft Project. The Backstage is accessed using the File tab on the Ribbon. Rather than offering you commands on a Ribbon, Backstage occupies the entire screen and has a series of options down the left side. Here the Print option is active, and that is why you can see a preview of the work area and a series of print-related options on .
